Flow Builder
The timeline (flow builder)
Communicate at the right time with our smart timeline
With our timeline feature, you automatically send the right messages at exactly the right moment. From registration emails to friendly reminders or targeted upsells: everything is clearly organized through one central timeline.
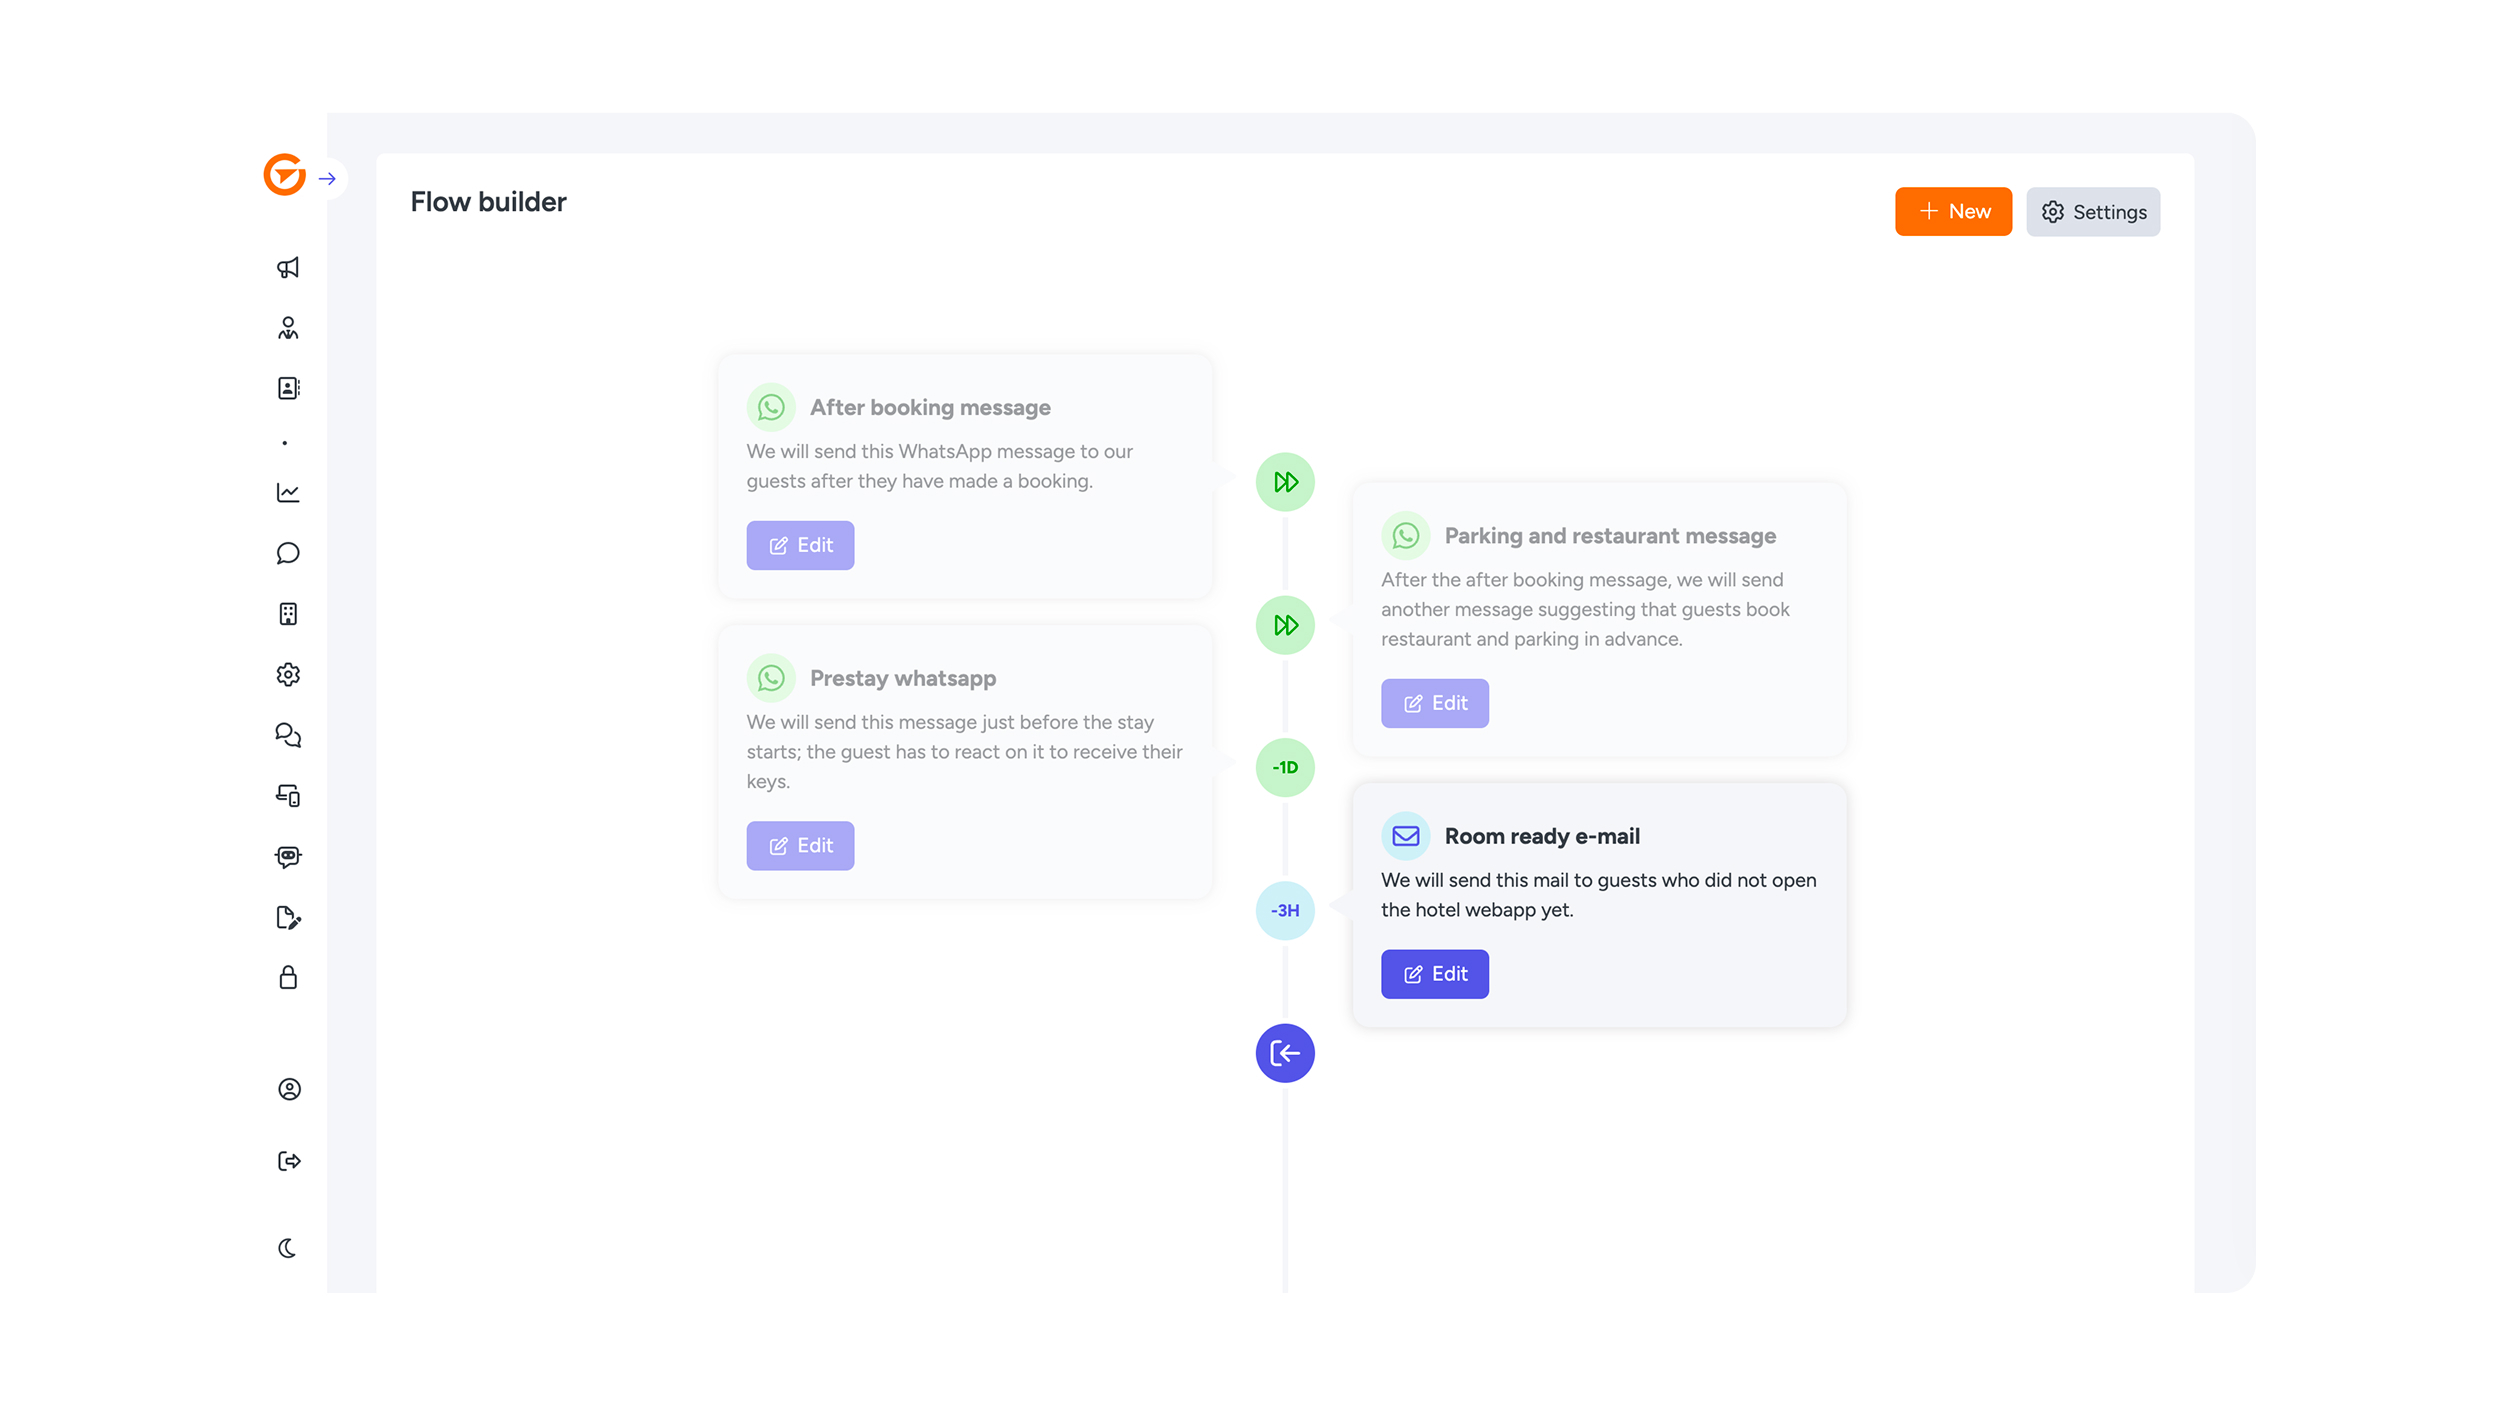
One timeline, all communication
The timeline shows you at a glance which messages are sent before, during, and after a guest's stay. Effortlessly guide your guests through every stage of their journey without missing a beat.
The right channel for every message
Every message can be sent via the channel that best suits your guest:
- Email for detailed information
- WhatsApp for quick, personal communication
- SMS for short, urgent updates
You decide which channel to use for each message, or combine multiple channels for maximum impact.
Create a new job (action)
Click the orange ‘New’ button to add a new action to the Flow Builder. Navigate through the four tabs to complete your action settings:
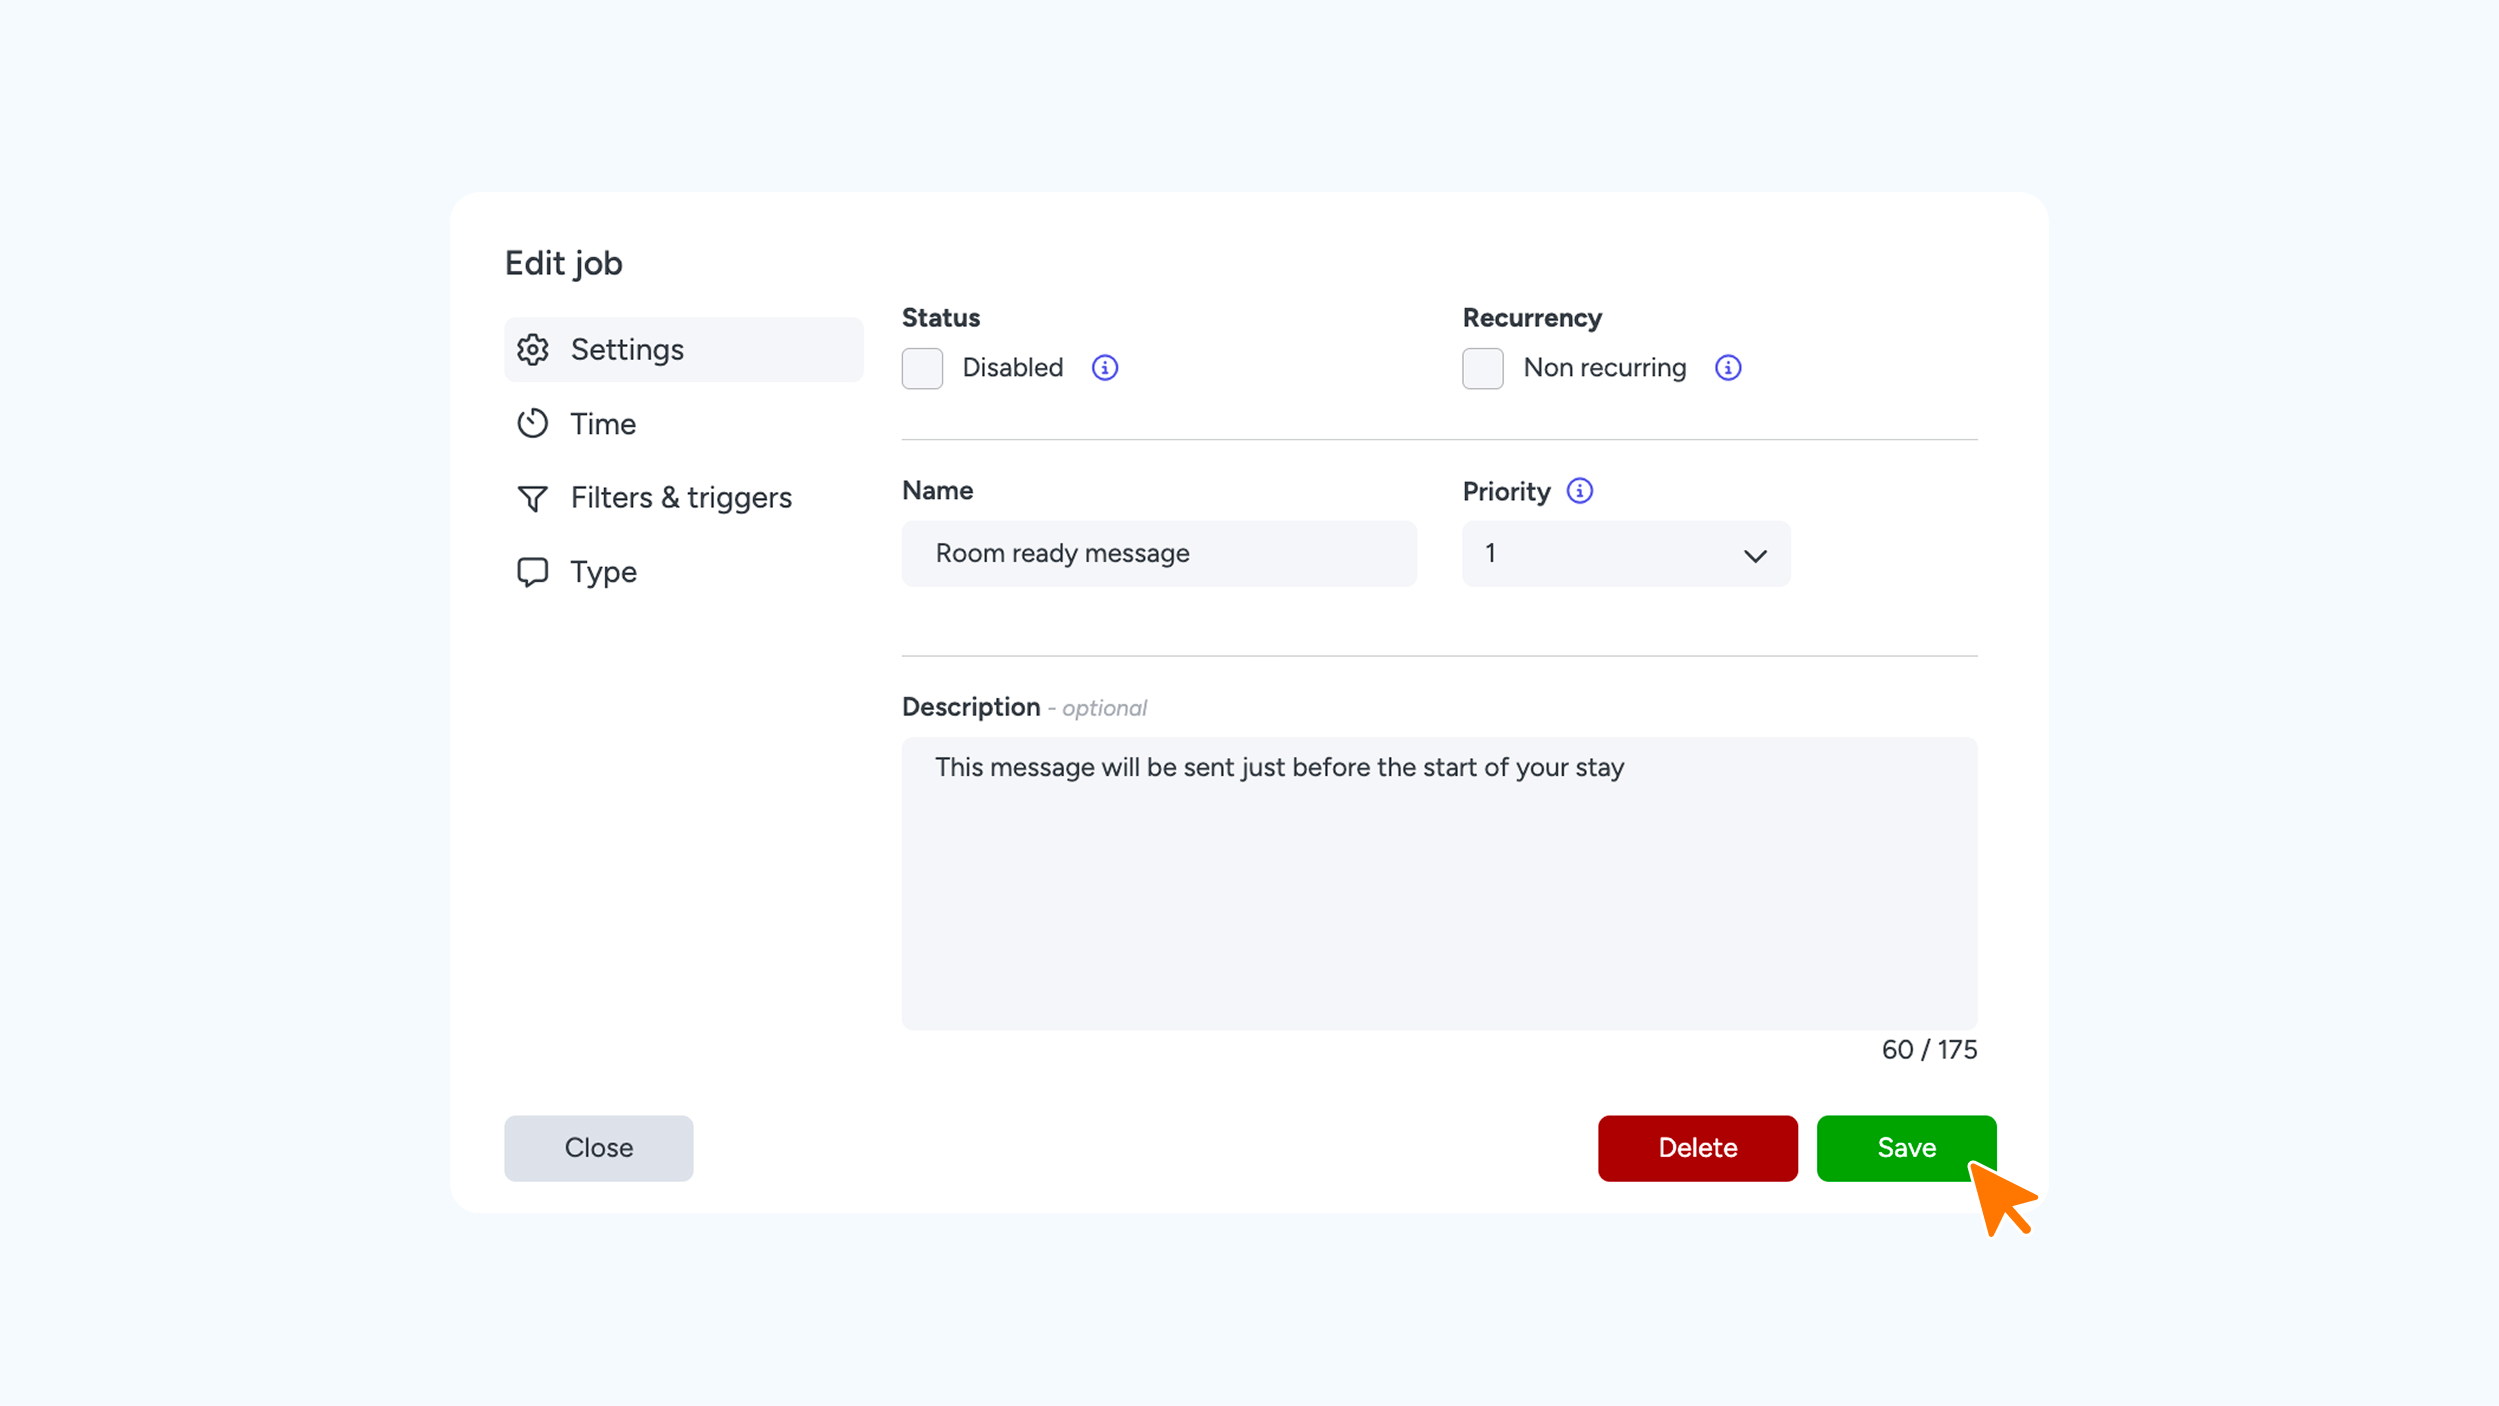
Settings
- Status: Manually enable or disable the action here by selecting ‘Disabled’.
Recurrency: Use the ‘Non-recurring’ setting to prevent a message from being sent to the same guest multiple times (for example, to ensure a guest doesn't receive the same upsell twice).
Note: This feature currently only applies to WhatsApp and SMS, not to email.
- Name: Give the action a clear, recognizable name so you can identify it instantly in your overview.
- Priority: Determine the delivery order of your messages. If you want to send multiple messages at the exact same time, use a scale of 1 to 10 to indicate which message takes precedence.
- Description (optional): Add a brief explanation of the action's purpose. This serves as a helpful reminder within the Flow Builder, ensuring you and your colleagues know exactly what the job entails.
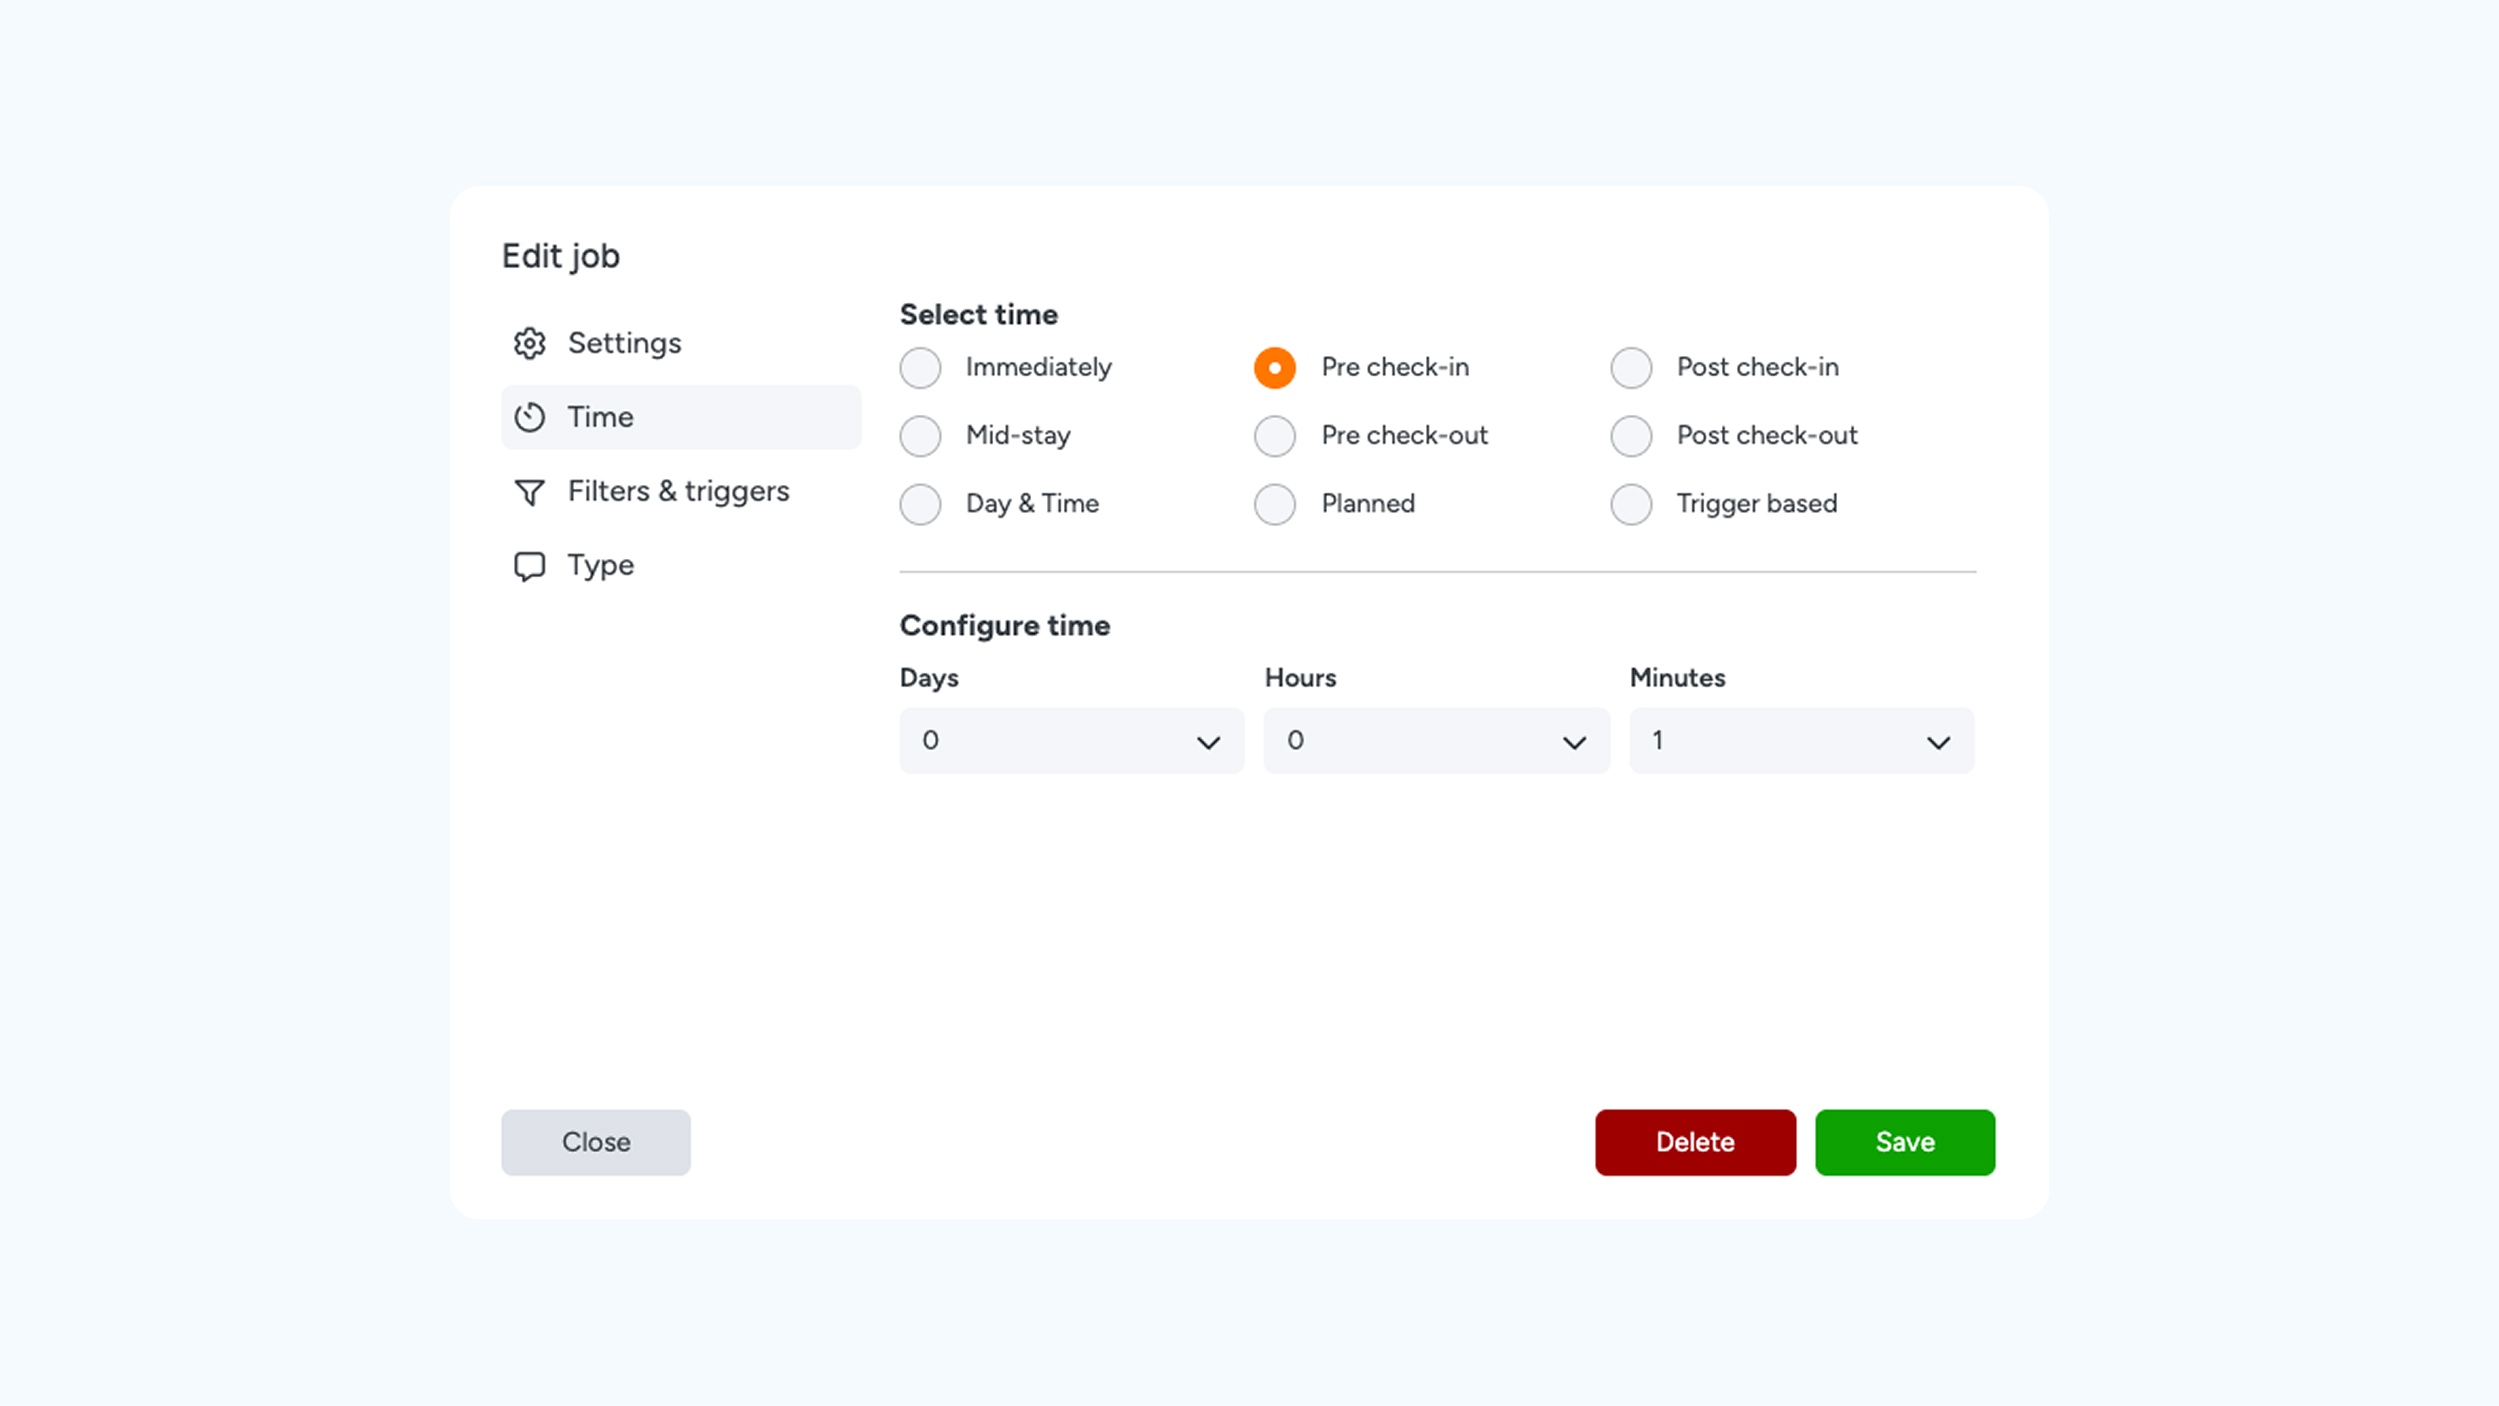
Time
In this tab, you determine the exact moment the message should be sent.
- Immediately: The message is sent as soon as the reservation enters our system (depending on the synchronization with your PMS).
- Pre-check-in: Send the message before the scheduled arrival time.
- Post-check-in: Send the message a specific number of hours or days after the check-in time.
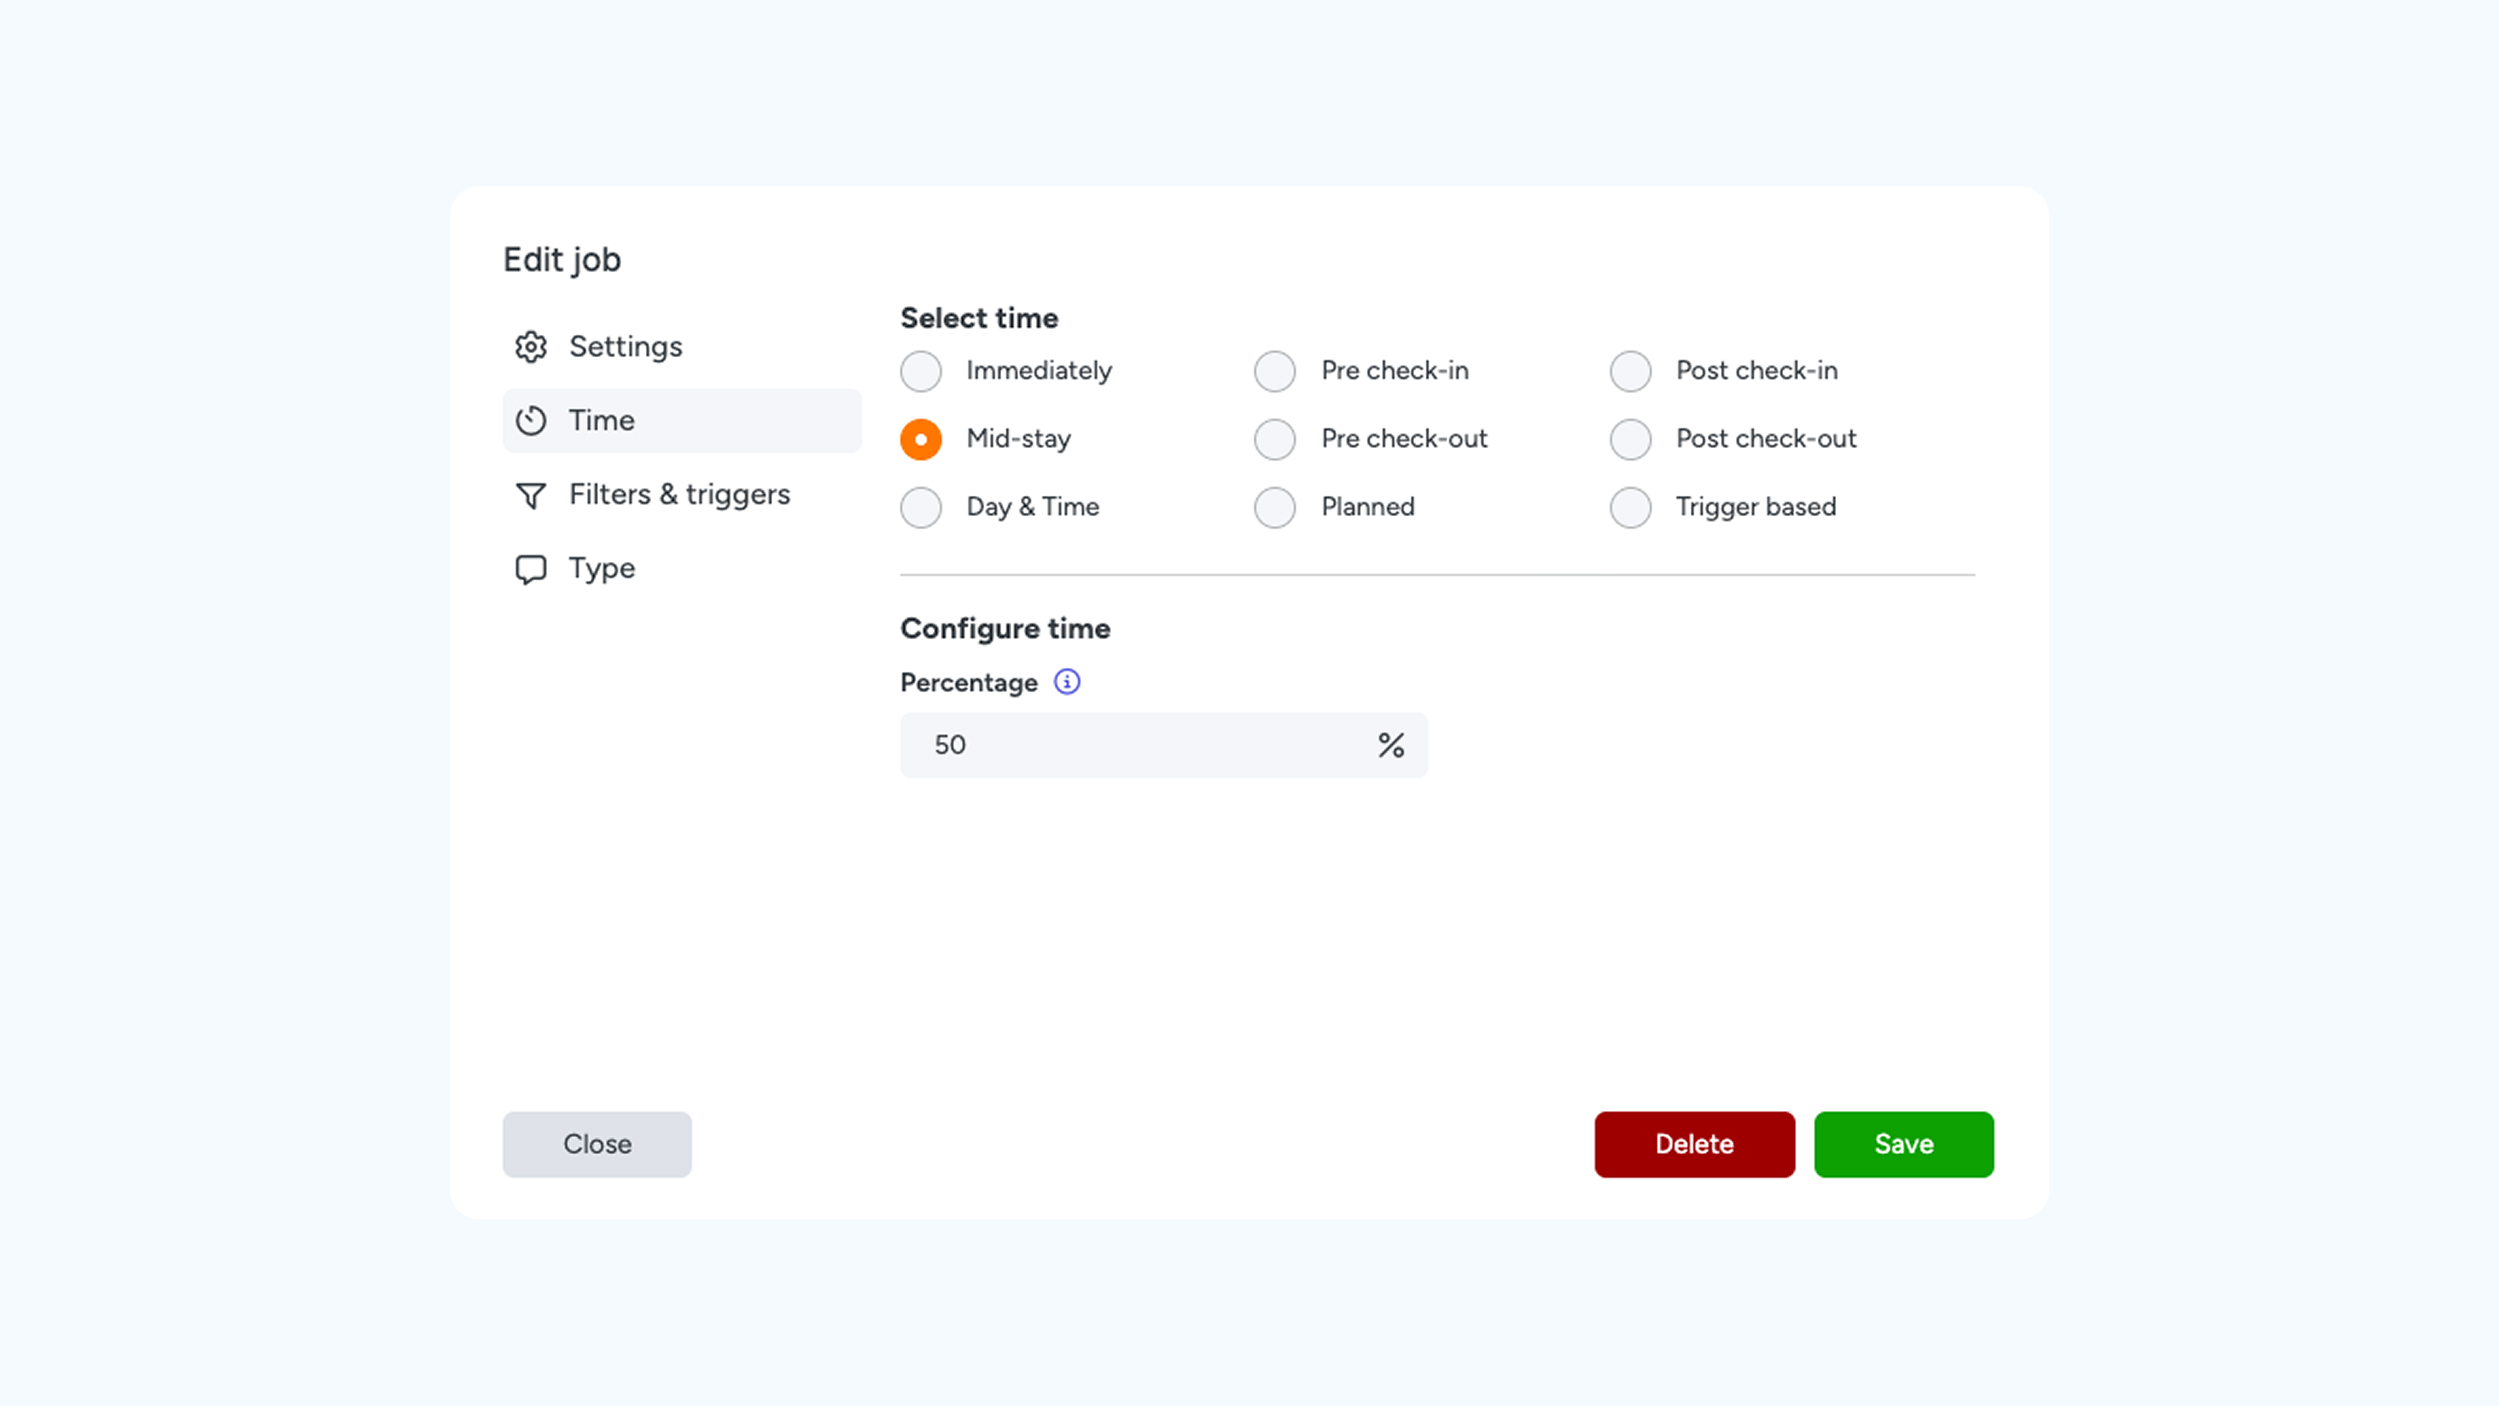
- Mid-stay: Schedule a moment during the stay (configurable based on a percentage of the total stay duration).
- Pre-check-out: Send the message before the departure time.
- Post-check-out: Send the message after the check-out time.
- Day & Time: Choose a fixed moment during the week (for example, every Monday at 12:00 PM).
- Planned: Choose a specific fixed date (ideal for holidays or special events).
- Trigger-based: The message is sent based on specific conditions that you configure under the ‘Filters & Triggers’ tab.
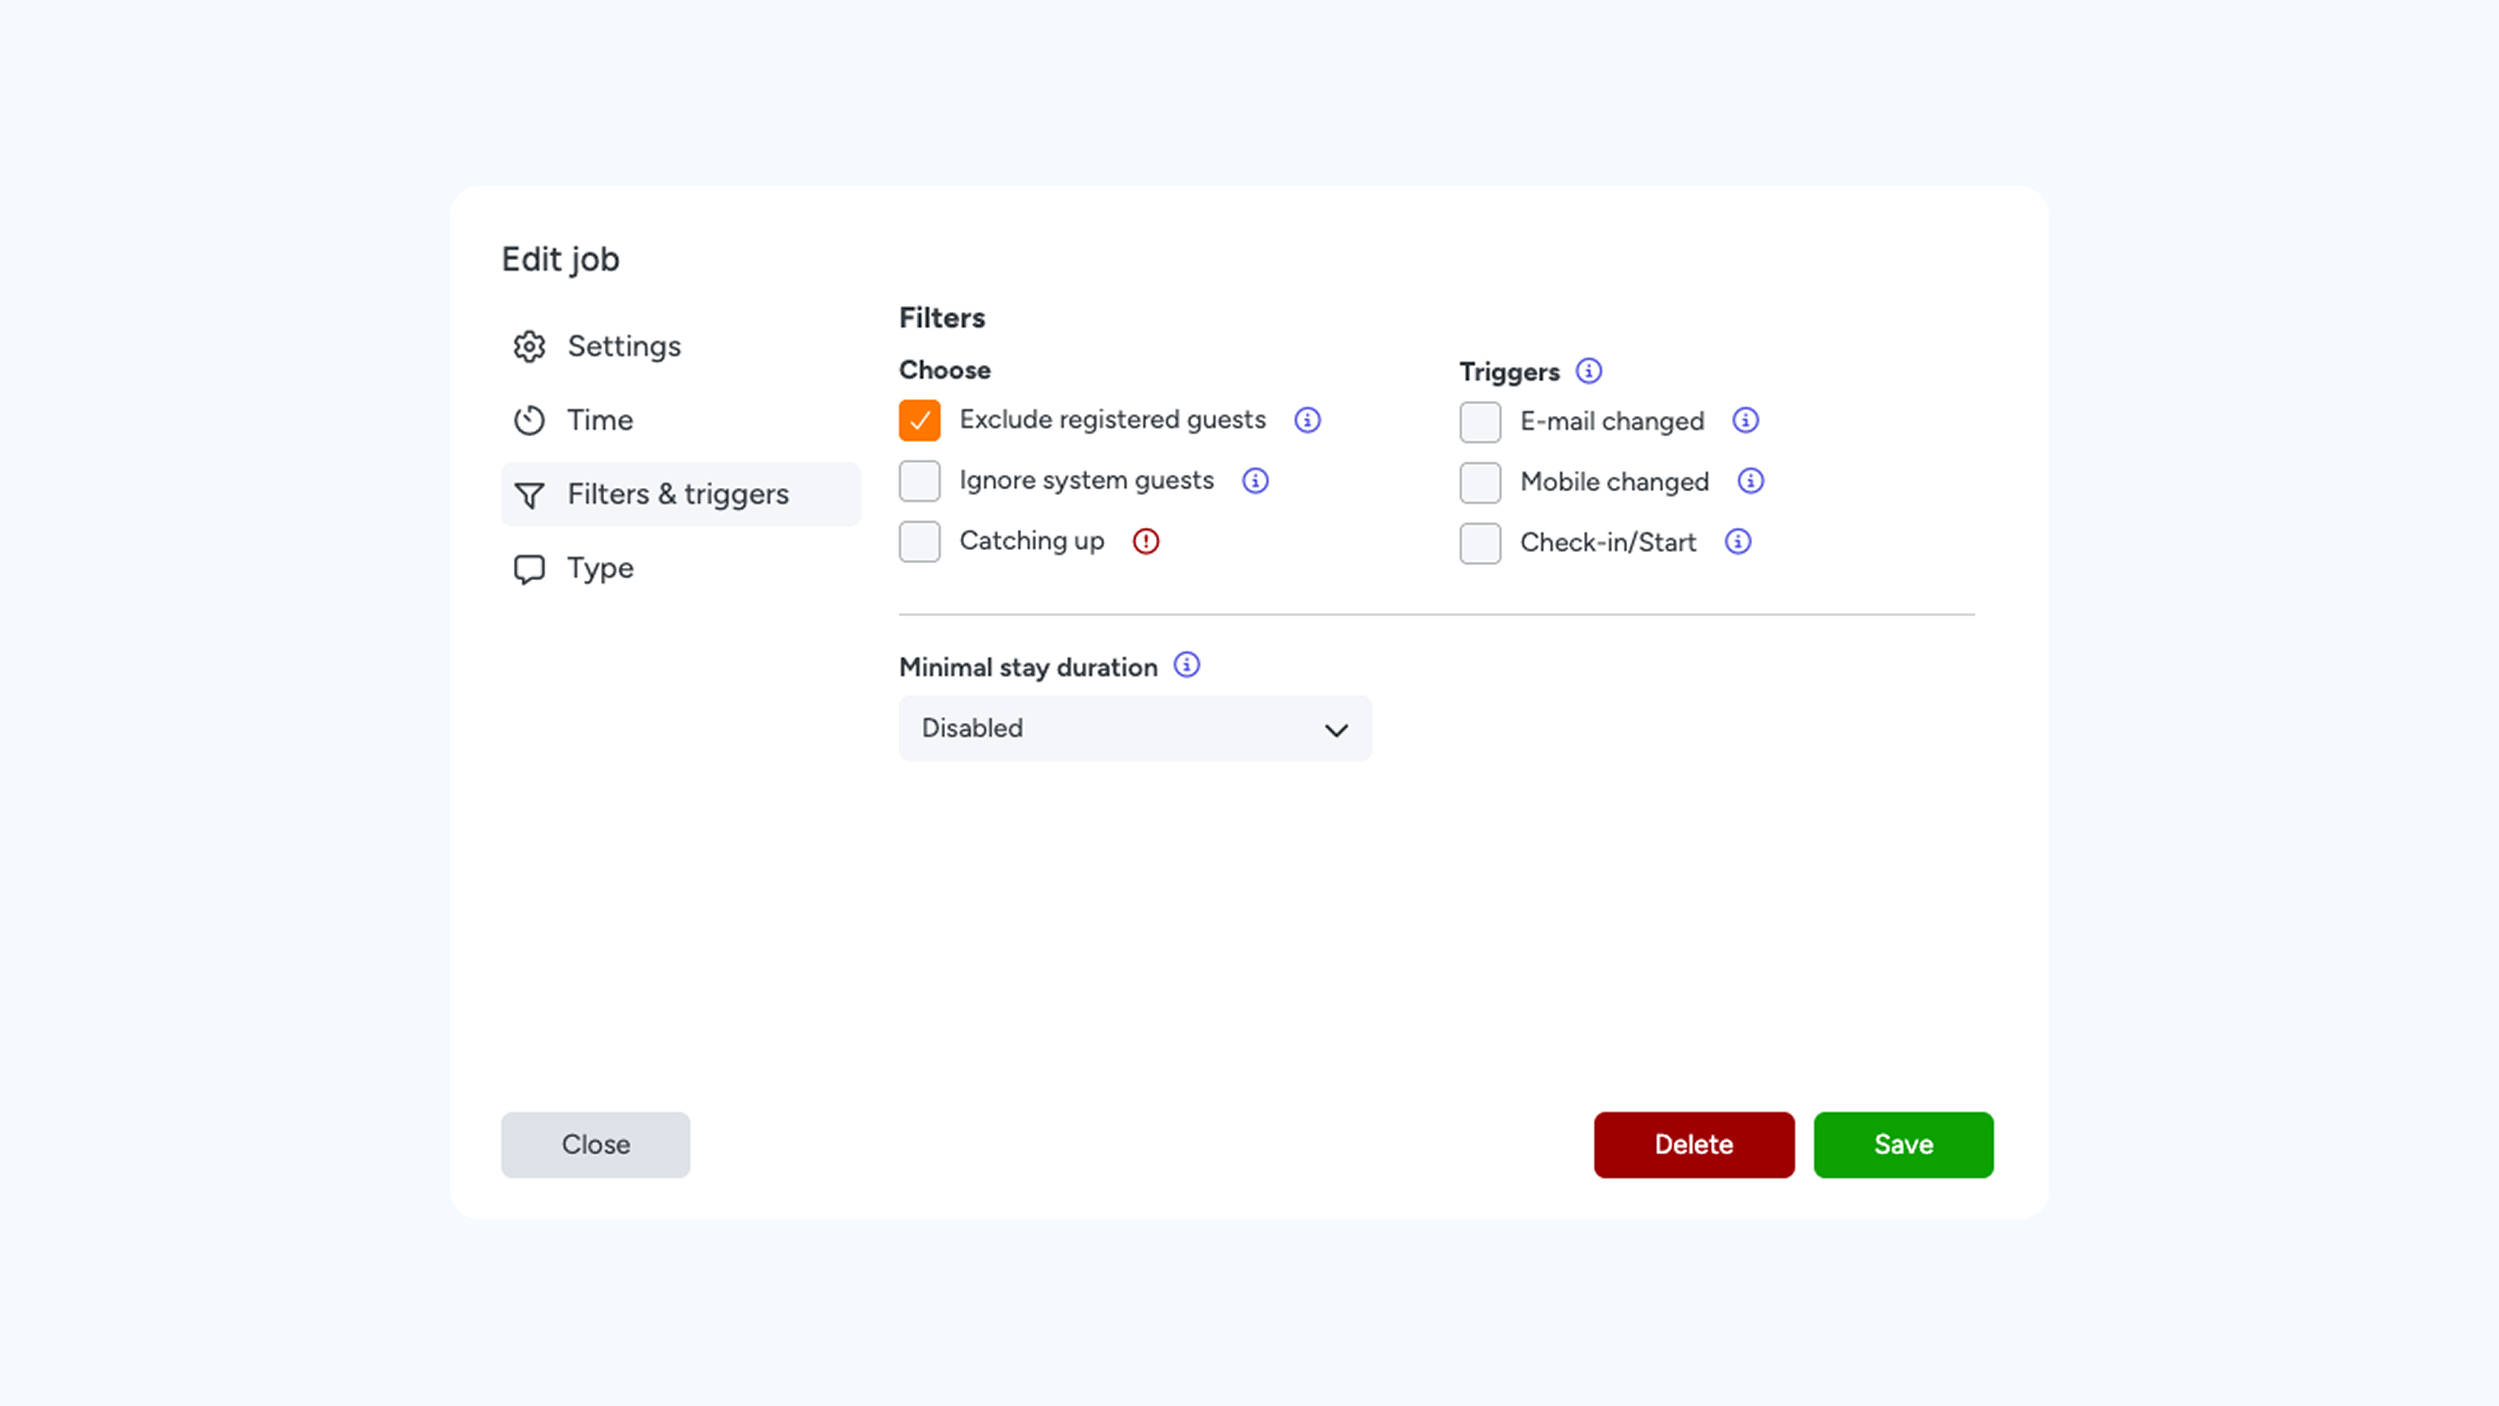
Filters & triggers
Note: The options visible to you depend on whether ‘Trigger-based’ was selected in the previous tab. If you enable a trigger without setting the timing to 'Trigger-based', the message will be sent twice. By setting the timing to 'Trigger-based', the message is correctly executed only once when the trigger is activated. With the 'Check-in/start' option, the message is only sent at the actual moment of check-in or start.
Filters
- Exclude registered guests: Enable this option to prevent messages from being sent to guests who have already registered or have already clicked a smartlink.
- Ignore system guest: Use this to exclude manually created users (e.g., manual 'staff keys'). Messages will never be sent to this group.
- Catching up: When activated, messages are sent retroactively. This is ideal for last-minute bookings, ensuring they still receive the necessary information.
- Require digital key (iLOQ only): When enabled, the message is only sent to users with a digital key (and not to guests who only have a PIN code).
- Minimum stay duration: Specify the minimum stay required to receive this message. For example, if set to 5 days and a guest only stays for 2 days, the message will not be sent.
- iLOQ Zones: Manage specific zones for iLOQ integrations. You have two options:
- Included zones: The zones you want to include in the action.
- Excluded zones: The zones you want to explicitly exclude.
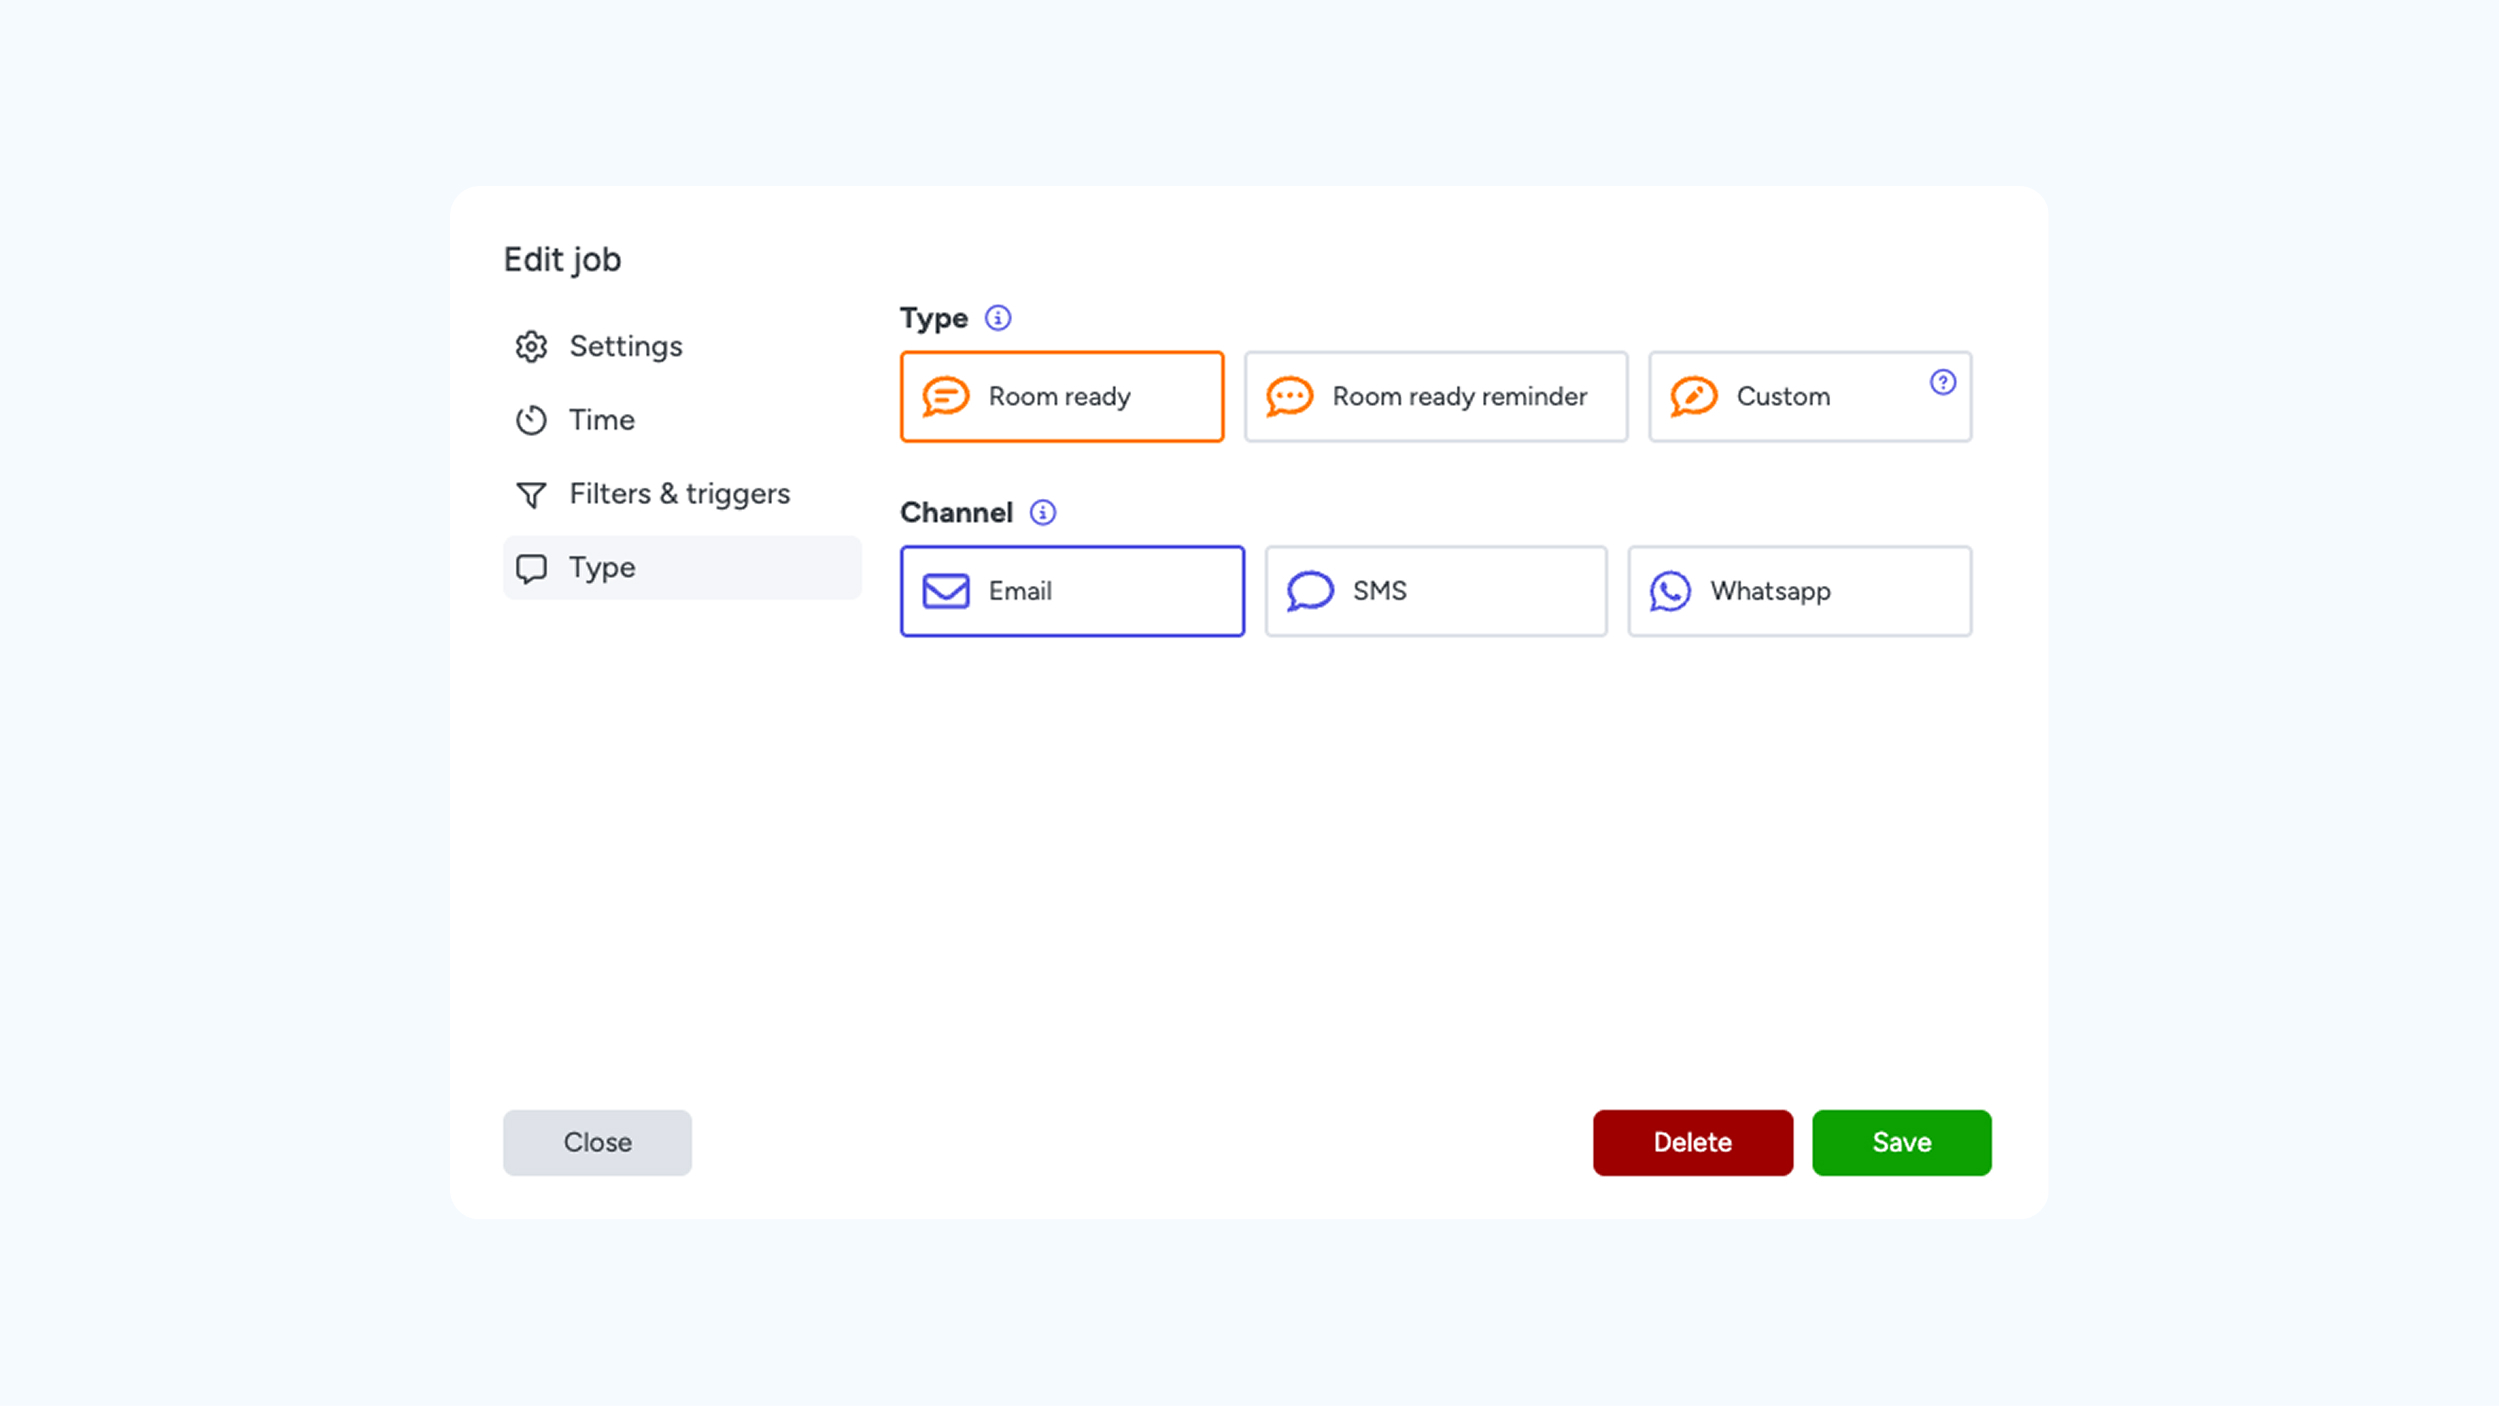
Type
Select the desired action type: Registration, Reminder, or Custom. When you choose ‘Custom,’ a new tab will appear where you can select your own template (provided it has been pre-created in the menu).
Channel: Next, select the desired sending channel: Email, SMS, or WhatsApp.
Note: Additional costs apply for the use of SMS and WhatsApp. Please contact us for more information regarding our rates.