Messaging
Enabling Messaging
Would you like to share digital keys with your guests? Our built-in messaging system makes this easy, while allowing you to customize the tone of voice and add personalized elements such as your logo.
How to activate the messaging system:
- Go to Settings in the menu and click Edit company.
- Scroll down to Room Ready Communication and enable Messaging enabled.
- Click the green Save button in the bottom-right corner to store your settings.
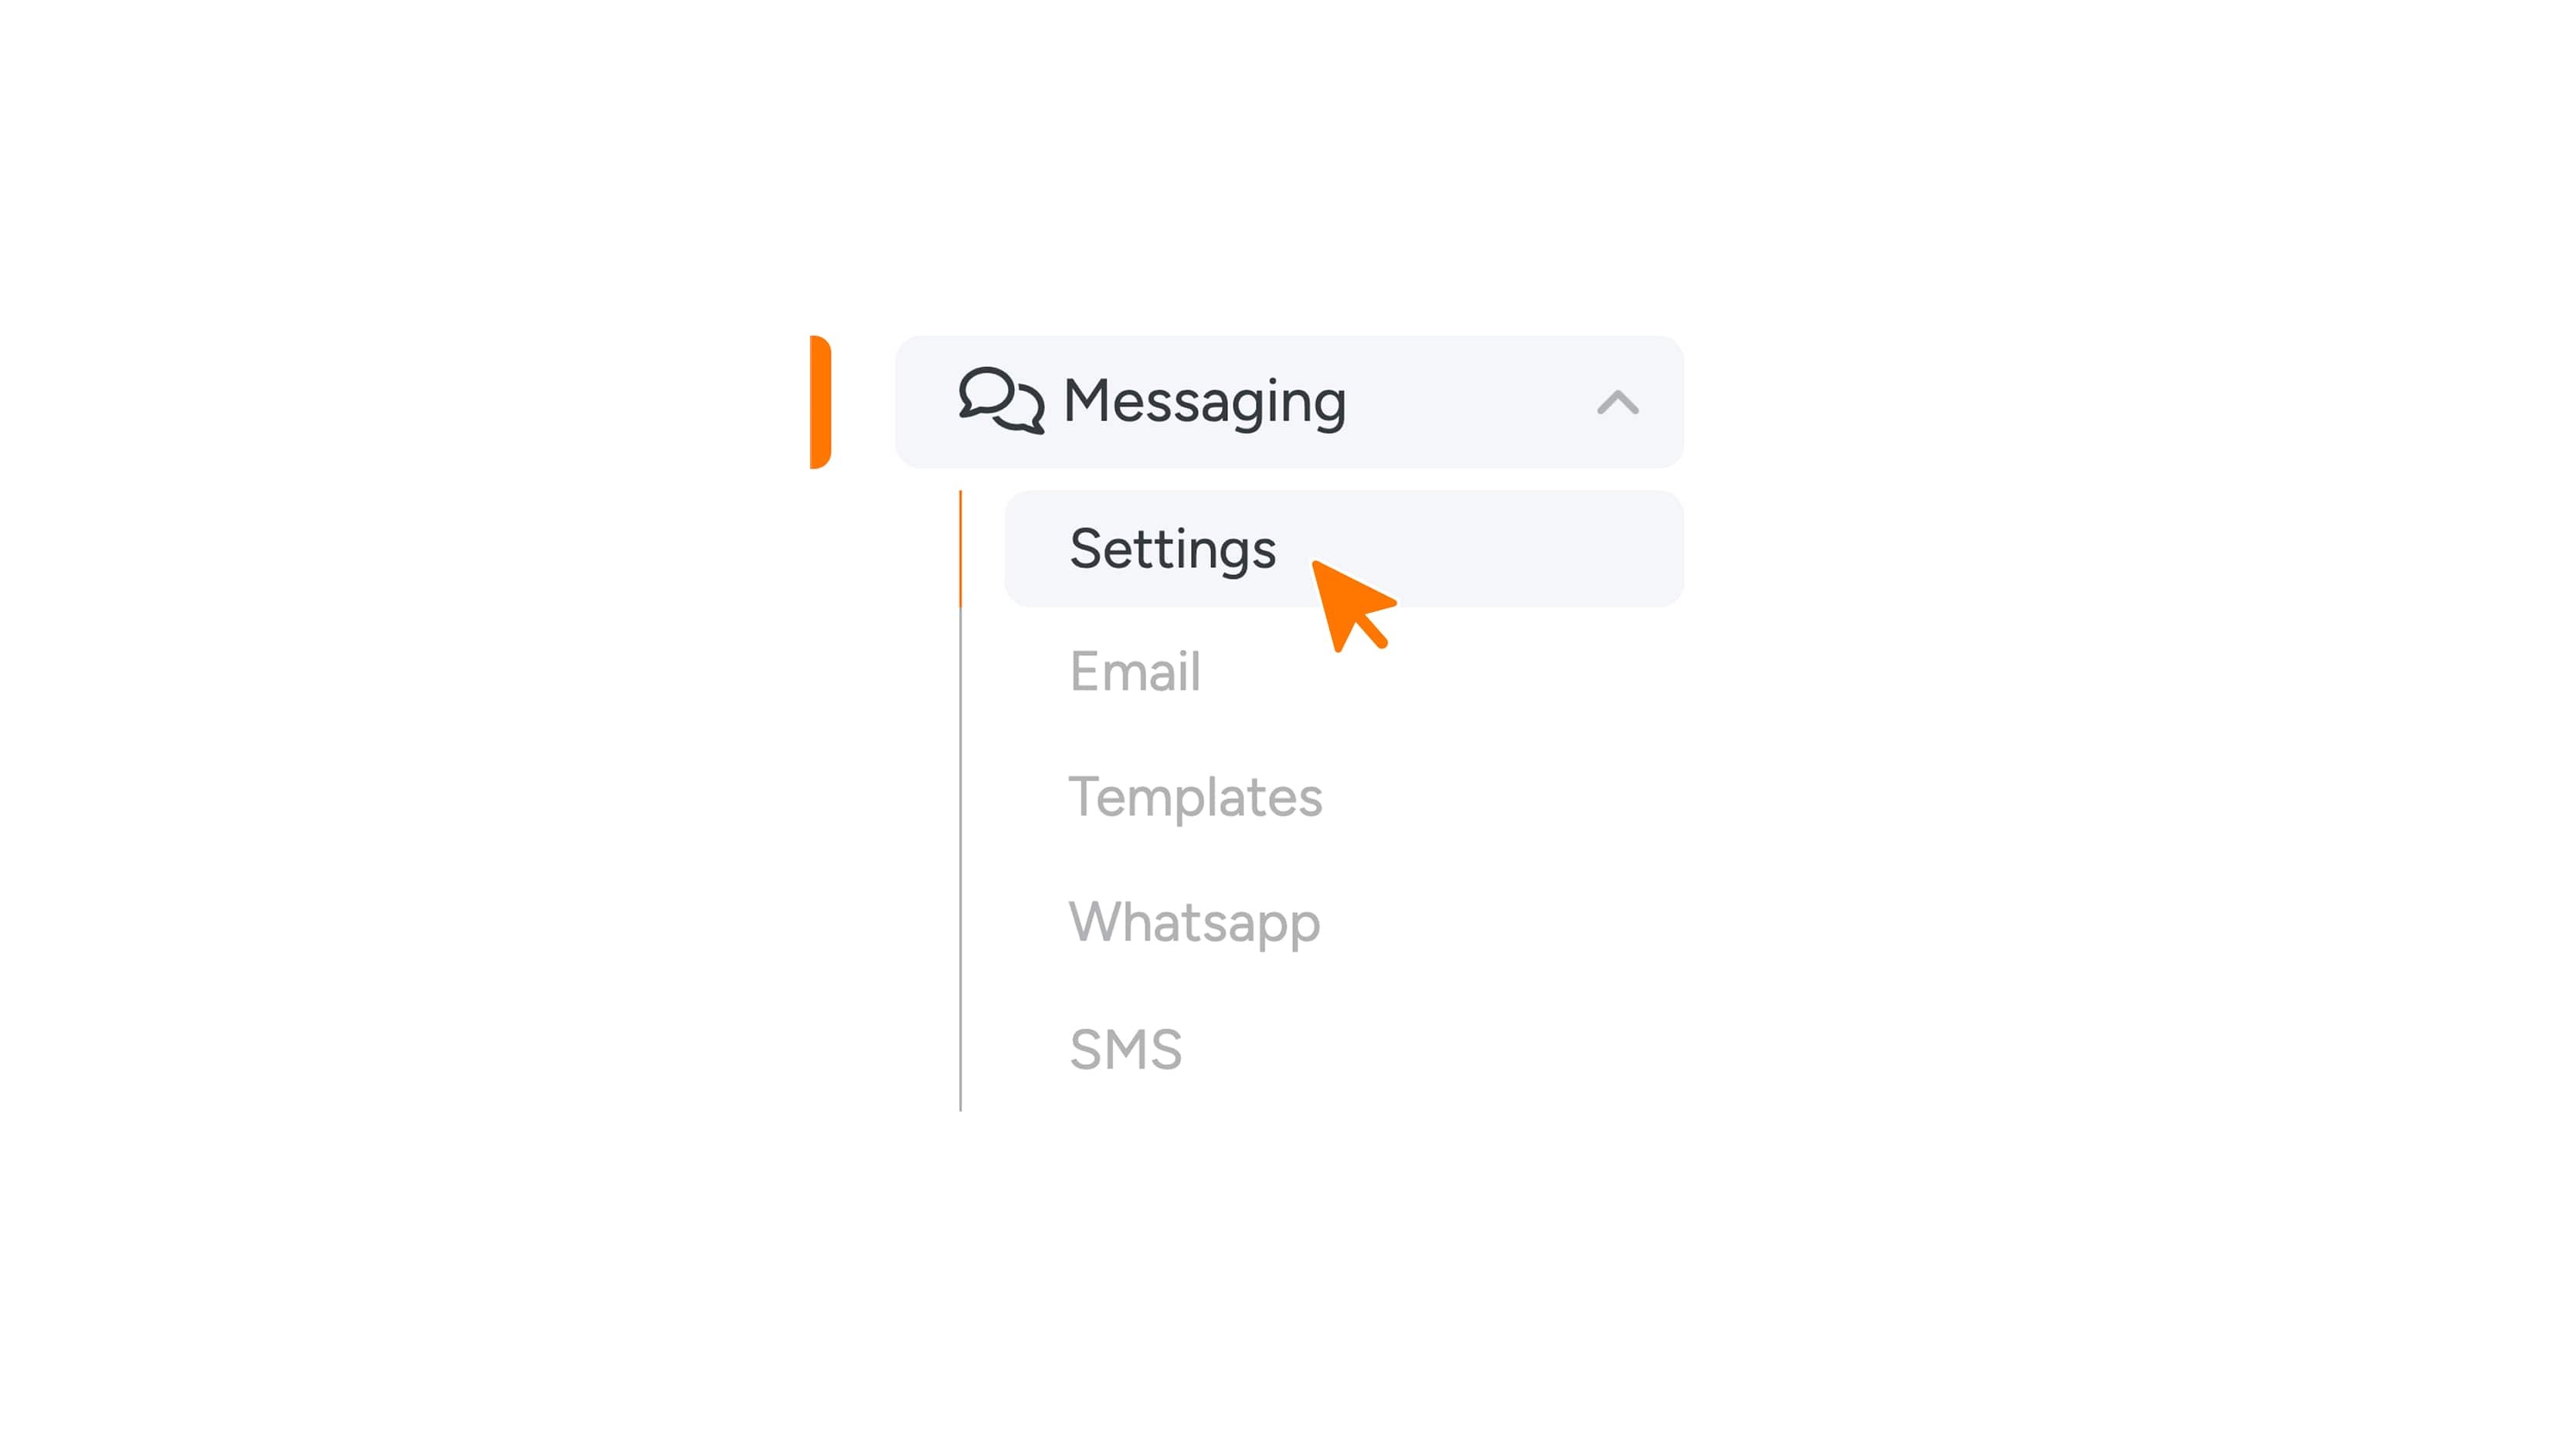
- After saving, the Messaging menu item will appear on the left-hand side.
- Open Messaging from the menu.
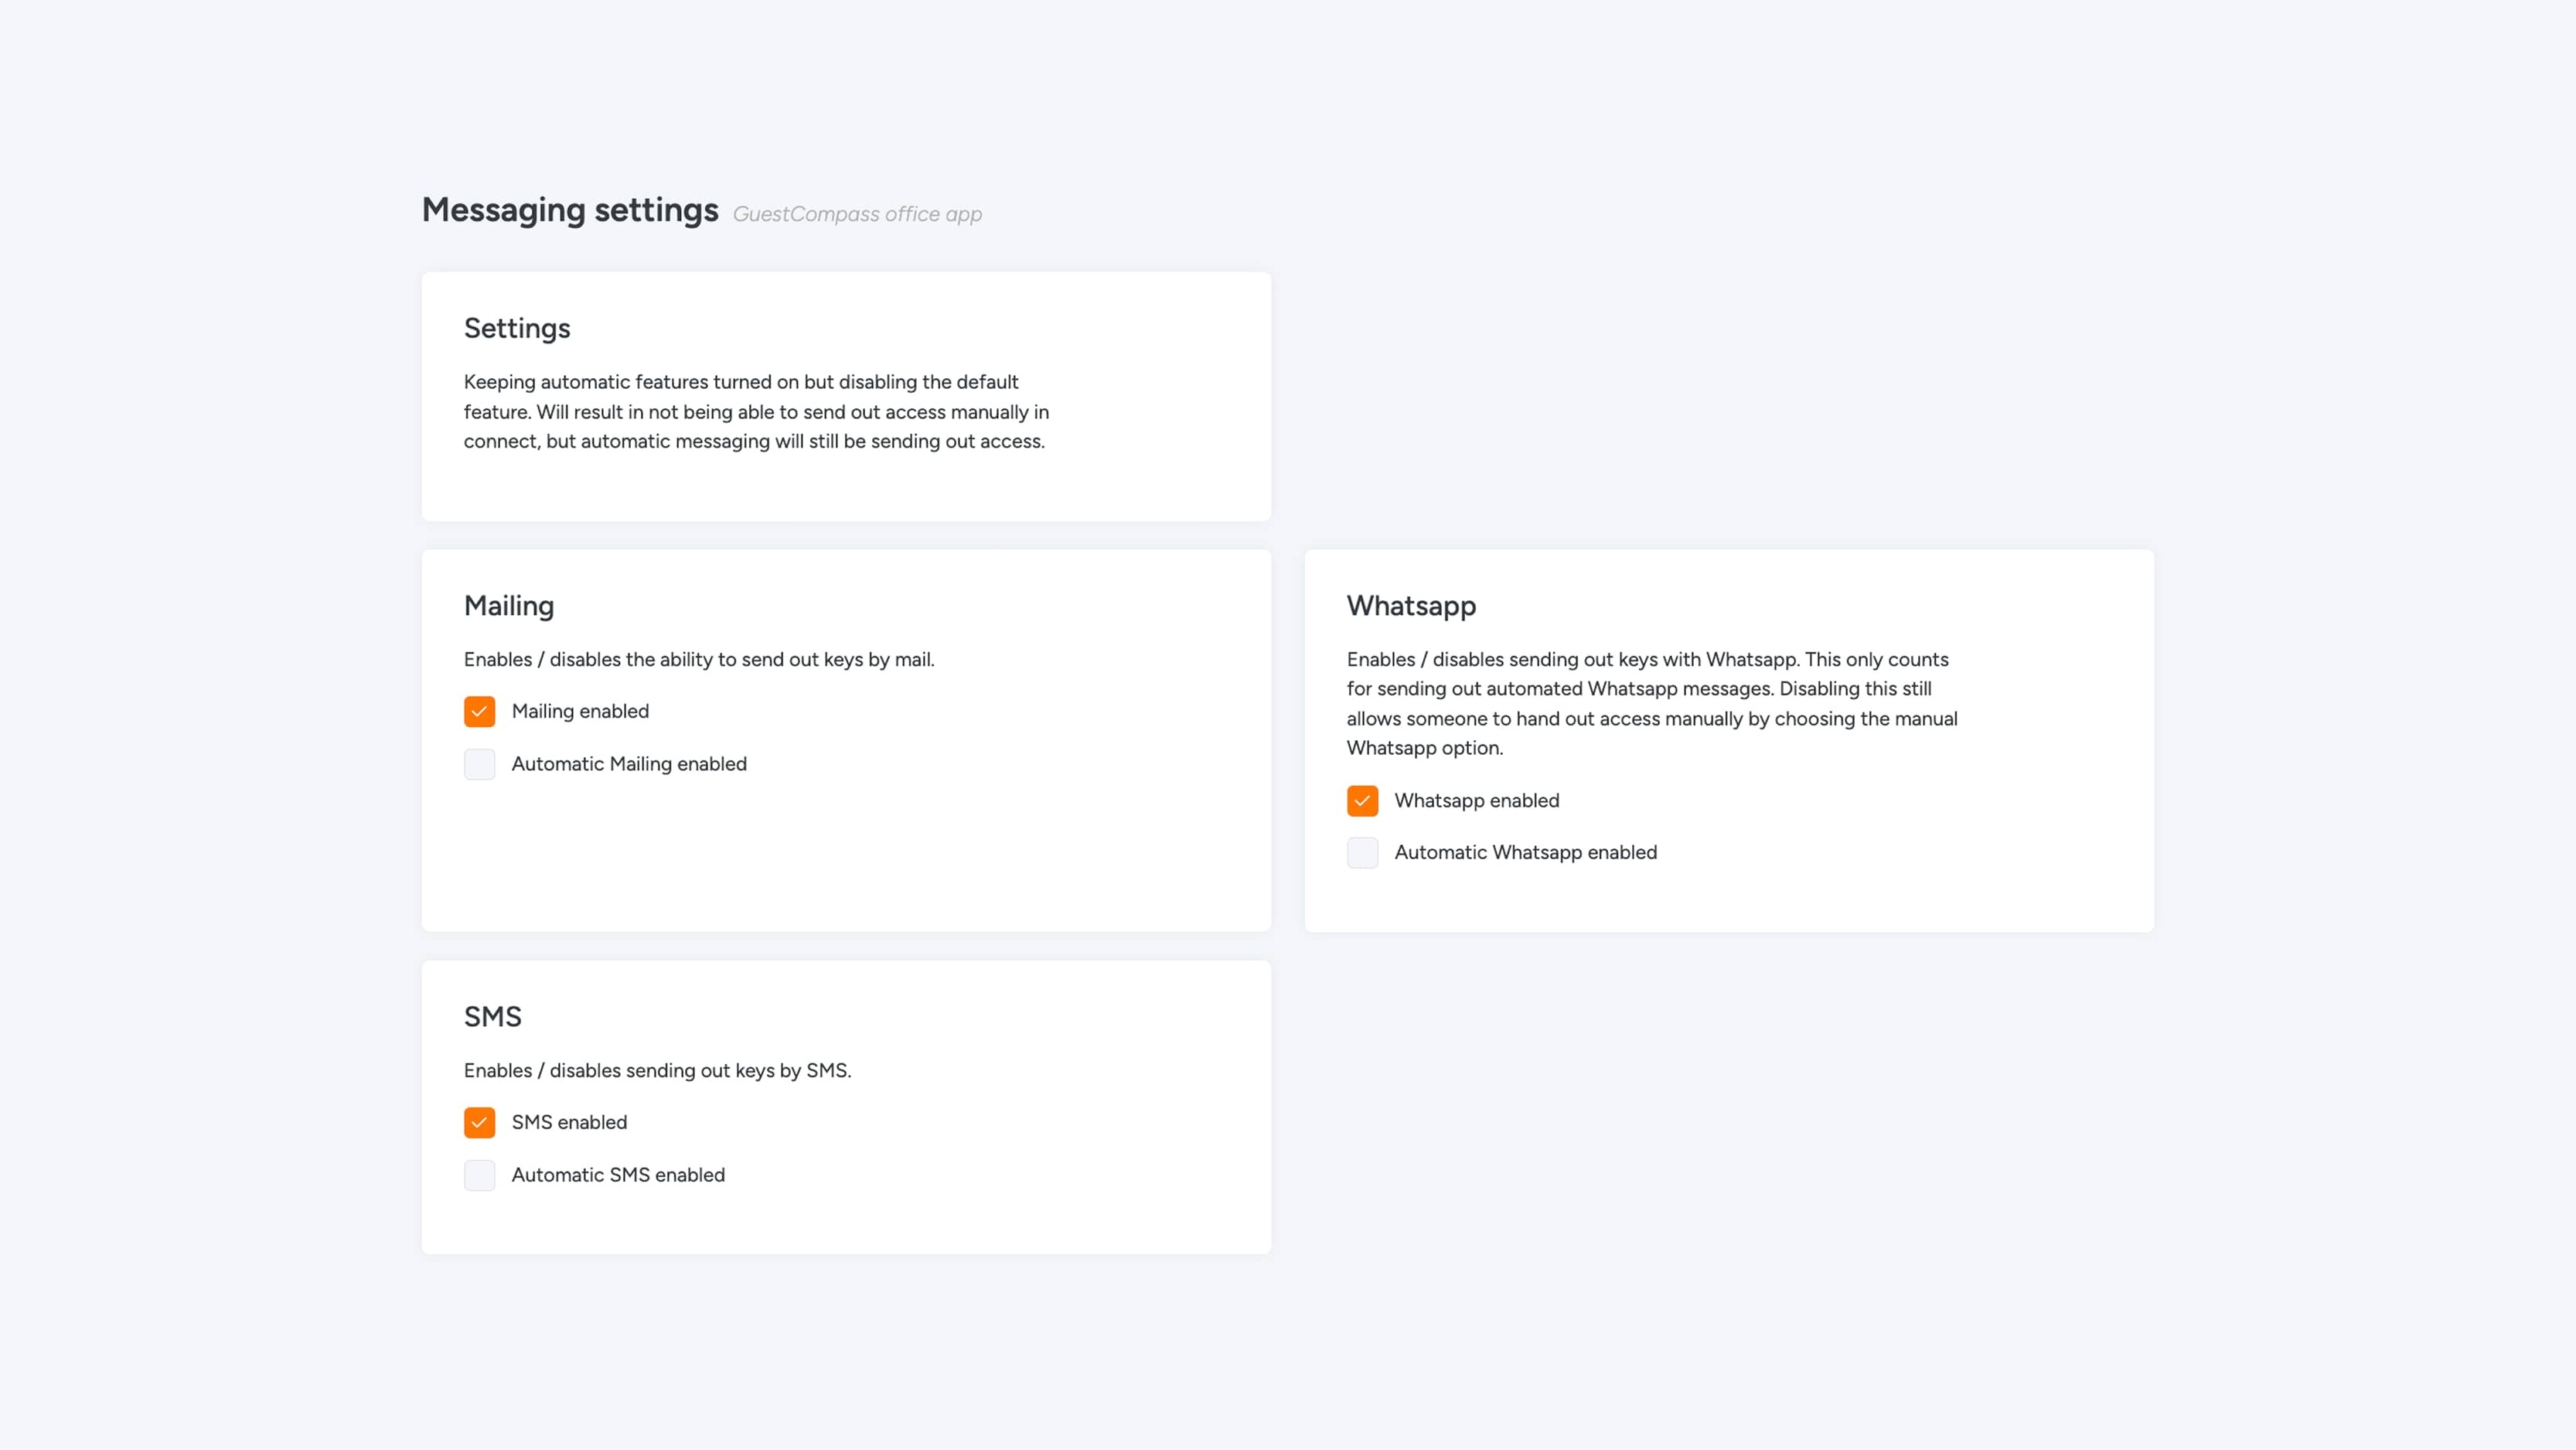
Under Mailing, check that Mailing enabled is turned on and click Save again.
Sending messages via WhatsApp or SMS
Here you can customize the email sent to your users. The settings are divided into three tabs: General, Text, and Style.
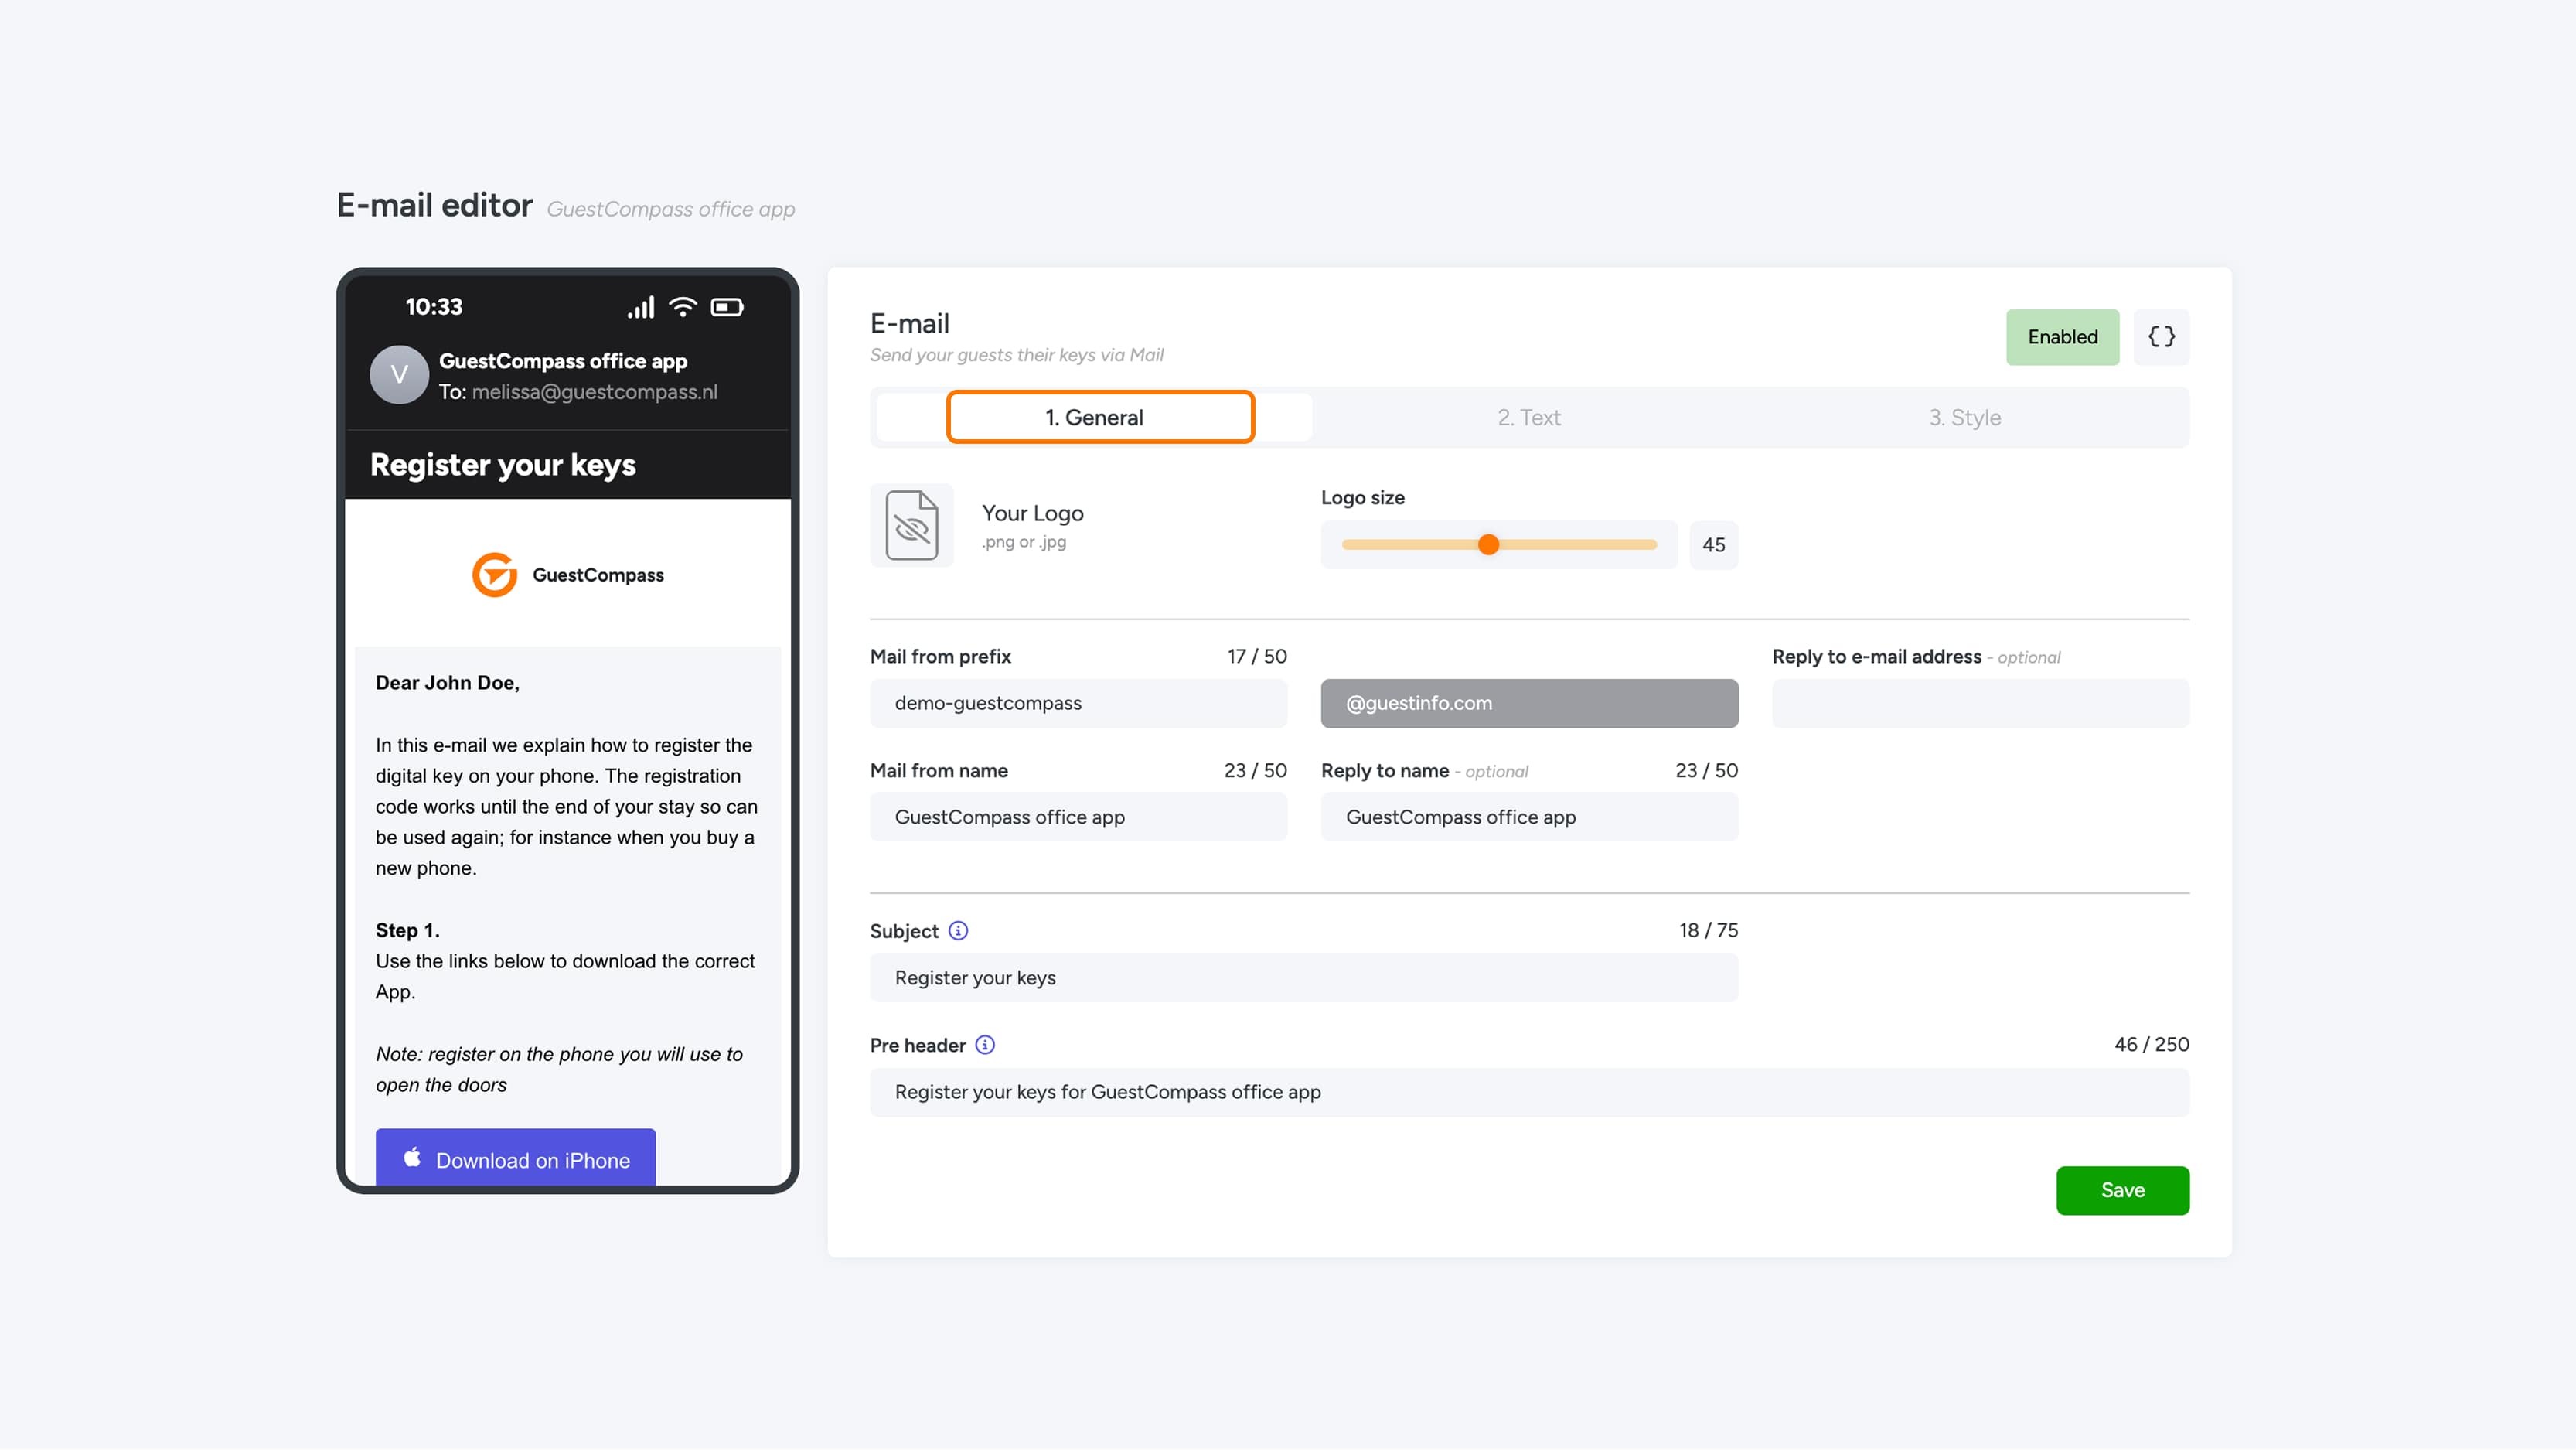
1. General
In this tab, you set the general details of the email.
You start by uploading a logo. You can then adjust the logo size using the corresponding slider.
The following fields will then be visible:
- Email from prefix + disabled field (maximum 50 characters)
- Reply to email address (optional)
- Email from name (maximum 50 characters)
- Reply to name (maximum 50 characters)
Next, enter the email subject. This is the short line of text at the top of the email that summarizes what the email is about. It's often the first thing displayed in the recipient's inbox.
Finally, set the preheader: this is the short text snippet that appears before the email is opened, often right next to or below the subject line.
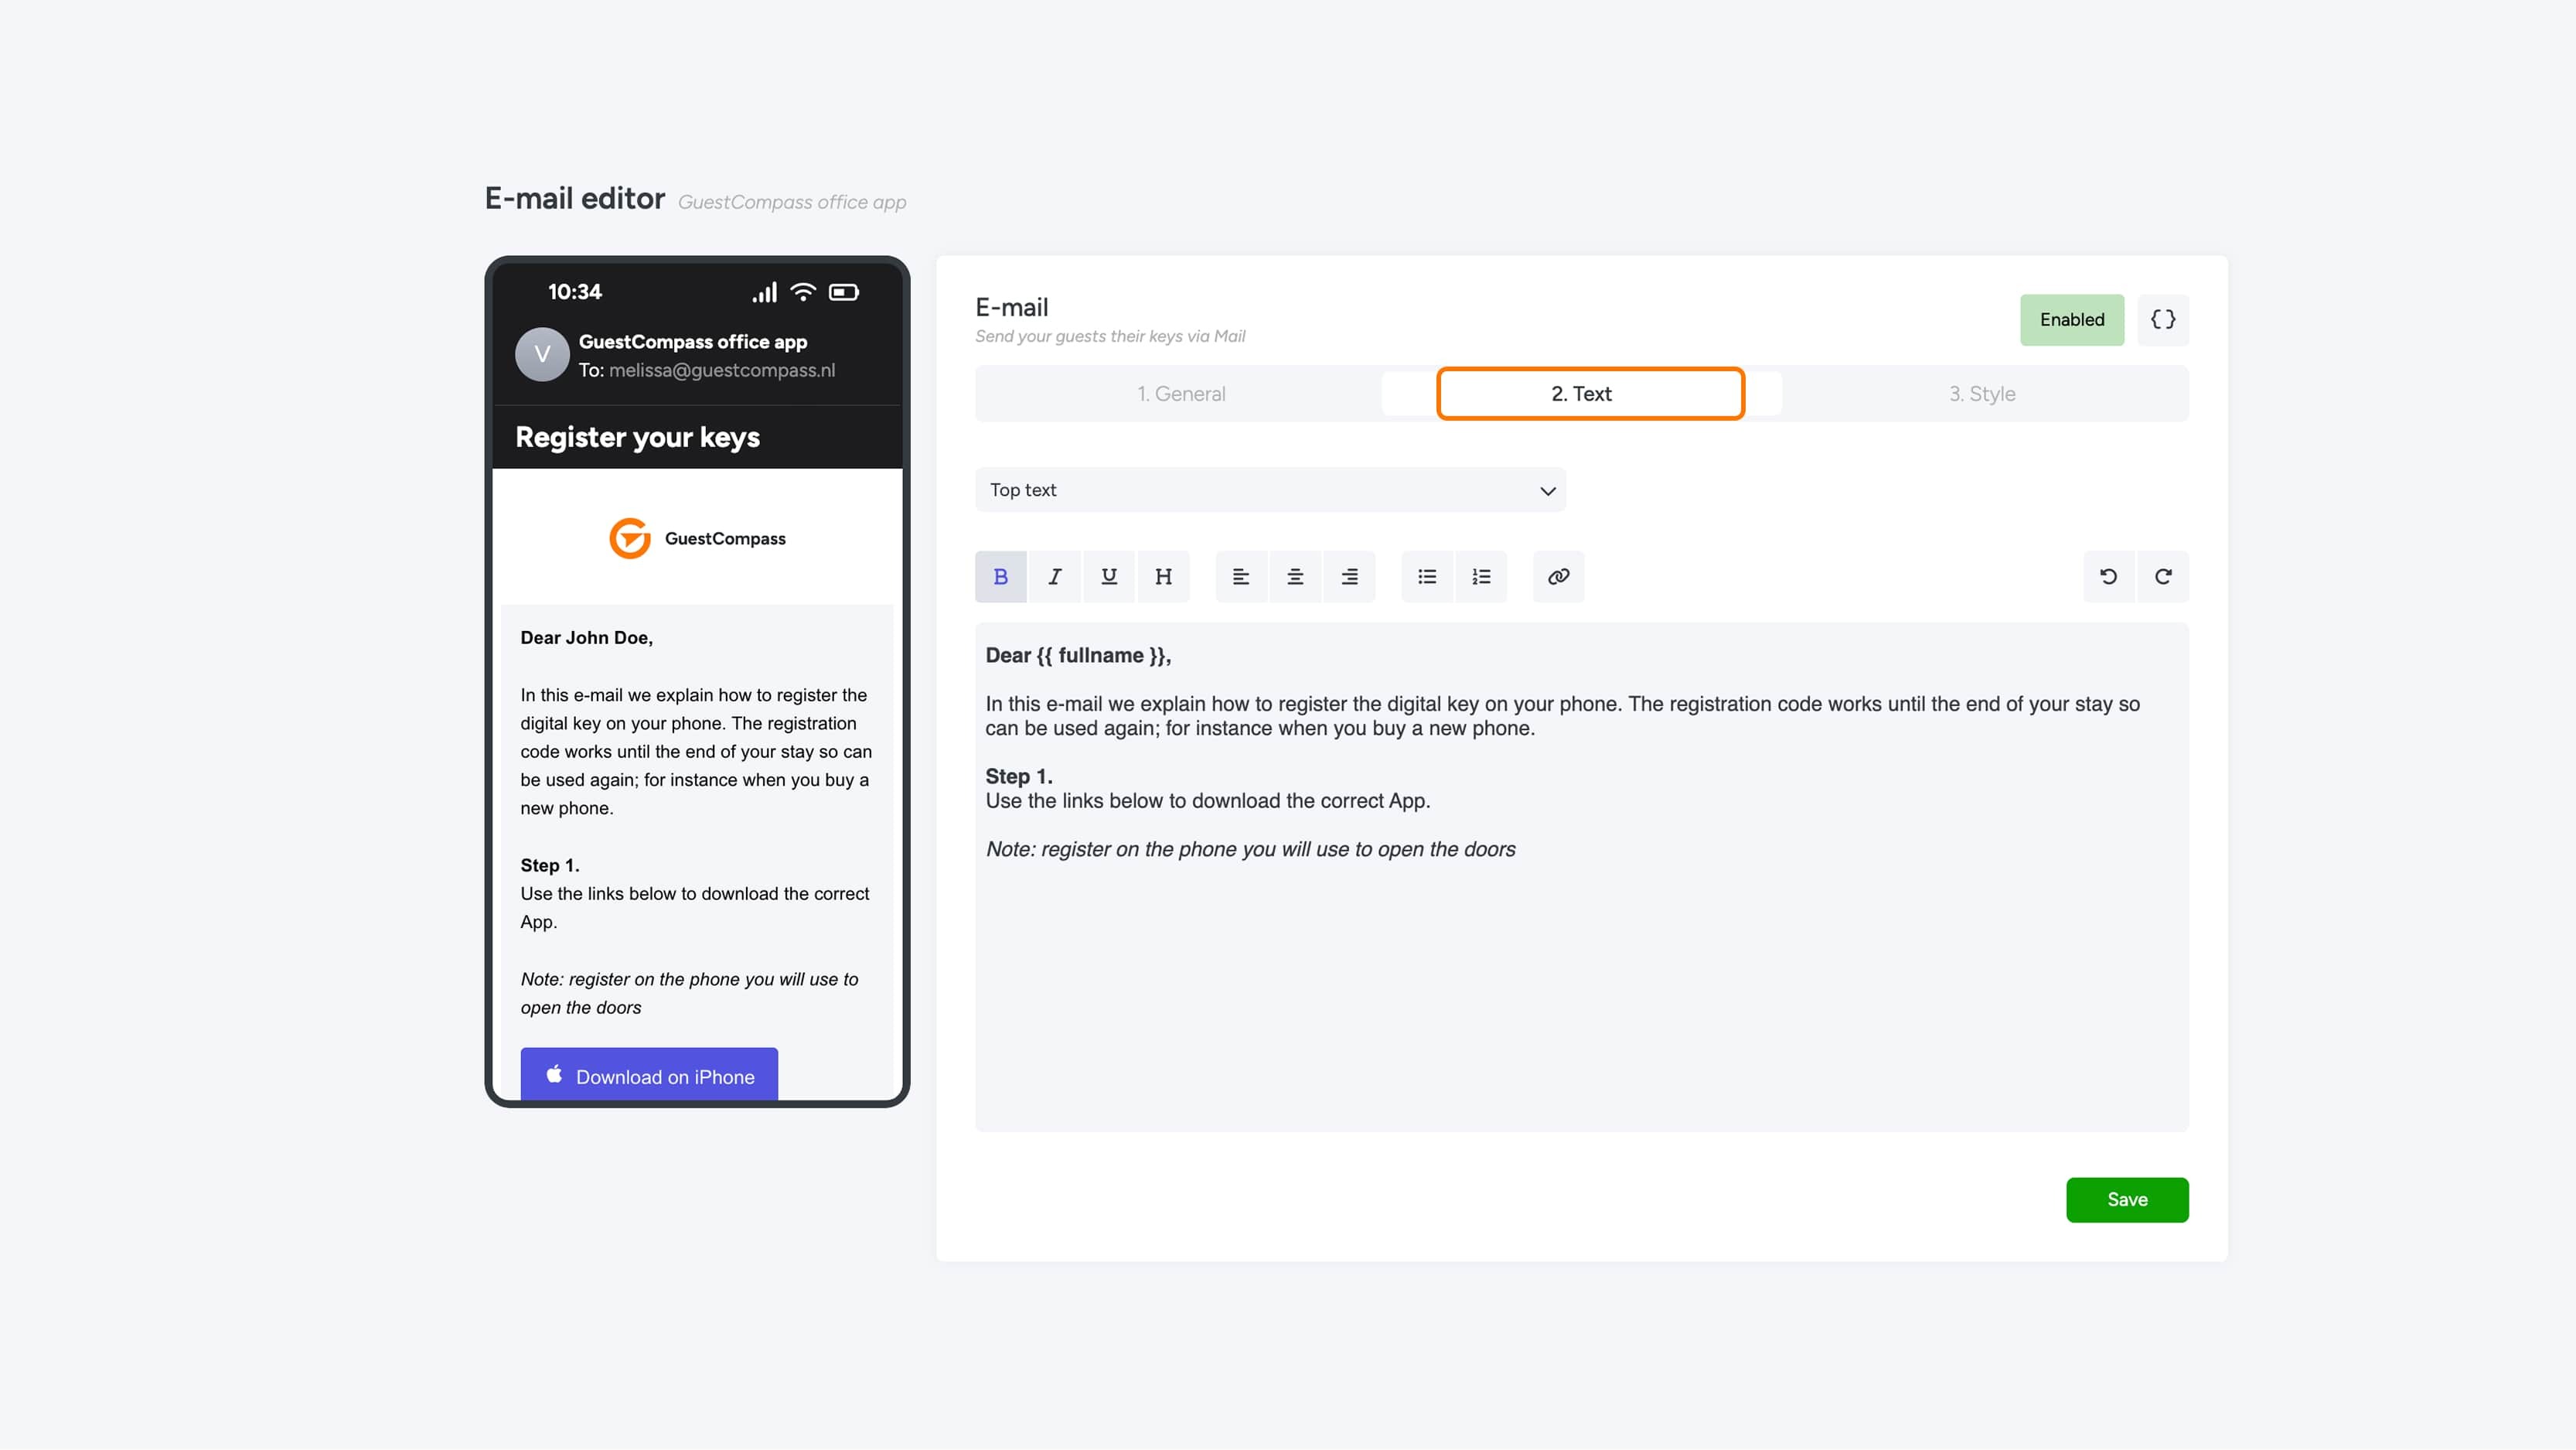
2. Text
In the second tab, enter the email's body. At the top, you can use a dropdown menu to choose where the text should be placed in the email:
- Top
- Middle
- Bottom
Within the text field, you can apply the desired formatting. A separate modal is available for inserting placeholders (see the "Placeholders" section for more information).
3. Style
In this tab, you customize the visual style of the email. Start by choosing the color of the icons displayed in the button(s). Then, you can activate Button 1 and determine whether to display an Apple or Android icon. In the button text field, enter the desired text; note that this can only be entered in one language. Next, set the color of the button itself, the text color within the button, and the associated link.
If you want to add a second button, you can configure Button 2 in the same way.
Finally, you can choose to add a registration code to the email. Above this code, you can add custom text in the "Top text" field. You can also set the background color and text color of the registration code. Ensure that the contrast between these colors is sufficient to ensure the code remains legible for the user.
Placeholders
In the Text tab (2. Text), you can use placeholders in your email. See the overview below.
Required in Messaging
{{ registration_code }}
Other
- {{ company }}
- {{ building }}
- {{ current_datetime }}
- {{ current_date }}
- {{ access_to }}
- {{ identifier }}
- {{ check_in }}
- {{ check_out }}
- {{ firstname }}
- {{ lastname }}
- {{ fullname }}
- {{ date_of_birth }}
- {{ email }}
- {{ mobile }}
- {{ salutation }}
Templates
Besides the standard email, you can also customize four different emails that may be relevant to the user. The following templates are visible in the table:
- Feedback tool
- Keyfob activation
- External Keyfriends
- Internal Keyfriends
You can edit a template by clicking the gray pencil icon. When you edit a template, the "Updated" date will change, and a check mark will appear next to "Configured."
Manual Sending
The manual template is used when you send a non-automated WhatsApp message. This means you send the message yourself instead of using one of our automated WhatsApp senders.
Enter the information in the "Text" field using the placeholders. You can see how it will look in the preview.
Automatic Sending
This template is used to automatically send WhatsApp messages to grant access. Because these messages must meet stricter Meta guidelines, prior approval is required. See the guidelines for more information.
Approval can take up to 24 hours. You can find the status under "Approval Status."
In the "Text" field, you can enter the desired WhatsApp message, with a maximum of 2000 characters.
SMS
Enter your SMS text here. You'll see a preview in the phone view on the left. You can add placeholders using the "{{}}" button in the top right corner. The SMS can contain up to 160 characters and must always include the placeholder "{{ registration_code }}."