Programming a Keyfob
An iLOQ key fob is a small electronic keychain used to open electronic iLOQ locks. Instead of a traditional mechanical key, a key fob contains a chip that communicates with the lock using contactless technology (such as NFC or RFID).
Within the system, you can easily link a user to a key fob.
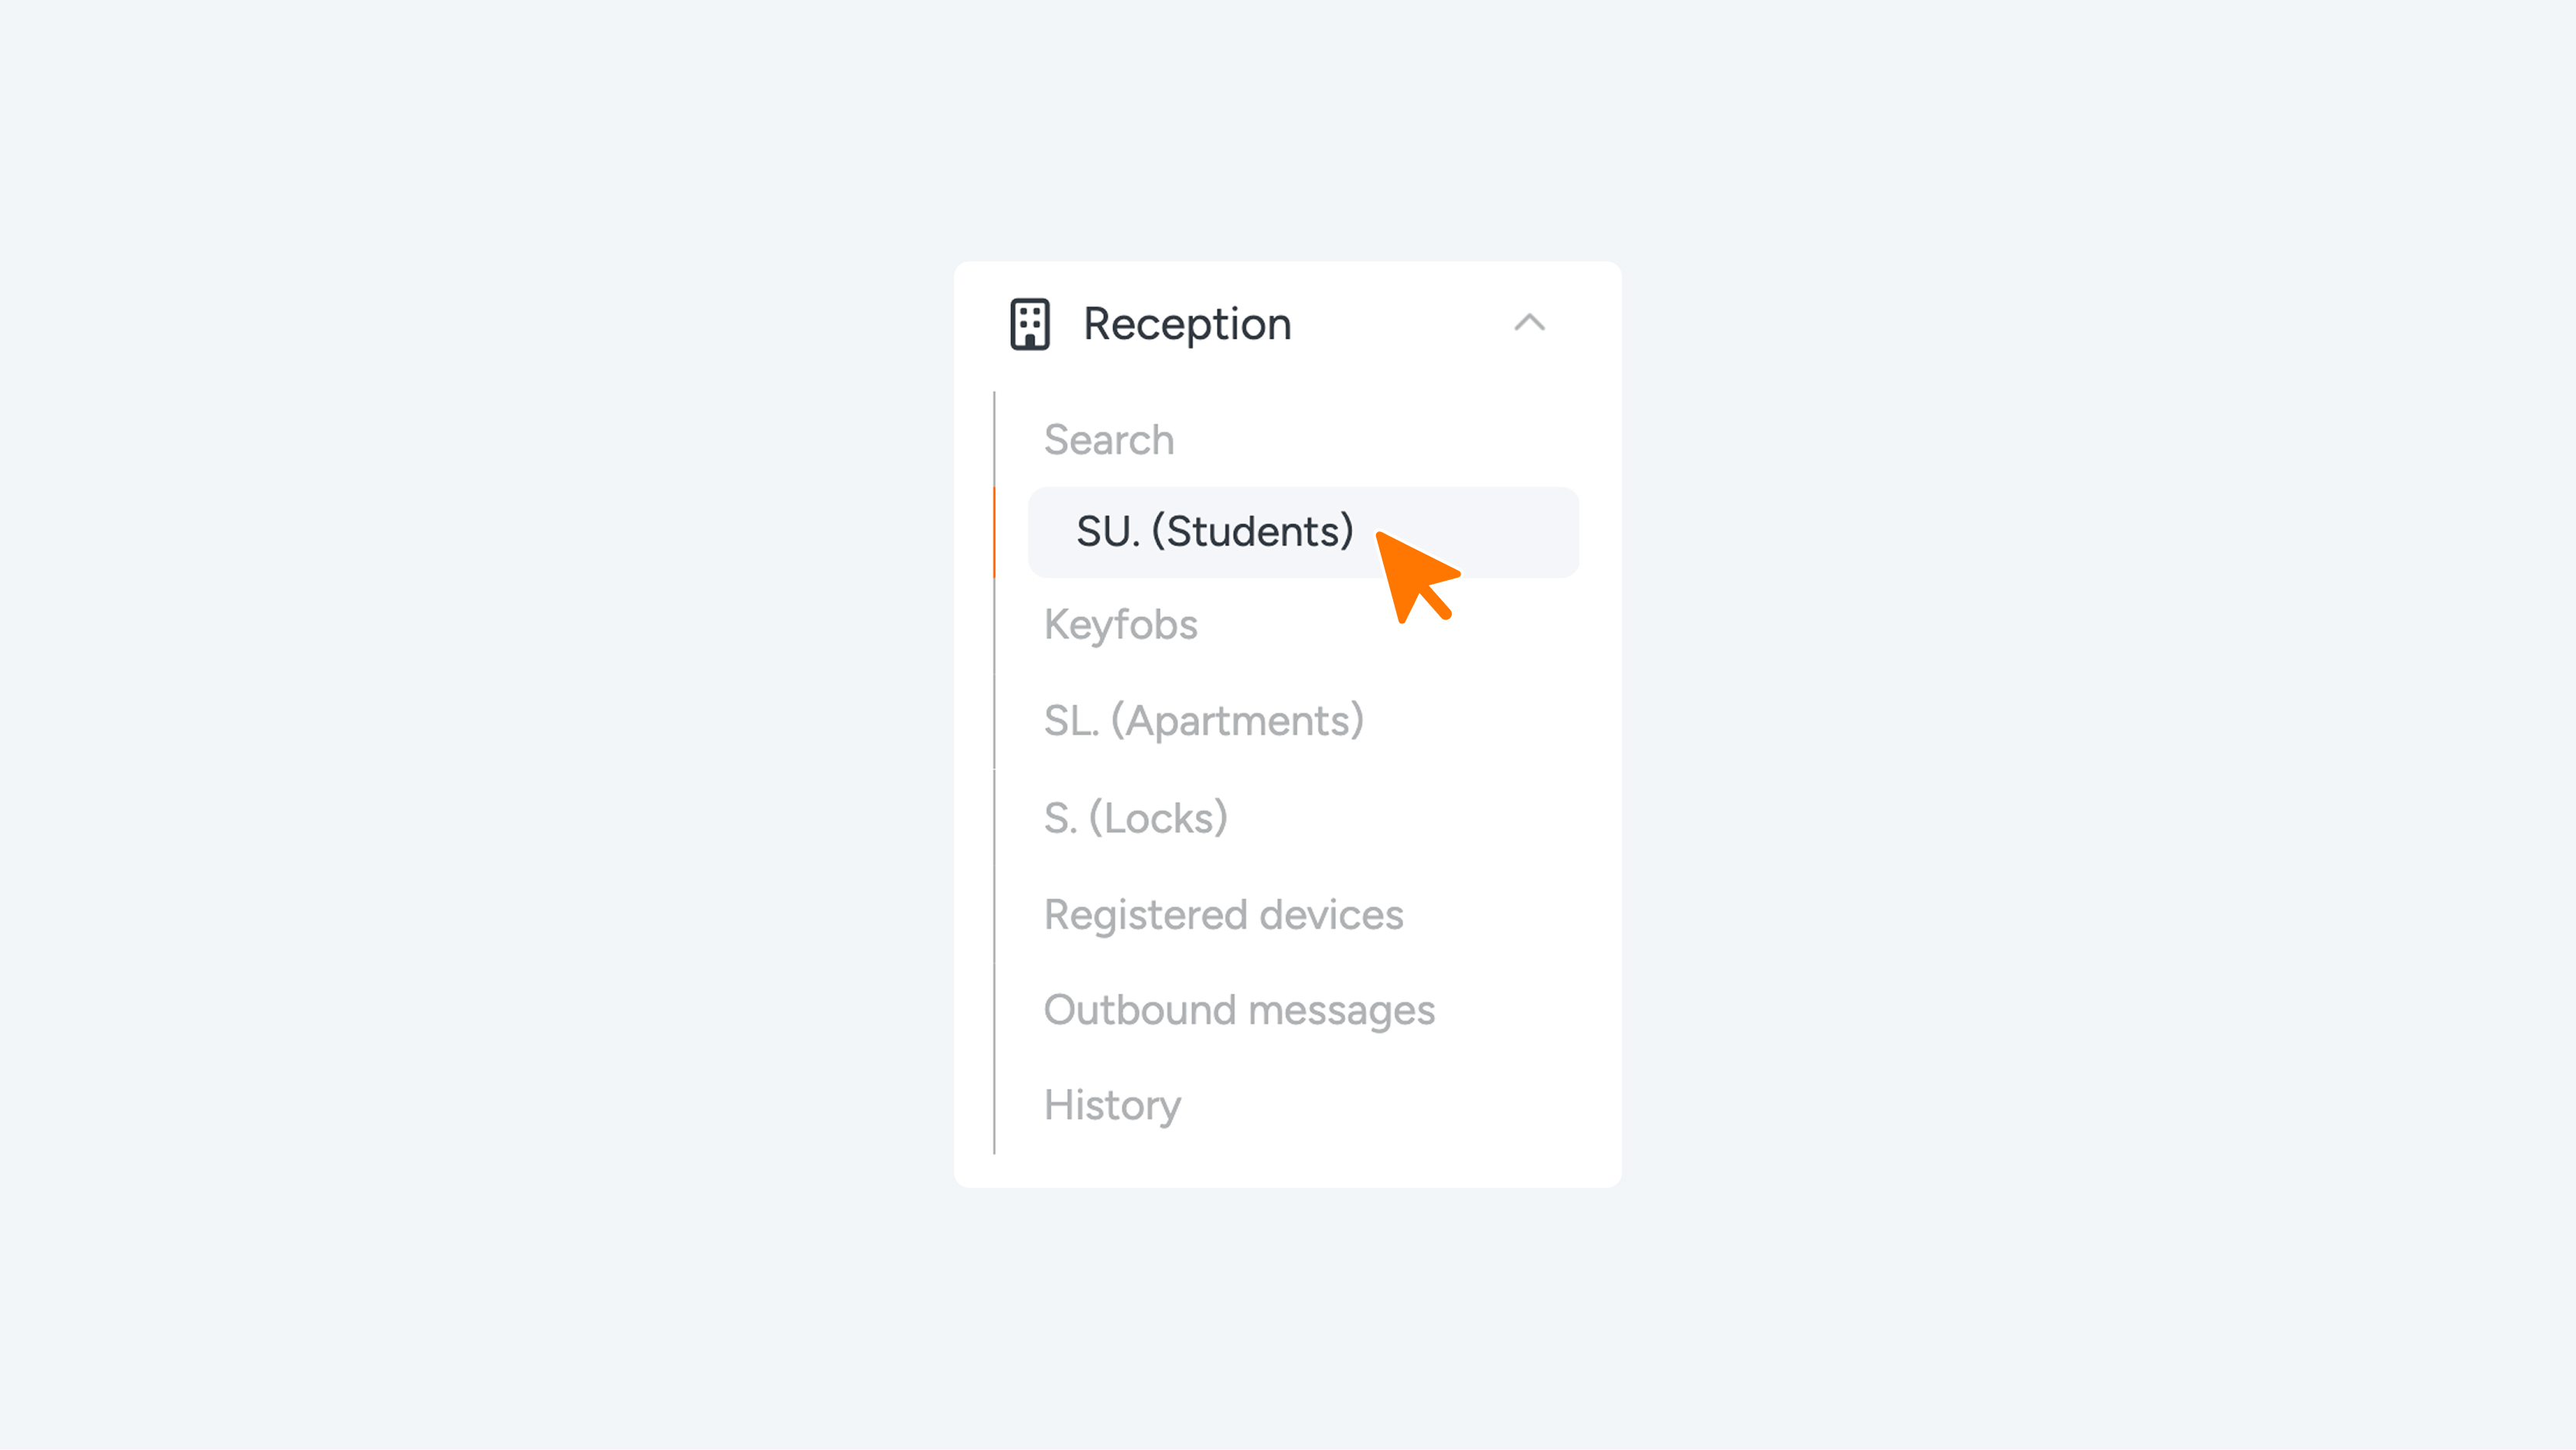
Navigate to Student, Guest, Key, Person, or Truck Driver via the menu or the dashboard. Next, click the pencil icon in the table to edit.
Scroll down to the ‘Keyfob’ section.
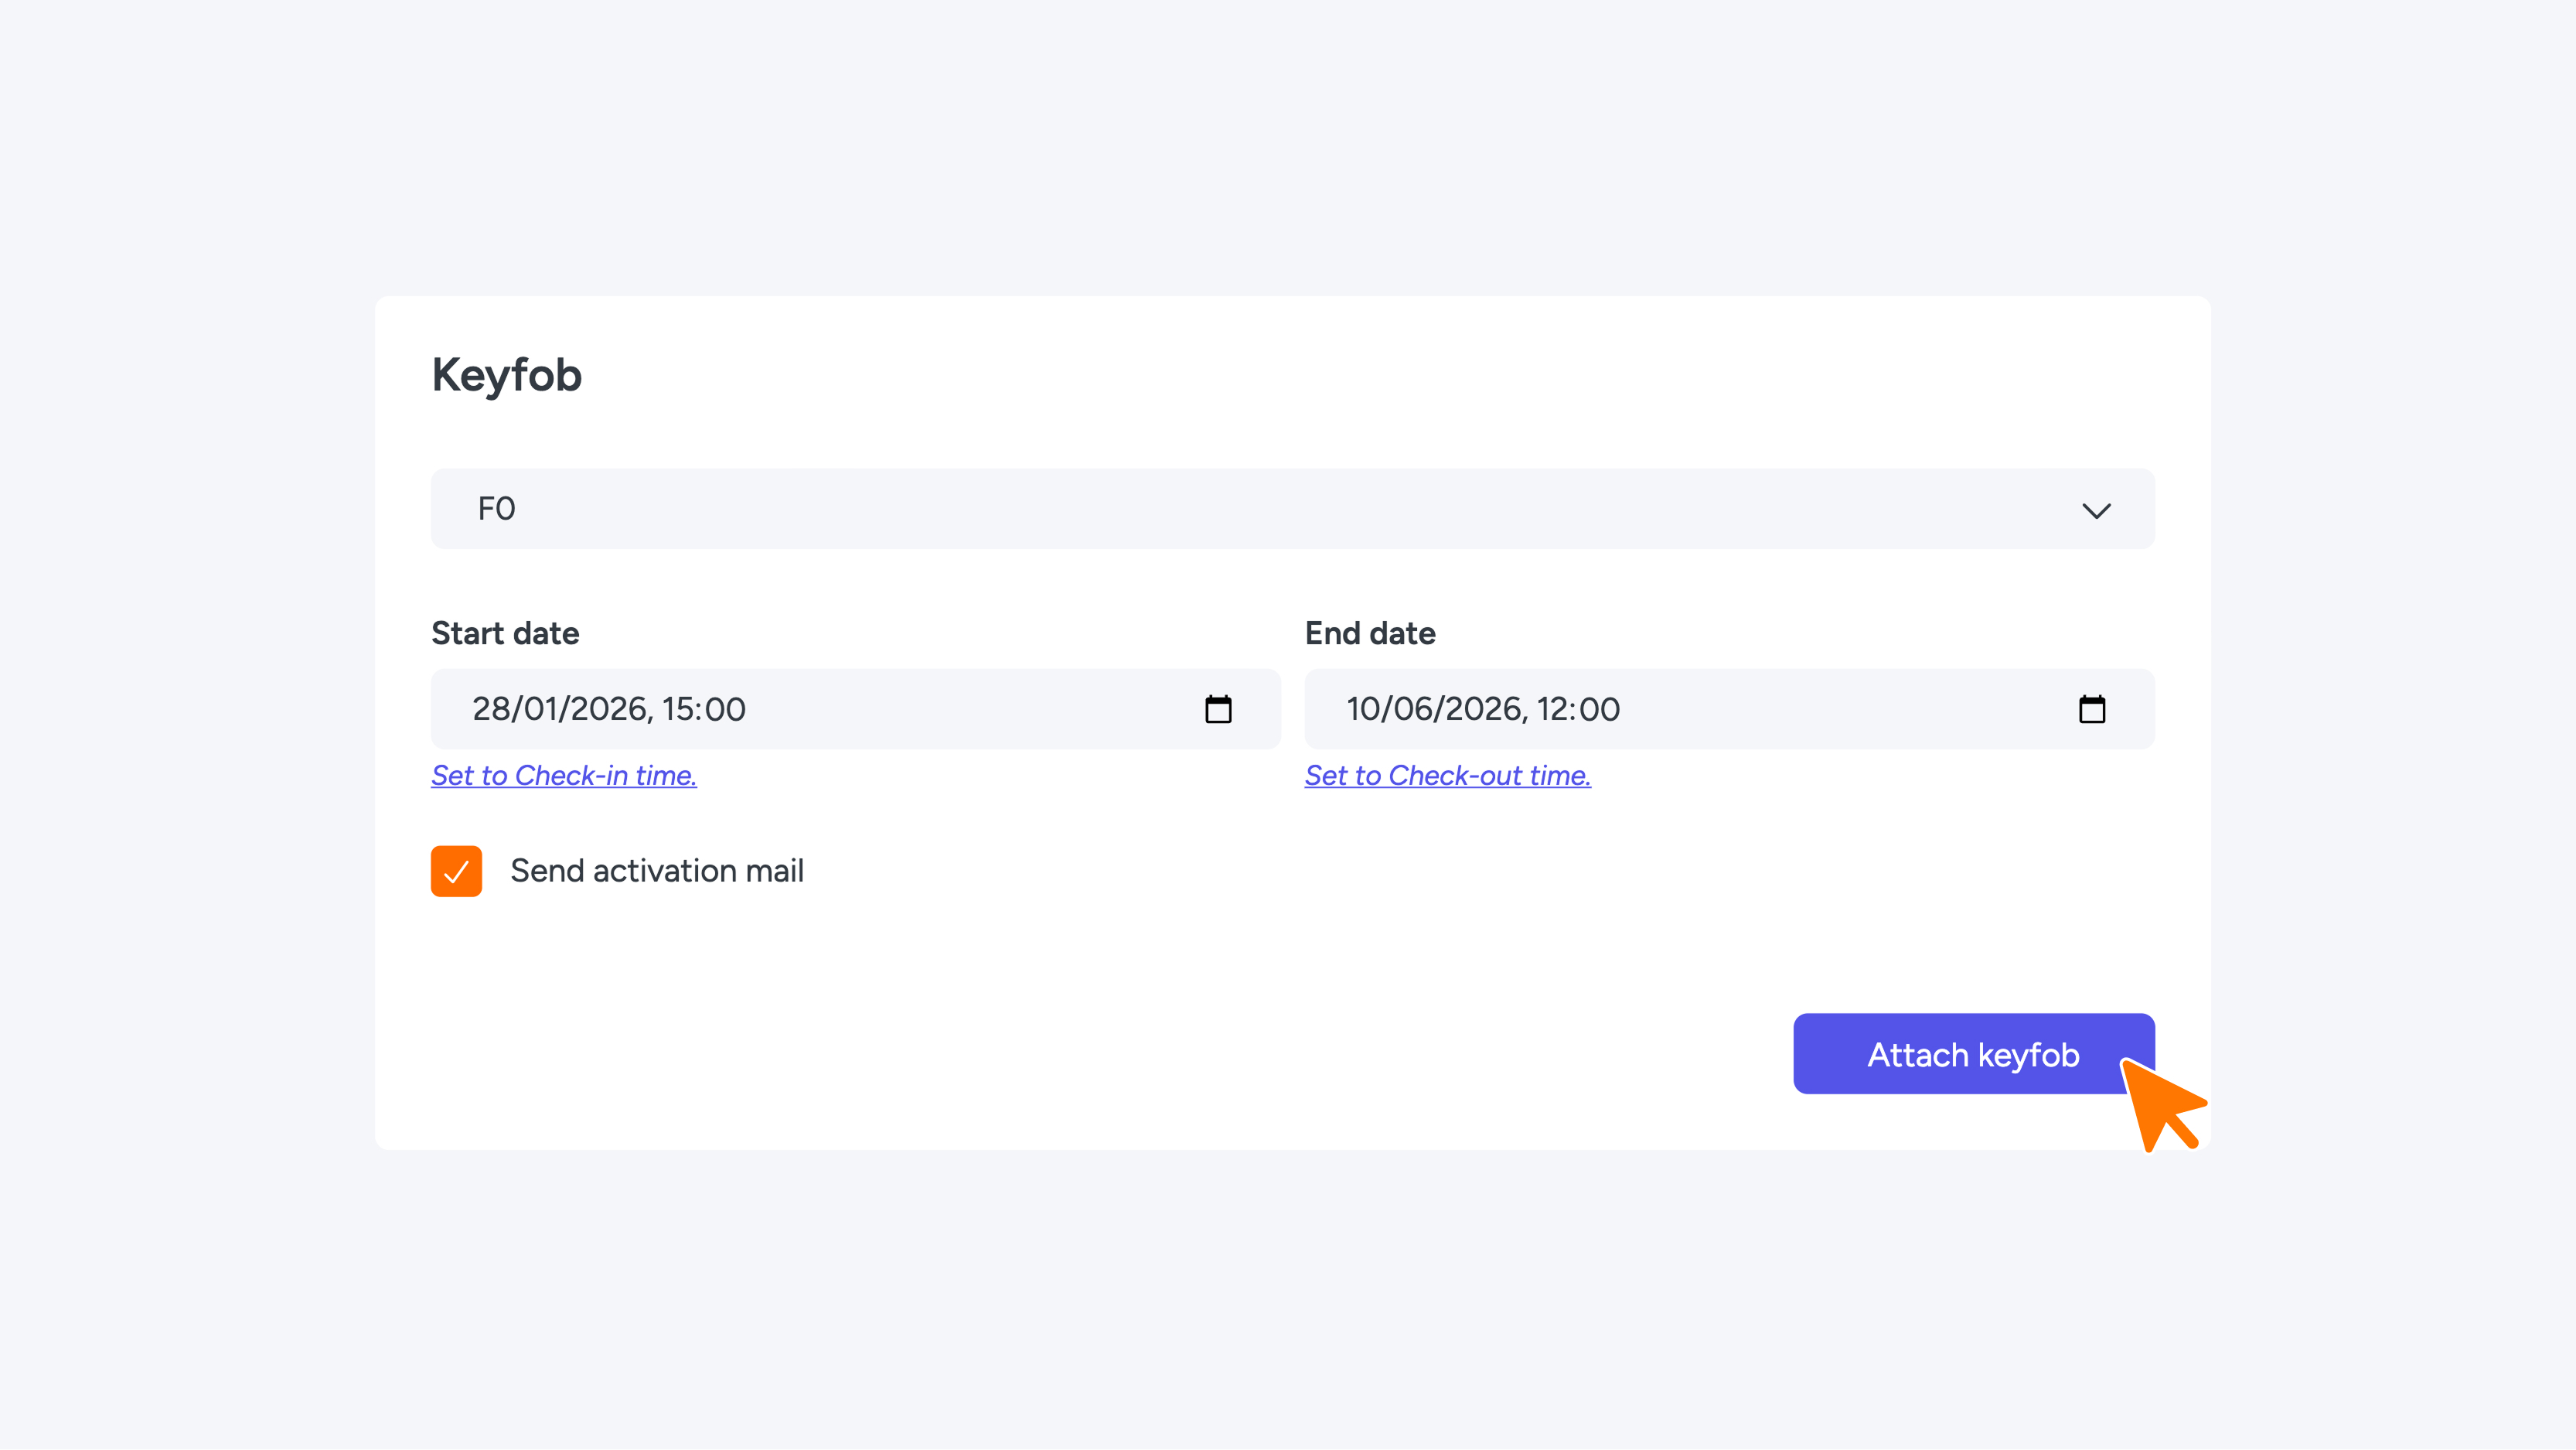
Select the code shown on the Keyfob. Then, enter the desired start and end dates and check the ‘Send activation mail’ box. Finally, click the blue ‘Attach Keyfob’ button to complete the link.
If the Keyfob code does not appear when you enter it in Connect, it means the Keyfob has not yet been added to the iLOQ system (new Keyfobs must be registered first), or the Keyfob was programmed via the iLOQ Manager using the “hand over” option, which prevents it from being programmed via Connect.
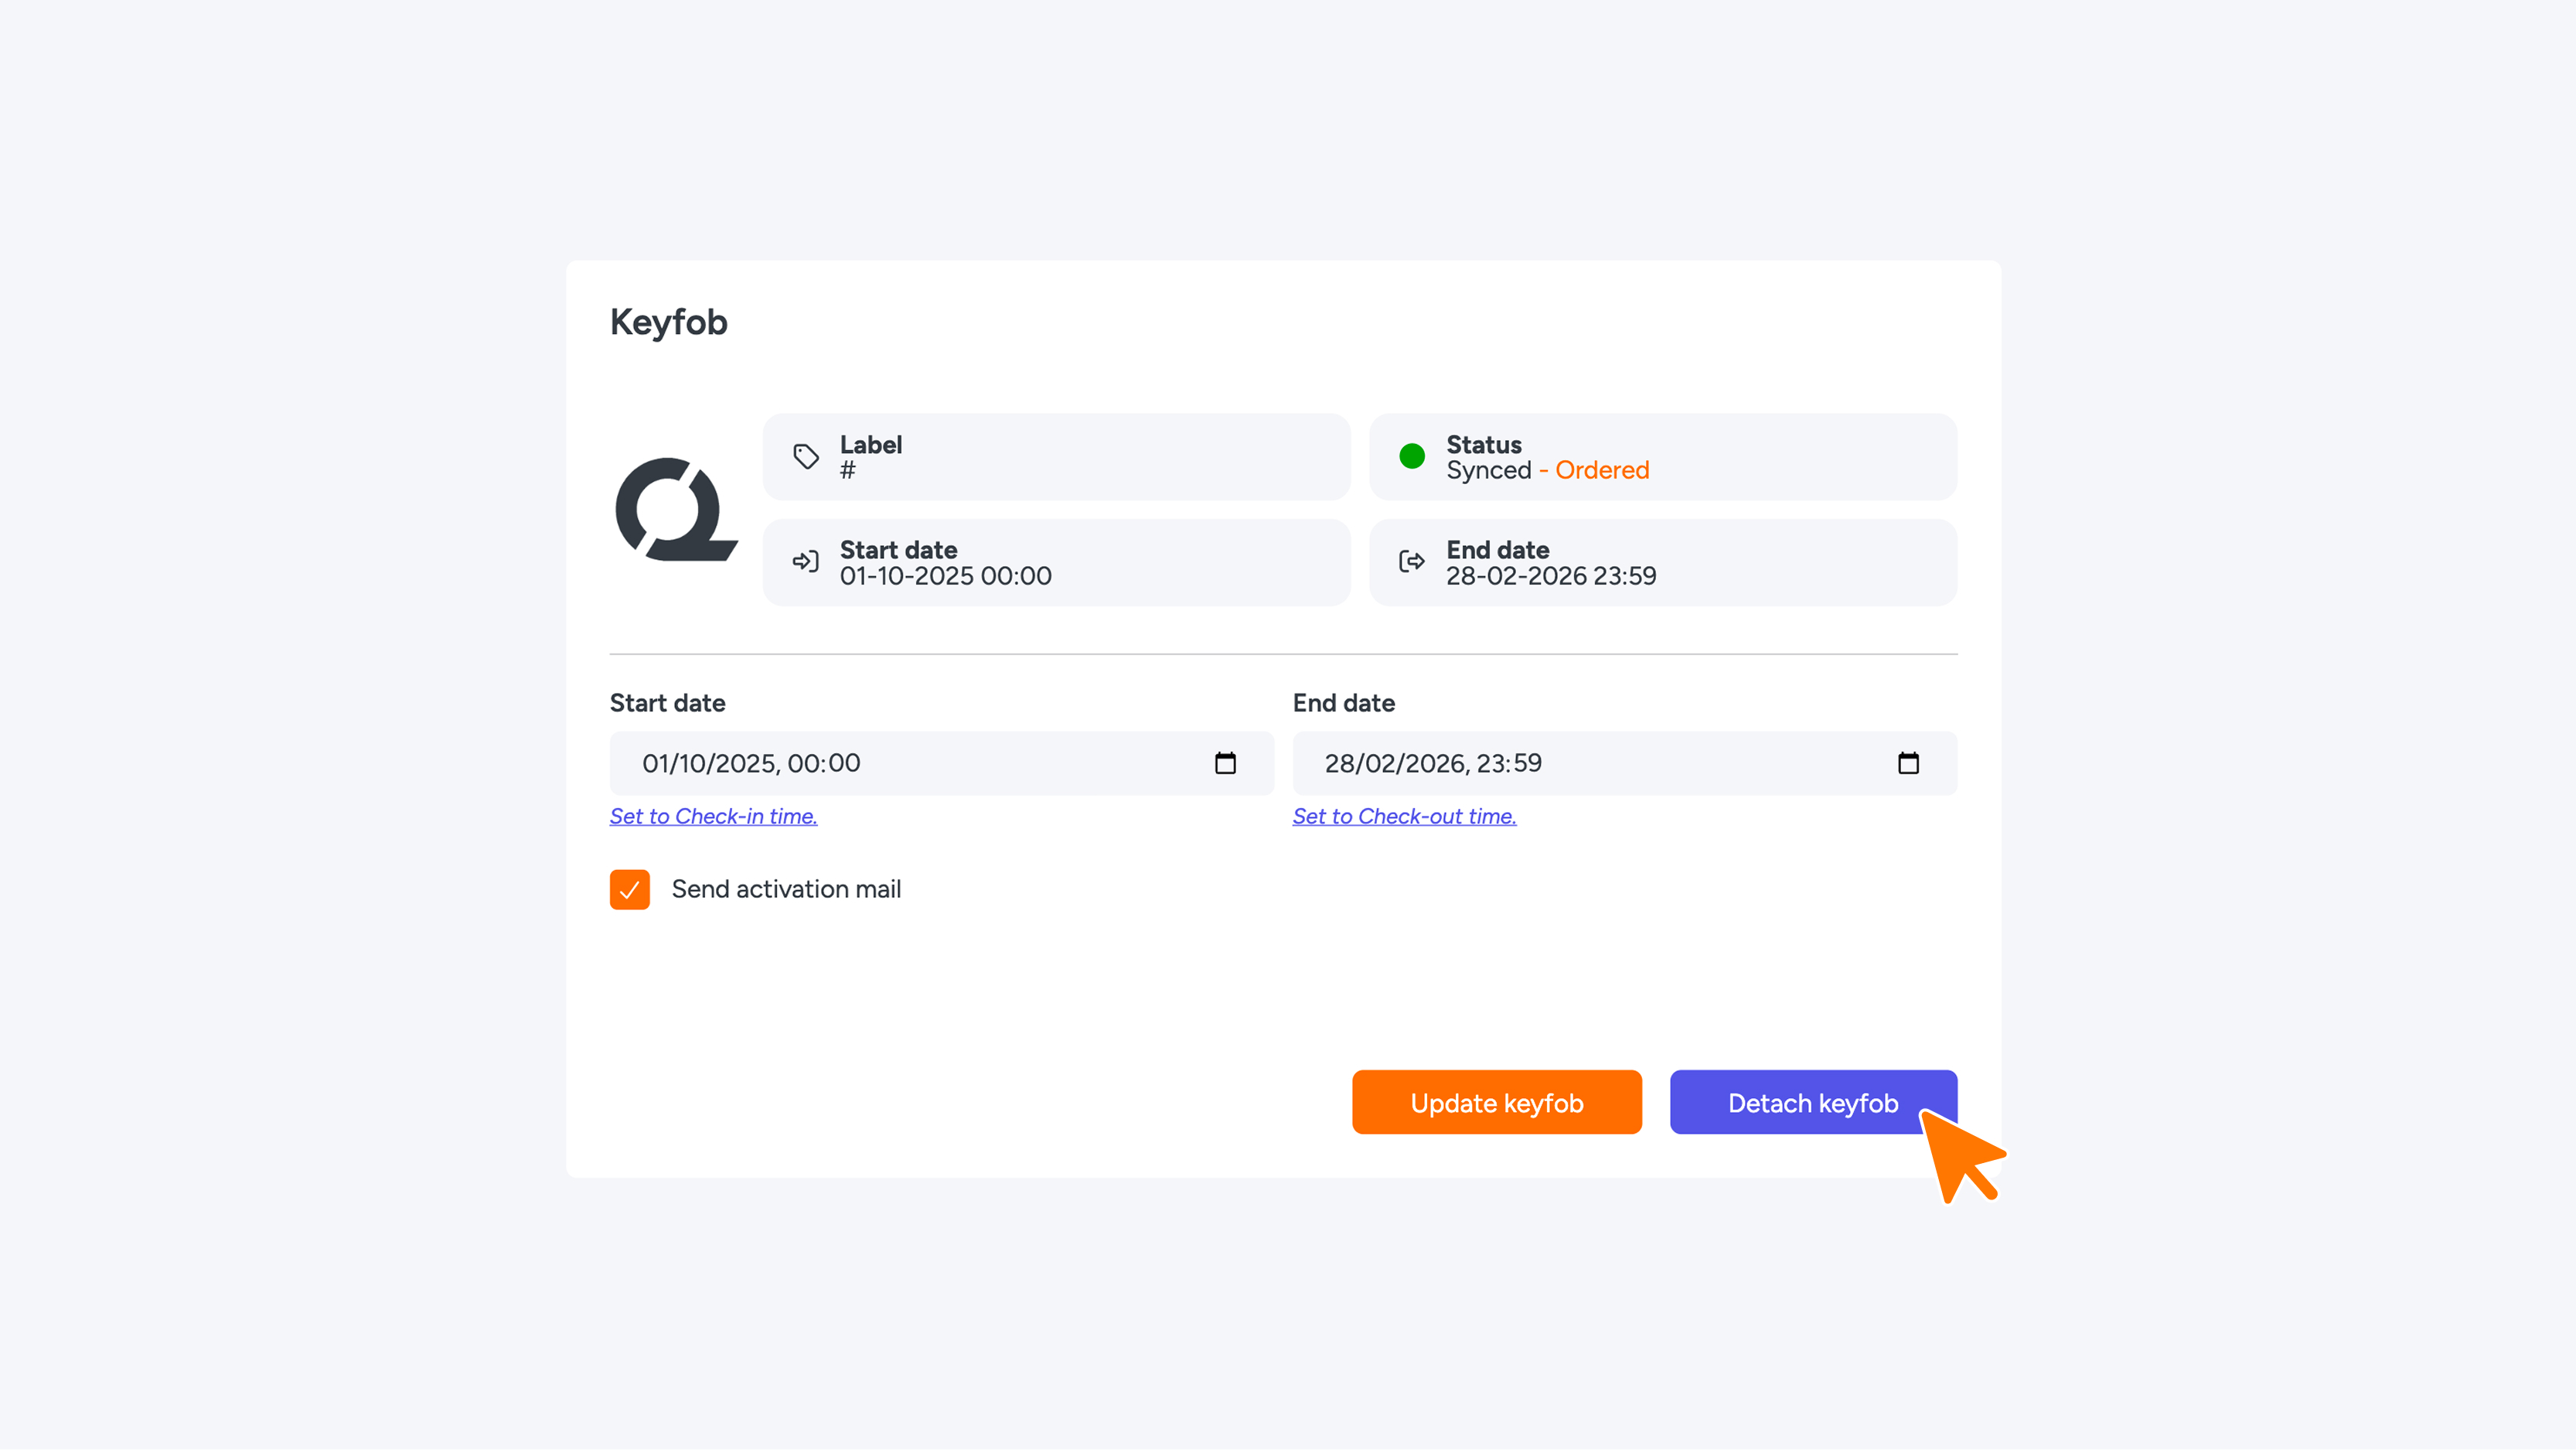
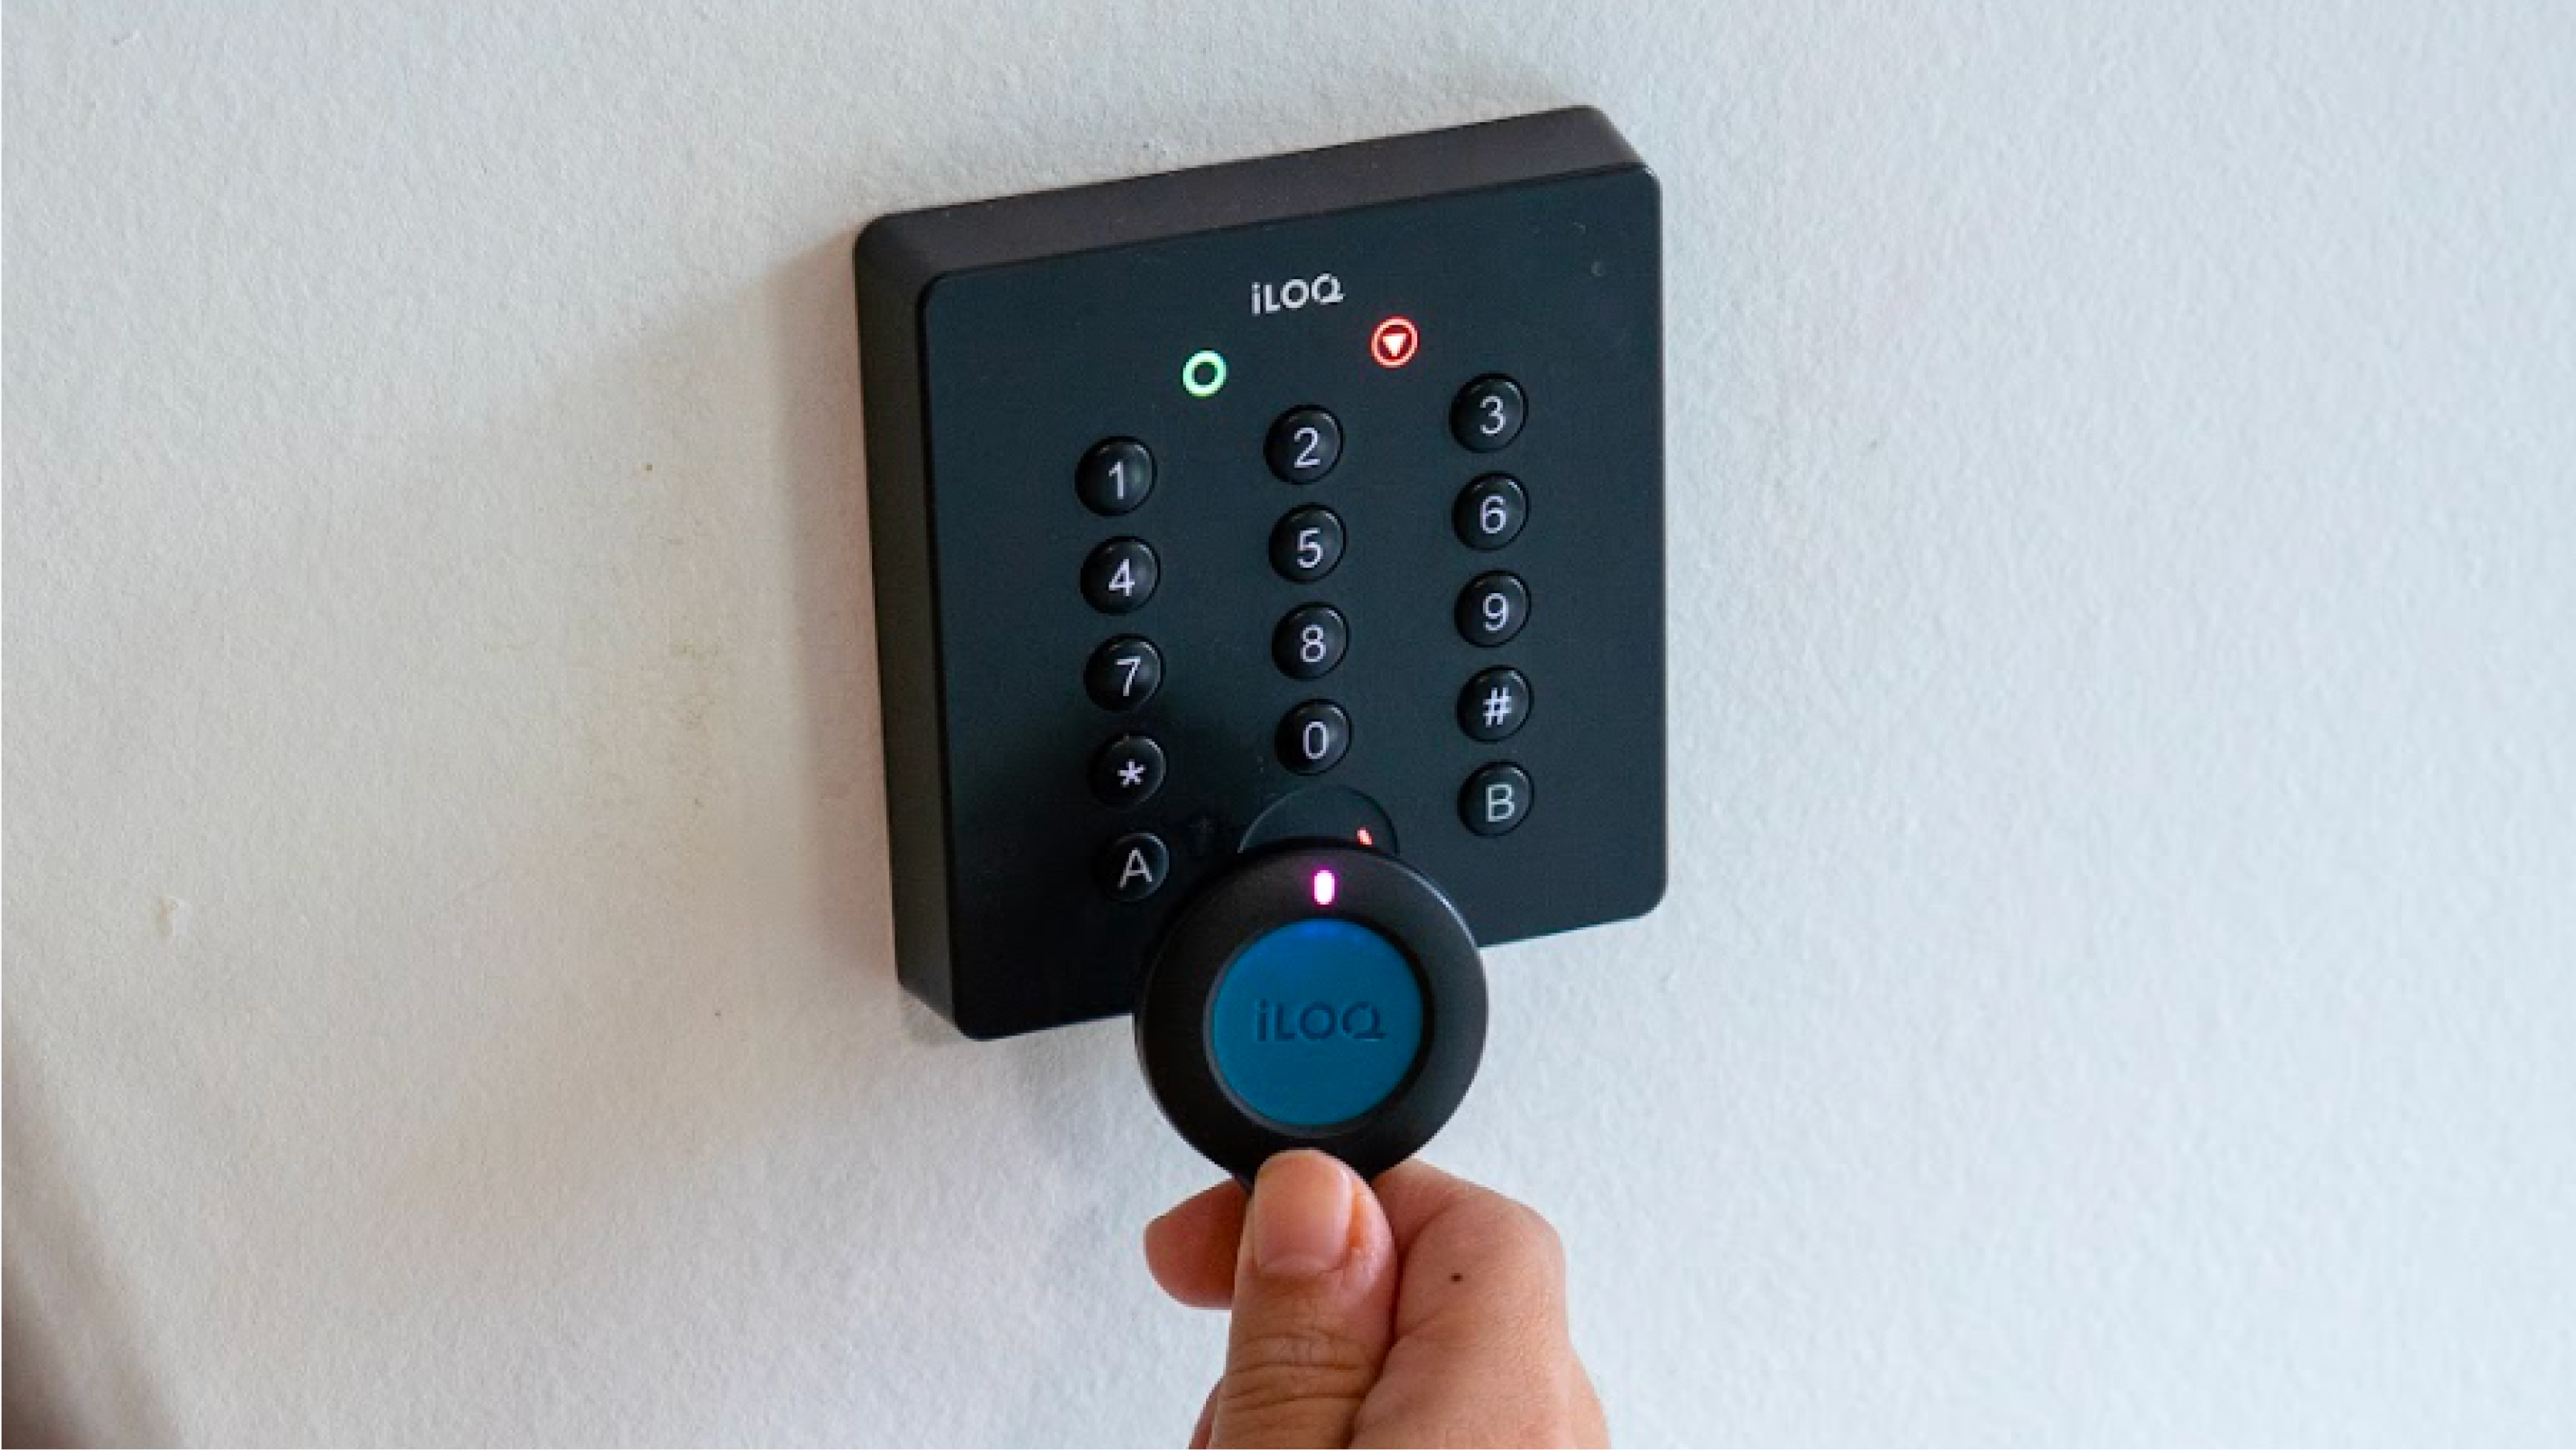
The correct access rights have now been “ordered” for the Keyfob; you can see this by the status “ordered”. The student will automatically receive an email explaining how to activate the Keyfob. By holding the Keyfob against an iLOQ keypad (pin code tableau), the ordered rights are transferred to the Keyfob. After this, you will see in Connect that the status has changed to “programmed”. The Keyfob will then work on the doors the student is authorized to access.
Keyfob Management
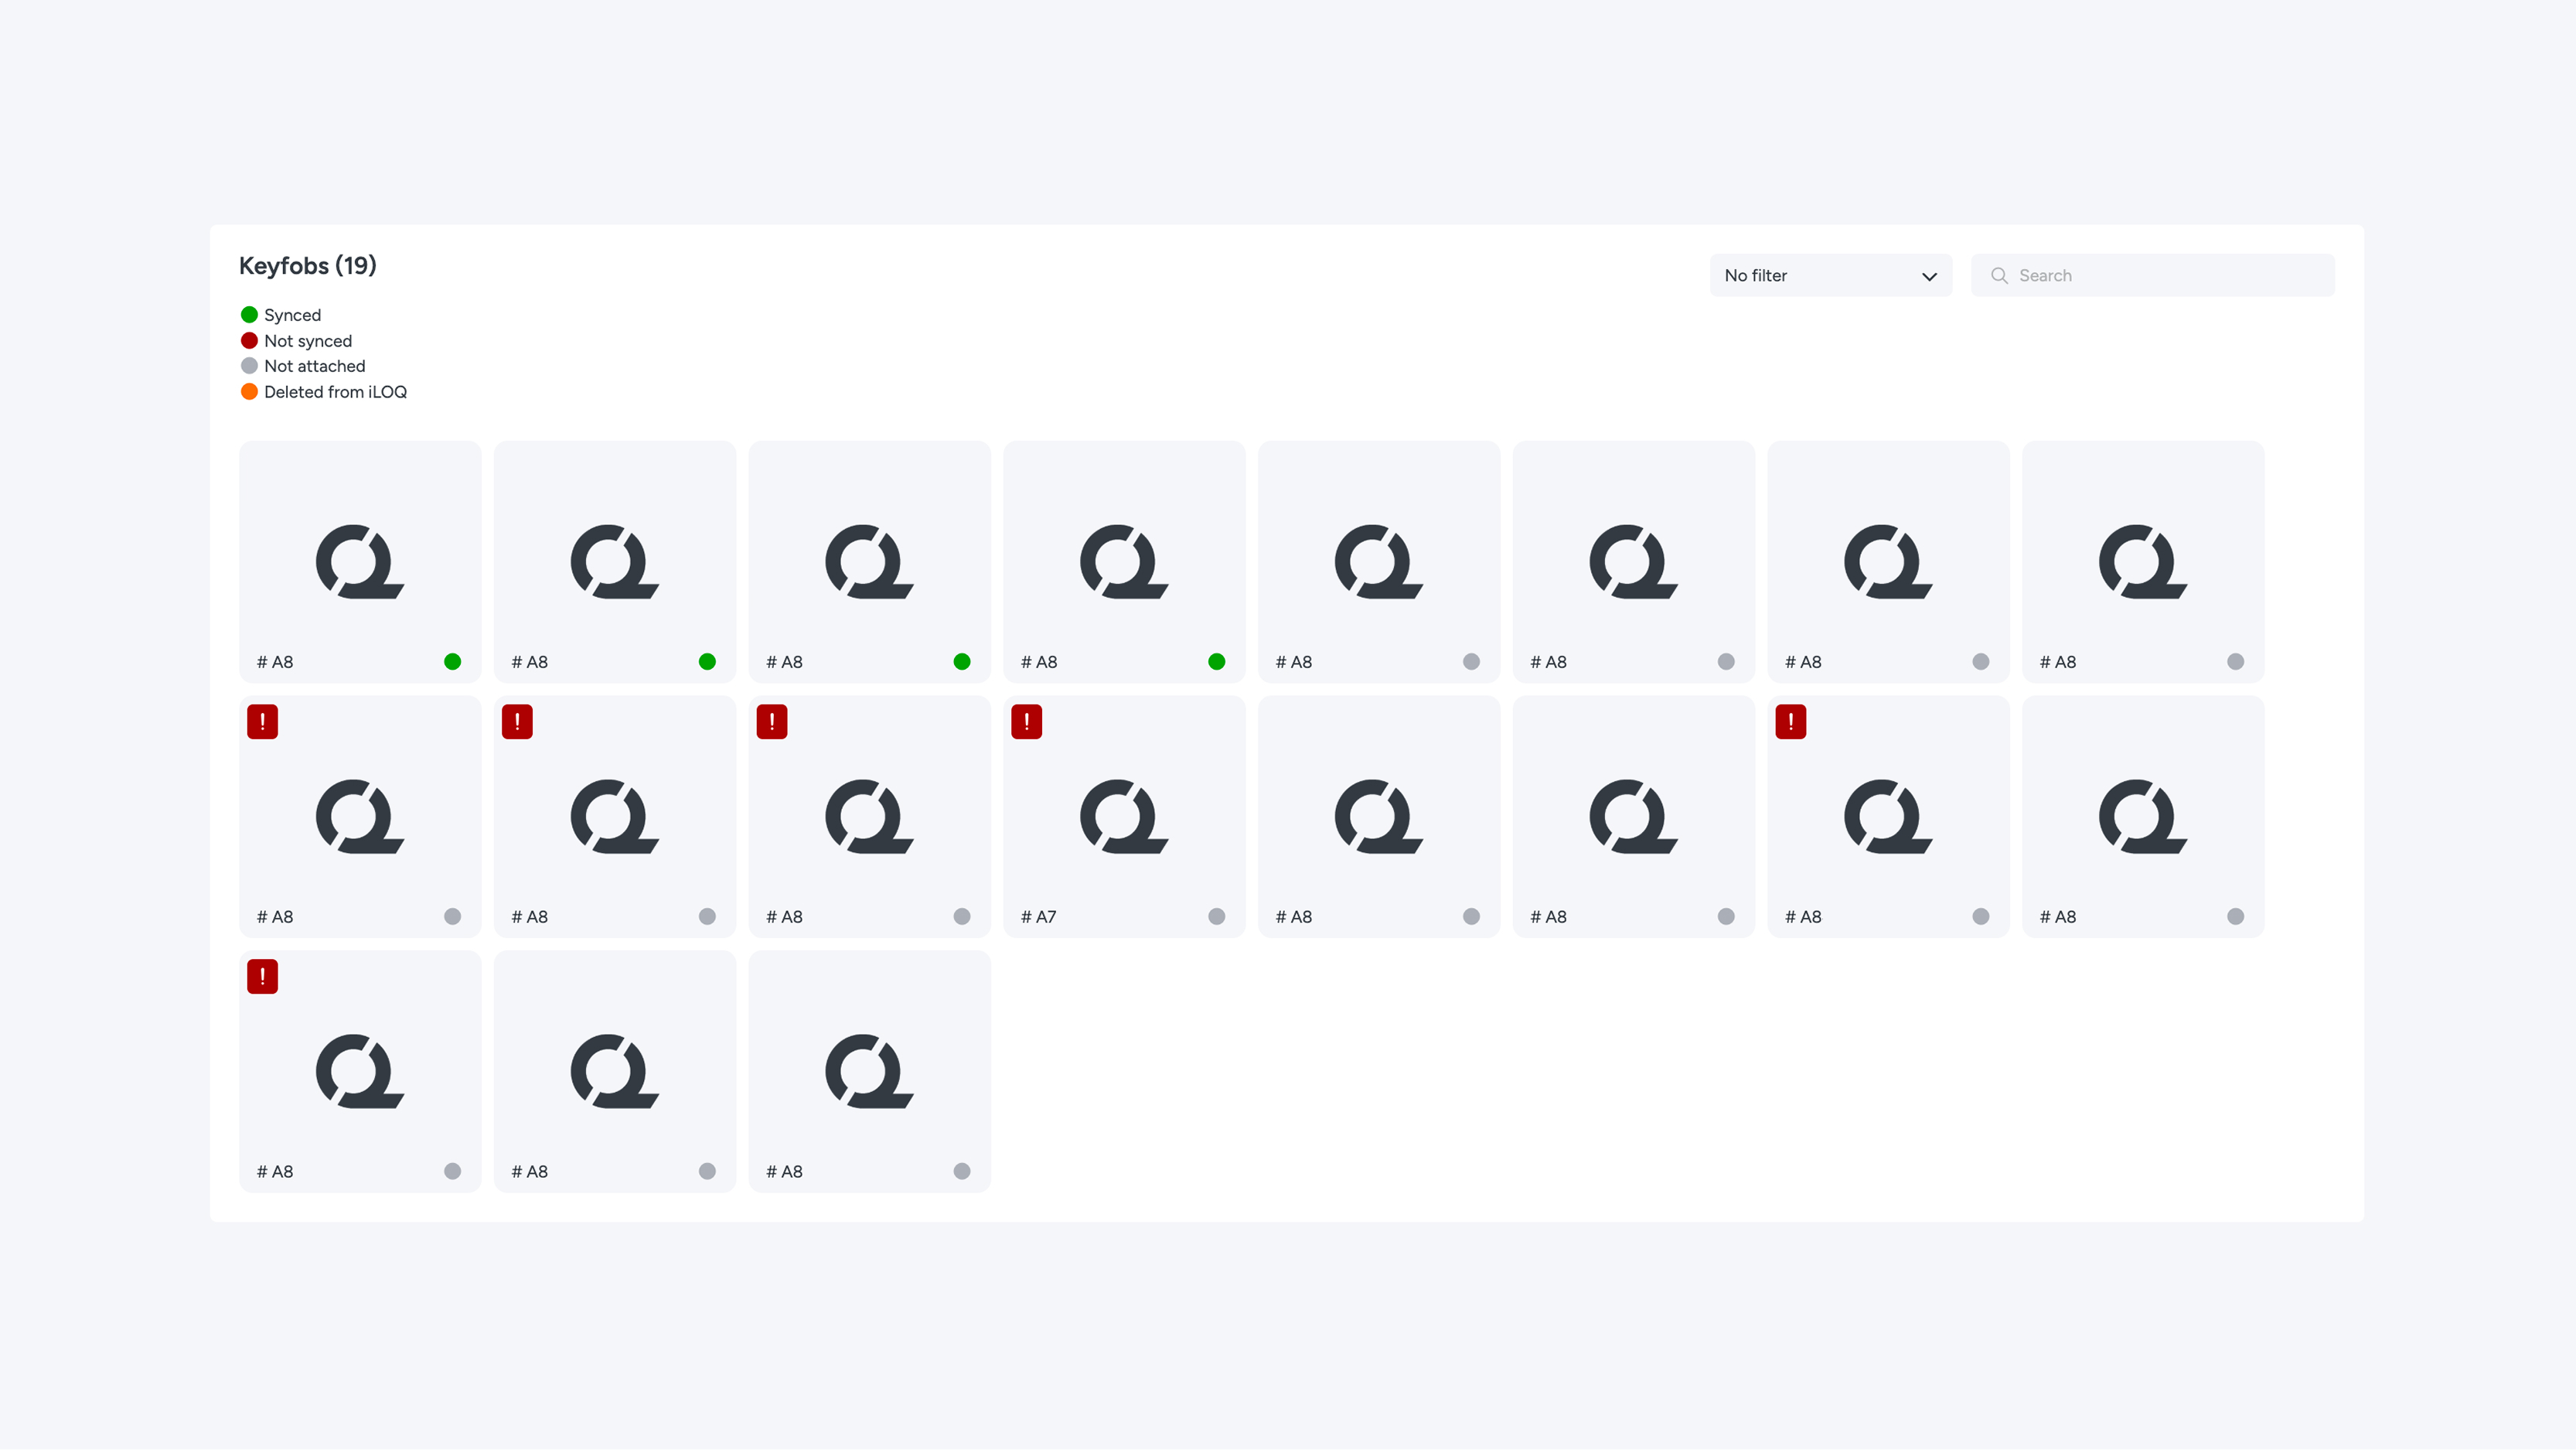
In the Keyfob overview under Reception, you can view all key fobs in the system and their current status. Key fobs marked with an exclamation mark must be removed from the "handed over" status in the iLOQ Manager before they can be reprogrammed via Connect.
If a key fob stops working, you can remove it from the student by clicking “Detach keyfob” in the Keyfob menu. You can then select a new key fob, after which the student will automatically receive a new email.