Messaging
Enable messaging
Want to share keys digitally with your guests? Then use the built-in messaging system. Here you can adjust the tone of voice and add personalized elements, such as your logo.
To activate the messaging system:
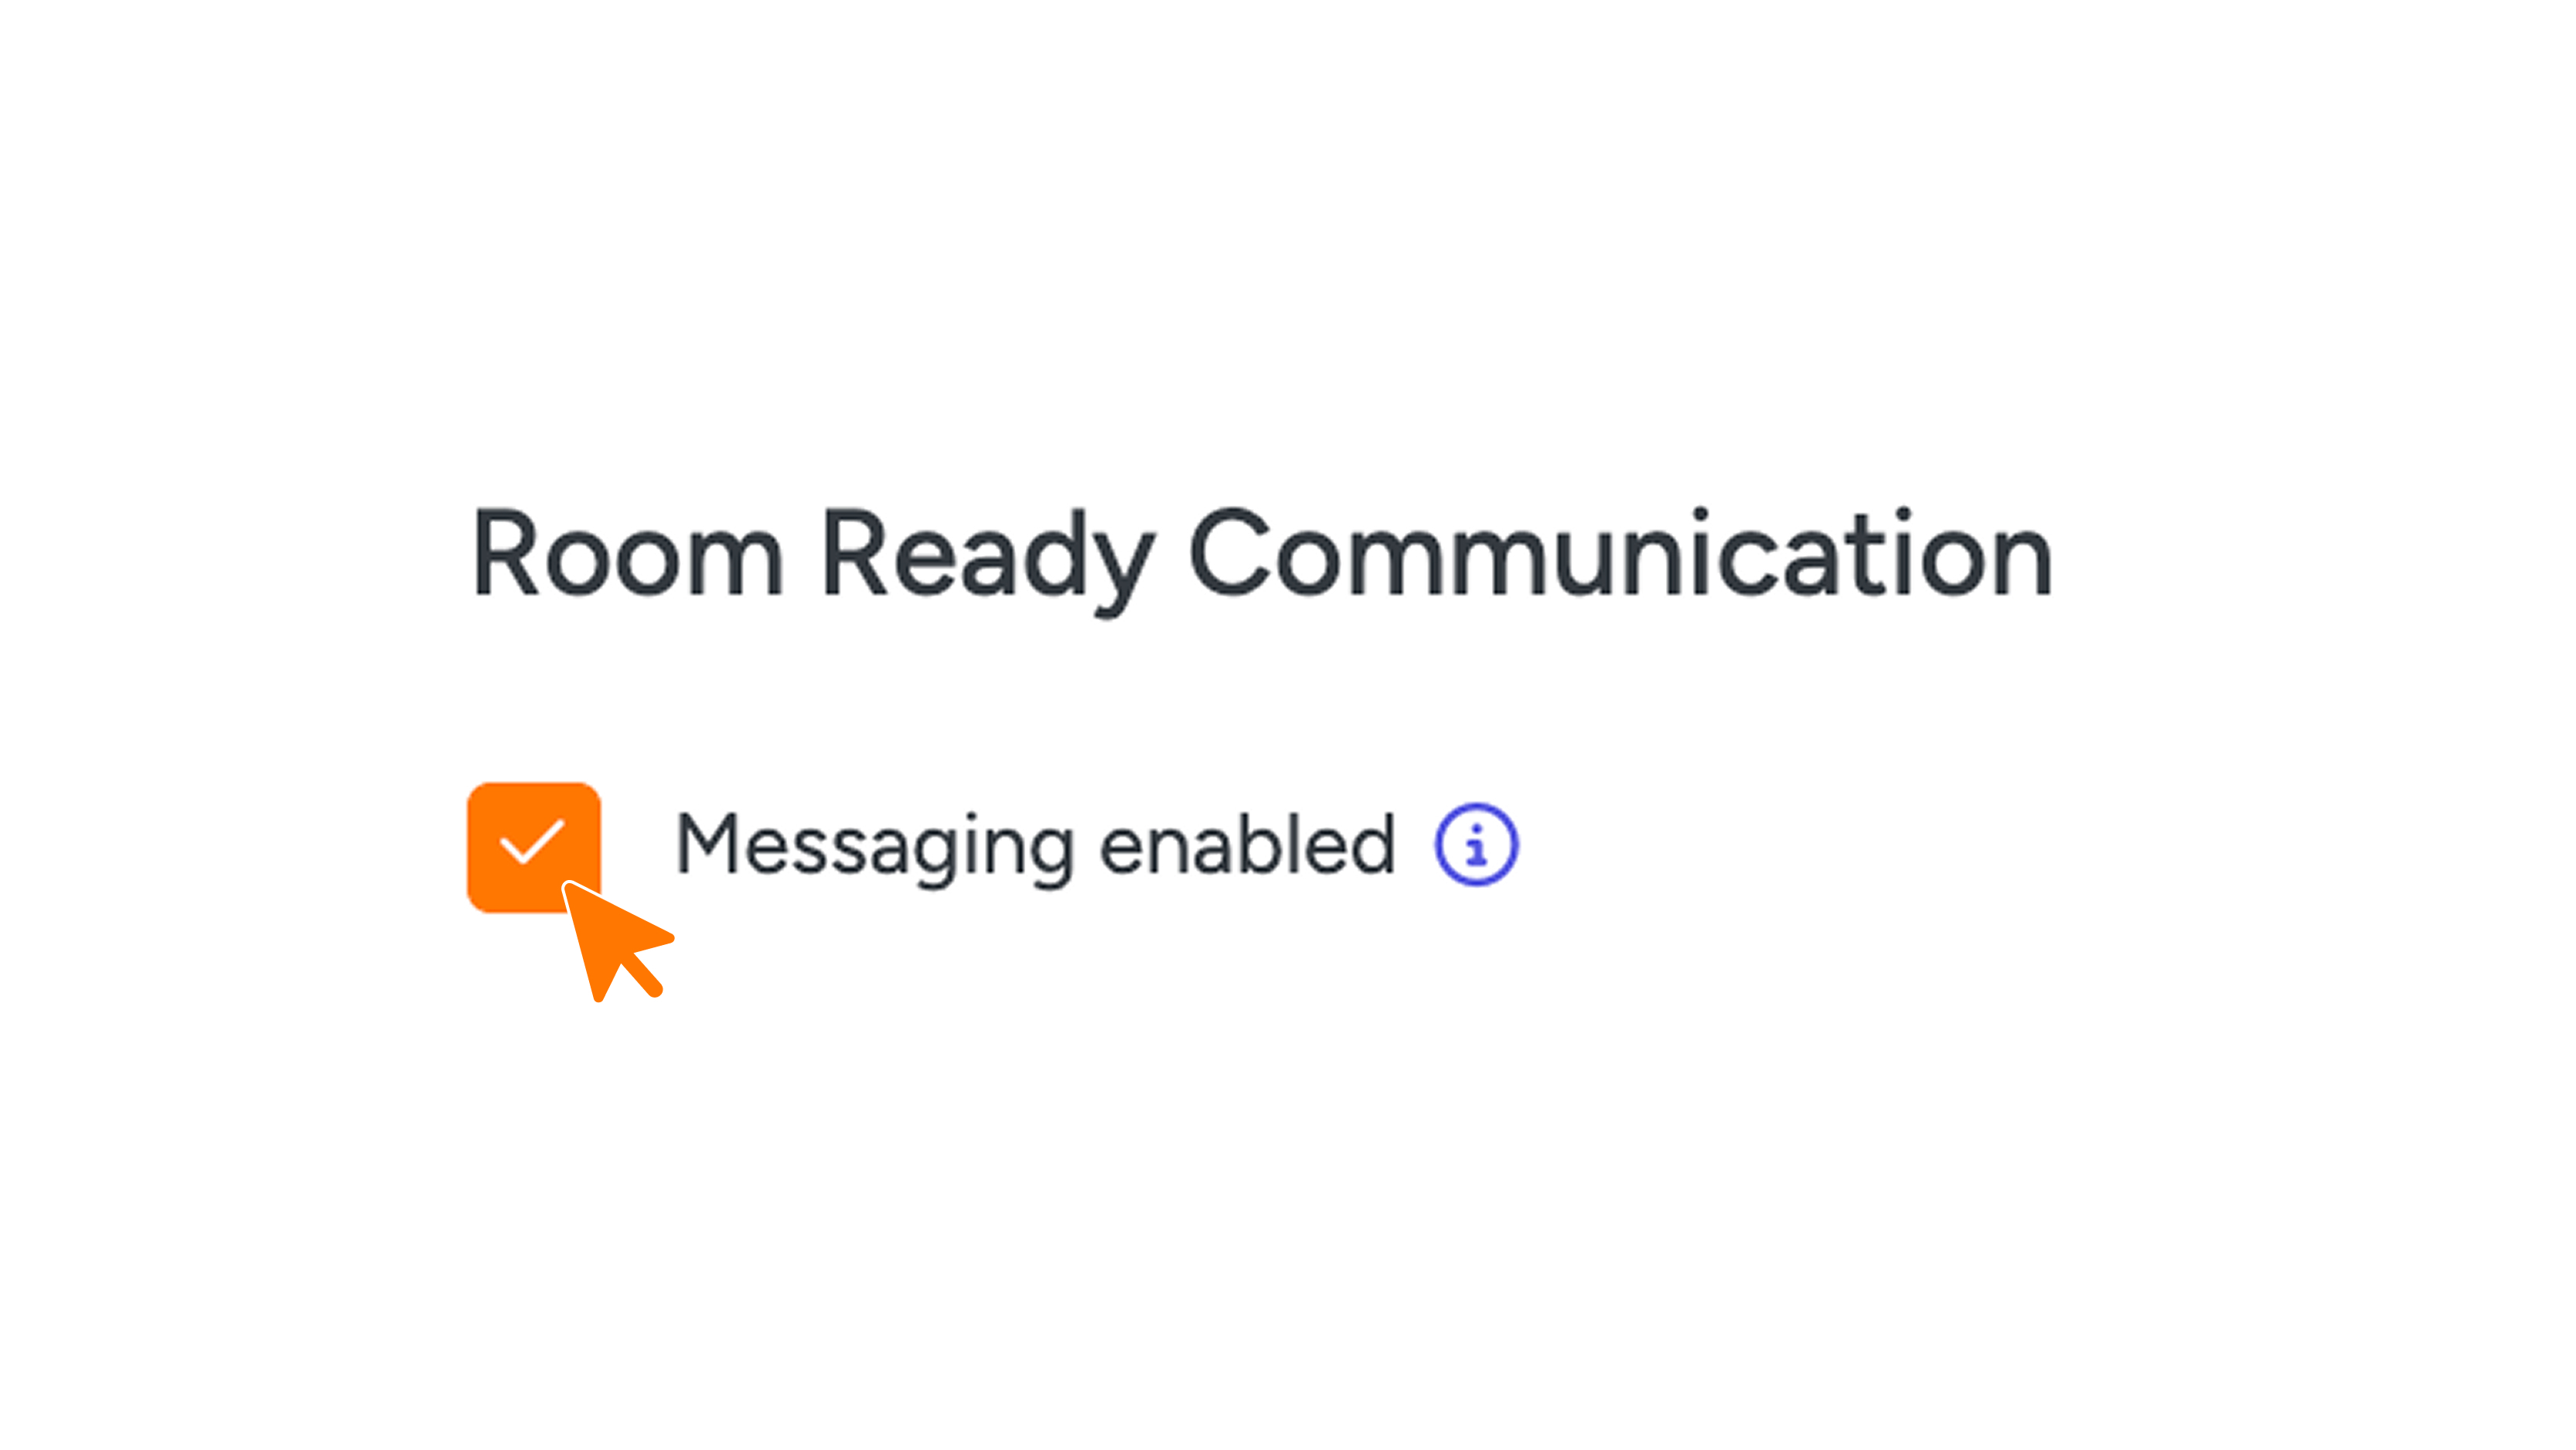
- Go to 'Settings' in the menu and click 'Edit company'.
- Scroll to the 'Room Ready Communication' section and check 'Messaging enabled'.
Click the green 'Save' button in the bottom right corner to save your settings.
After saving, the 'Messaging' menu item will appear on the left side of the menu.
- Open 'Messaging' in the menu.
Check that 'Mailing enabled' is selected under 'Mailing' and click 'Save' again.

Send messages via WhatsApp or SMS
Besides email, you can also send the "Room Ready" message via WhatsApp. Please note that this may incur charges. Would you prefer to send the message via SMS? Please contact support@guestcompass.nl. SMS may also incur charges, just like WhatsApp.
Set up and customize 'Room Ready' email
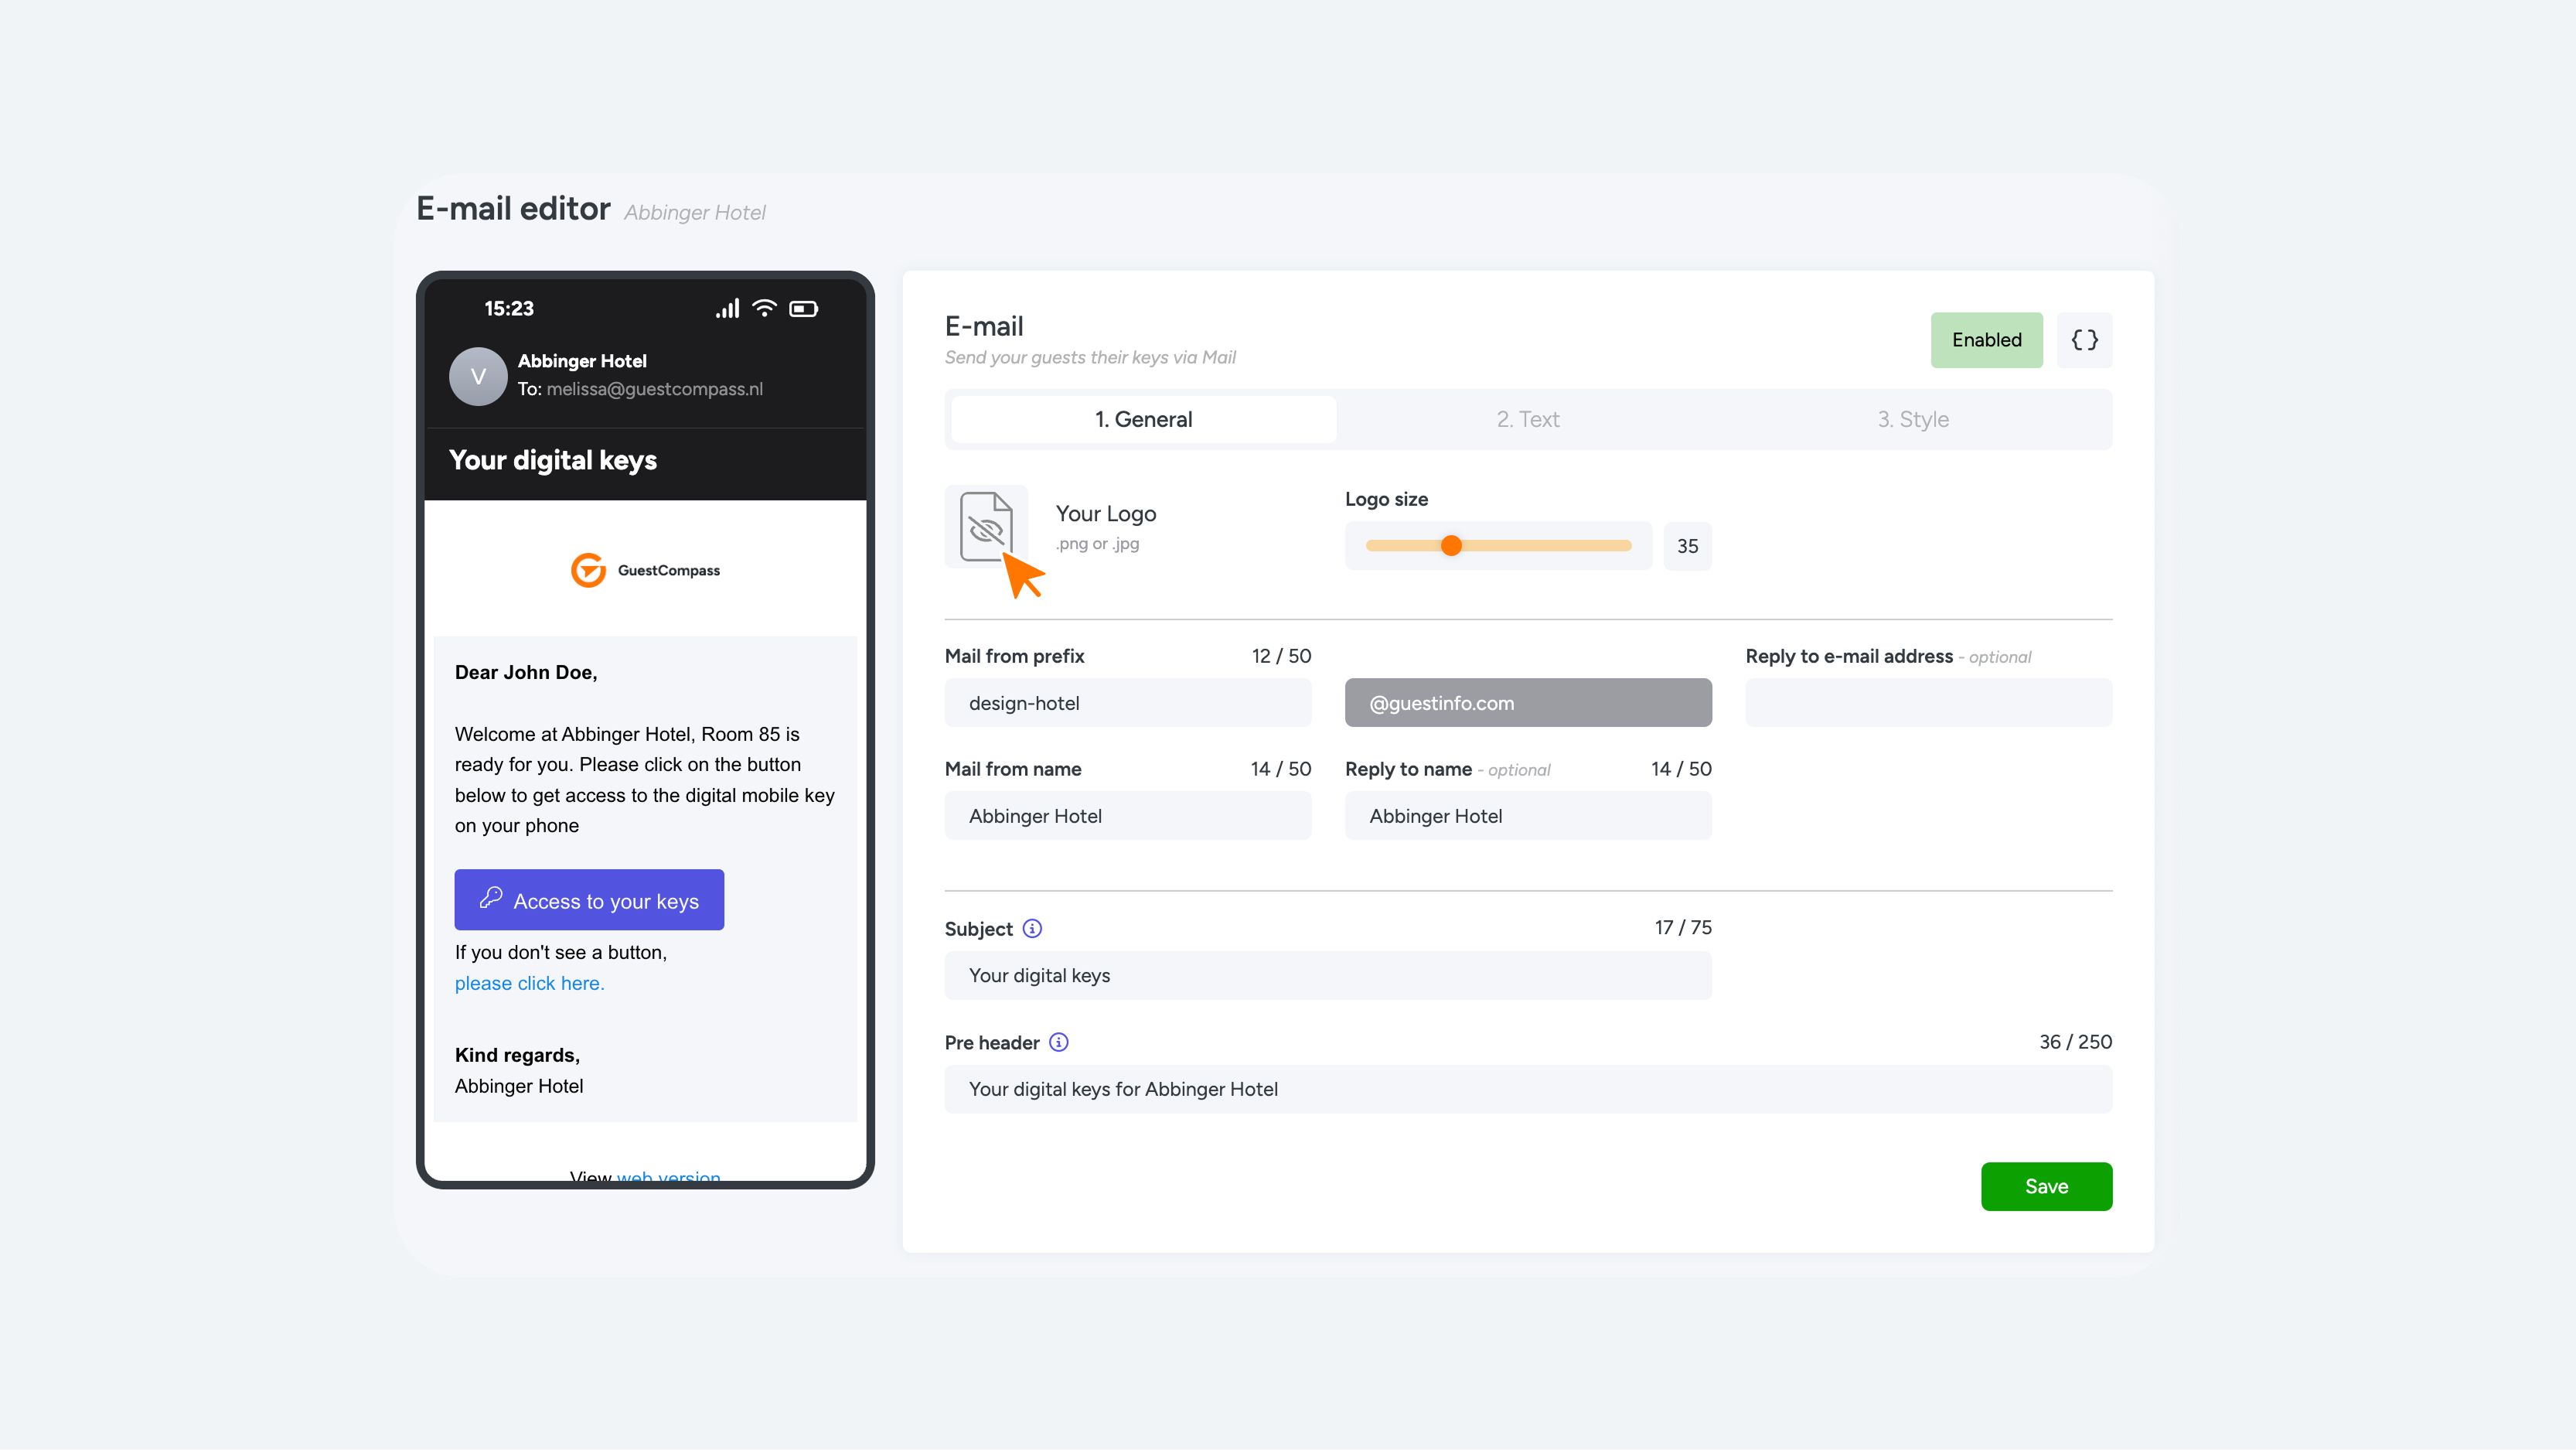
Once you've activated messaging, you can configure the "Room Ready" email under the "Email" tab. The settings are divided into three tabs: General, Text, and Style.
Tab 1 – General
- Upload your logo here (PNG or JPG).
- Adjust the logo size using the slider.
- Information such as the sender and email address is automatically filled in from your company settings. We recommend leaving this information unchanged.
- Set the email subject. This is the short sentence that appears in the guest's inbox.
- Add a pre-header: This is the additional text that appears before the email is opened.
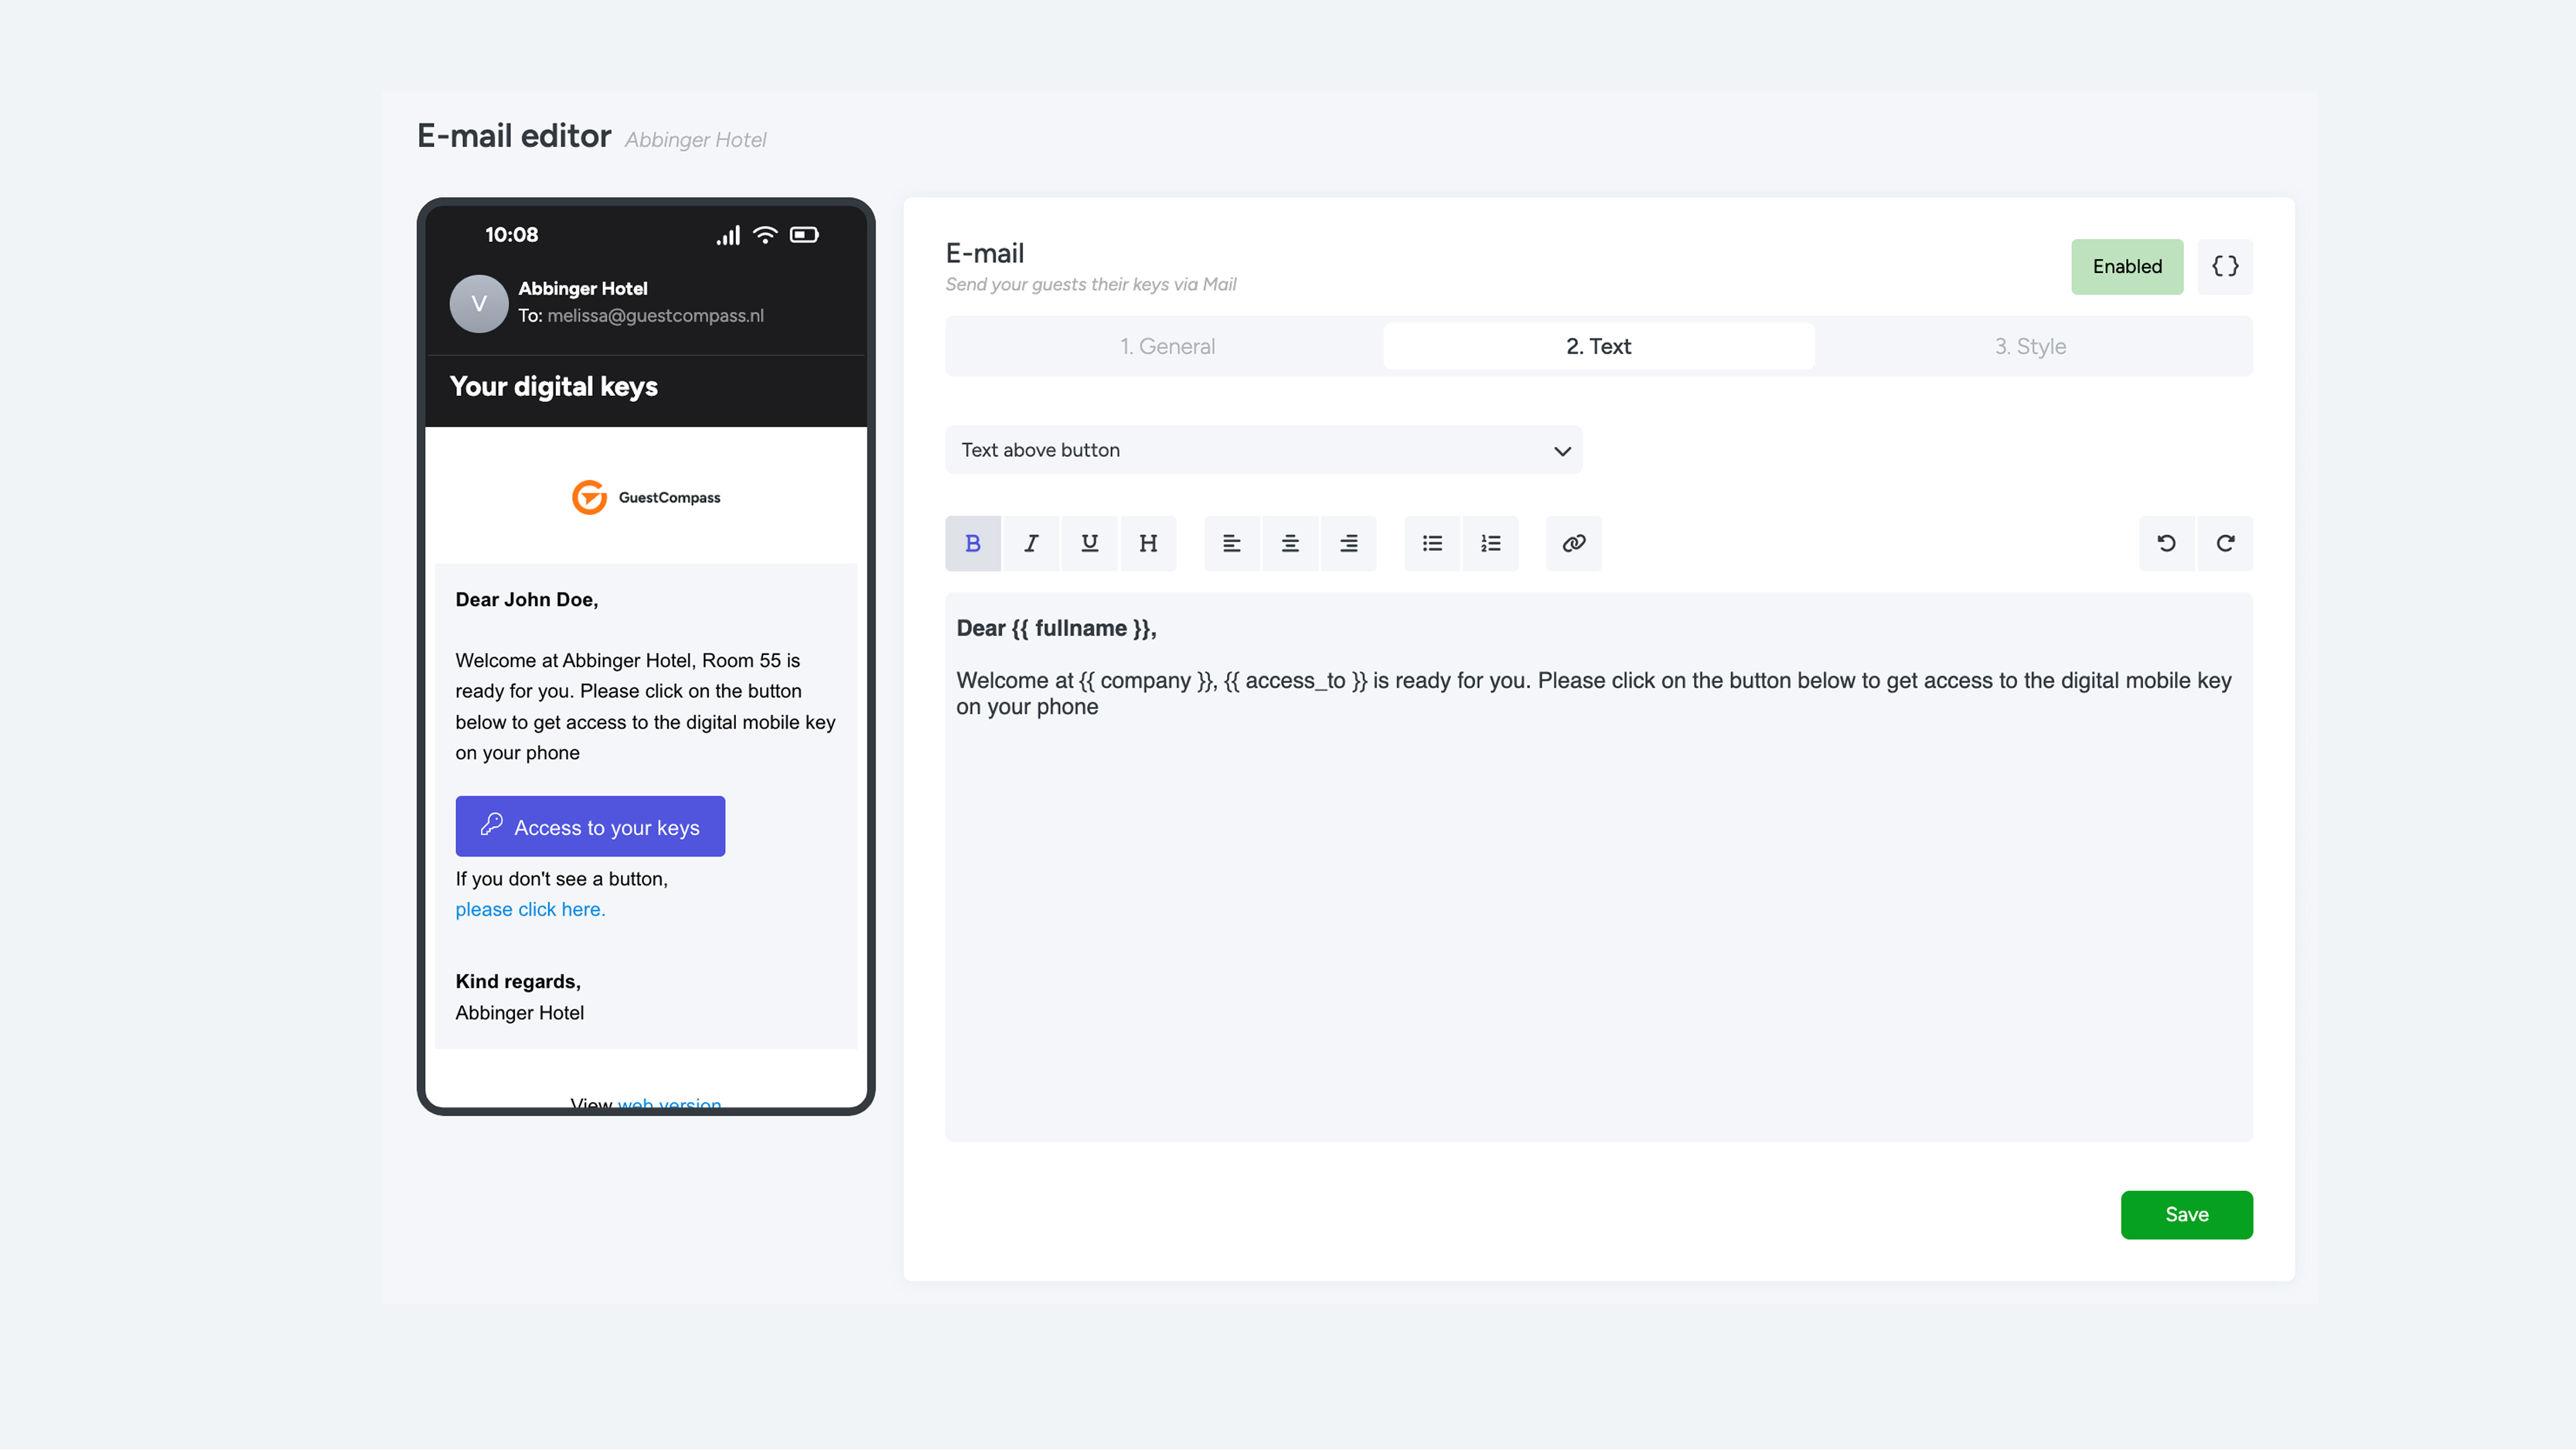
Tab 2 – Text
Edit the email content here.
Use the dropdown to edit various text elements, such as the text above and below the "Access to your keys" button.
You can also use placeholders by clicking the {} button. This will automatically fill in information such as the name or room number.
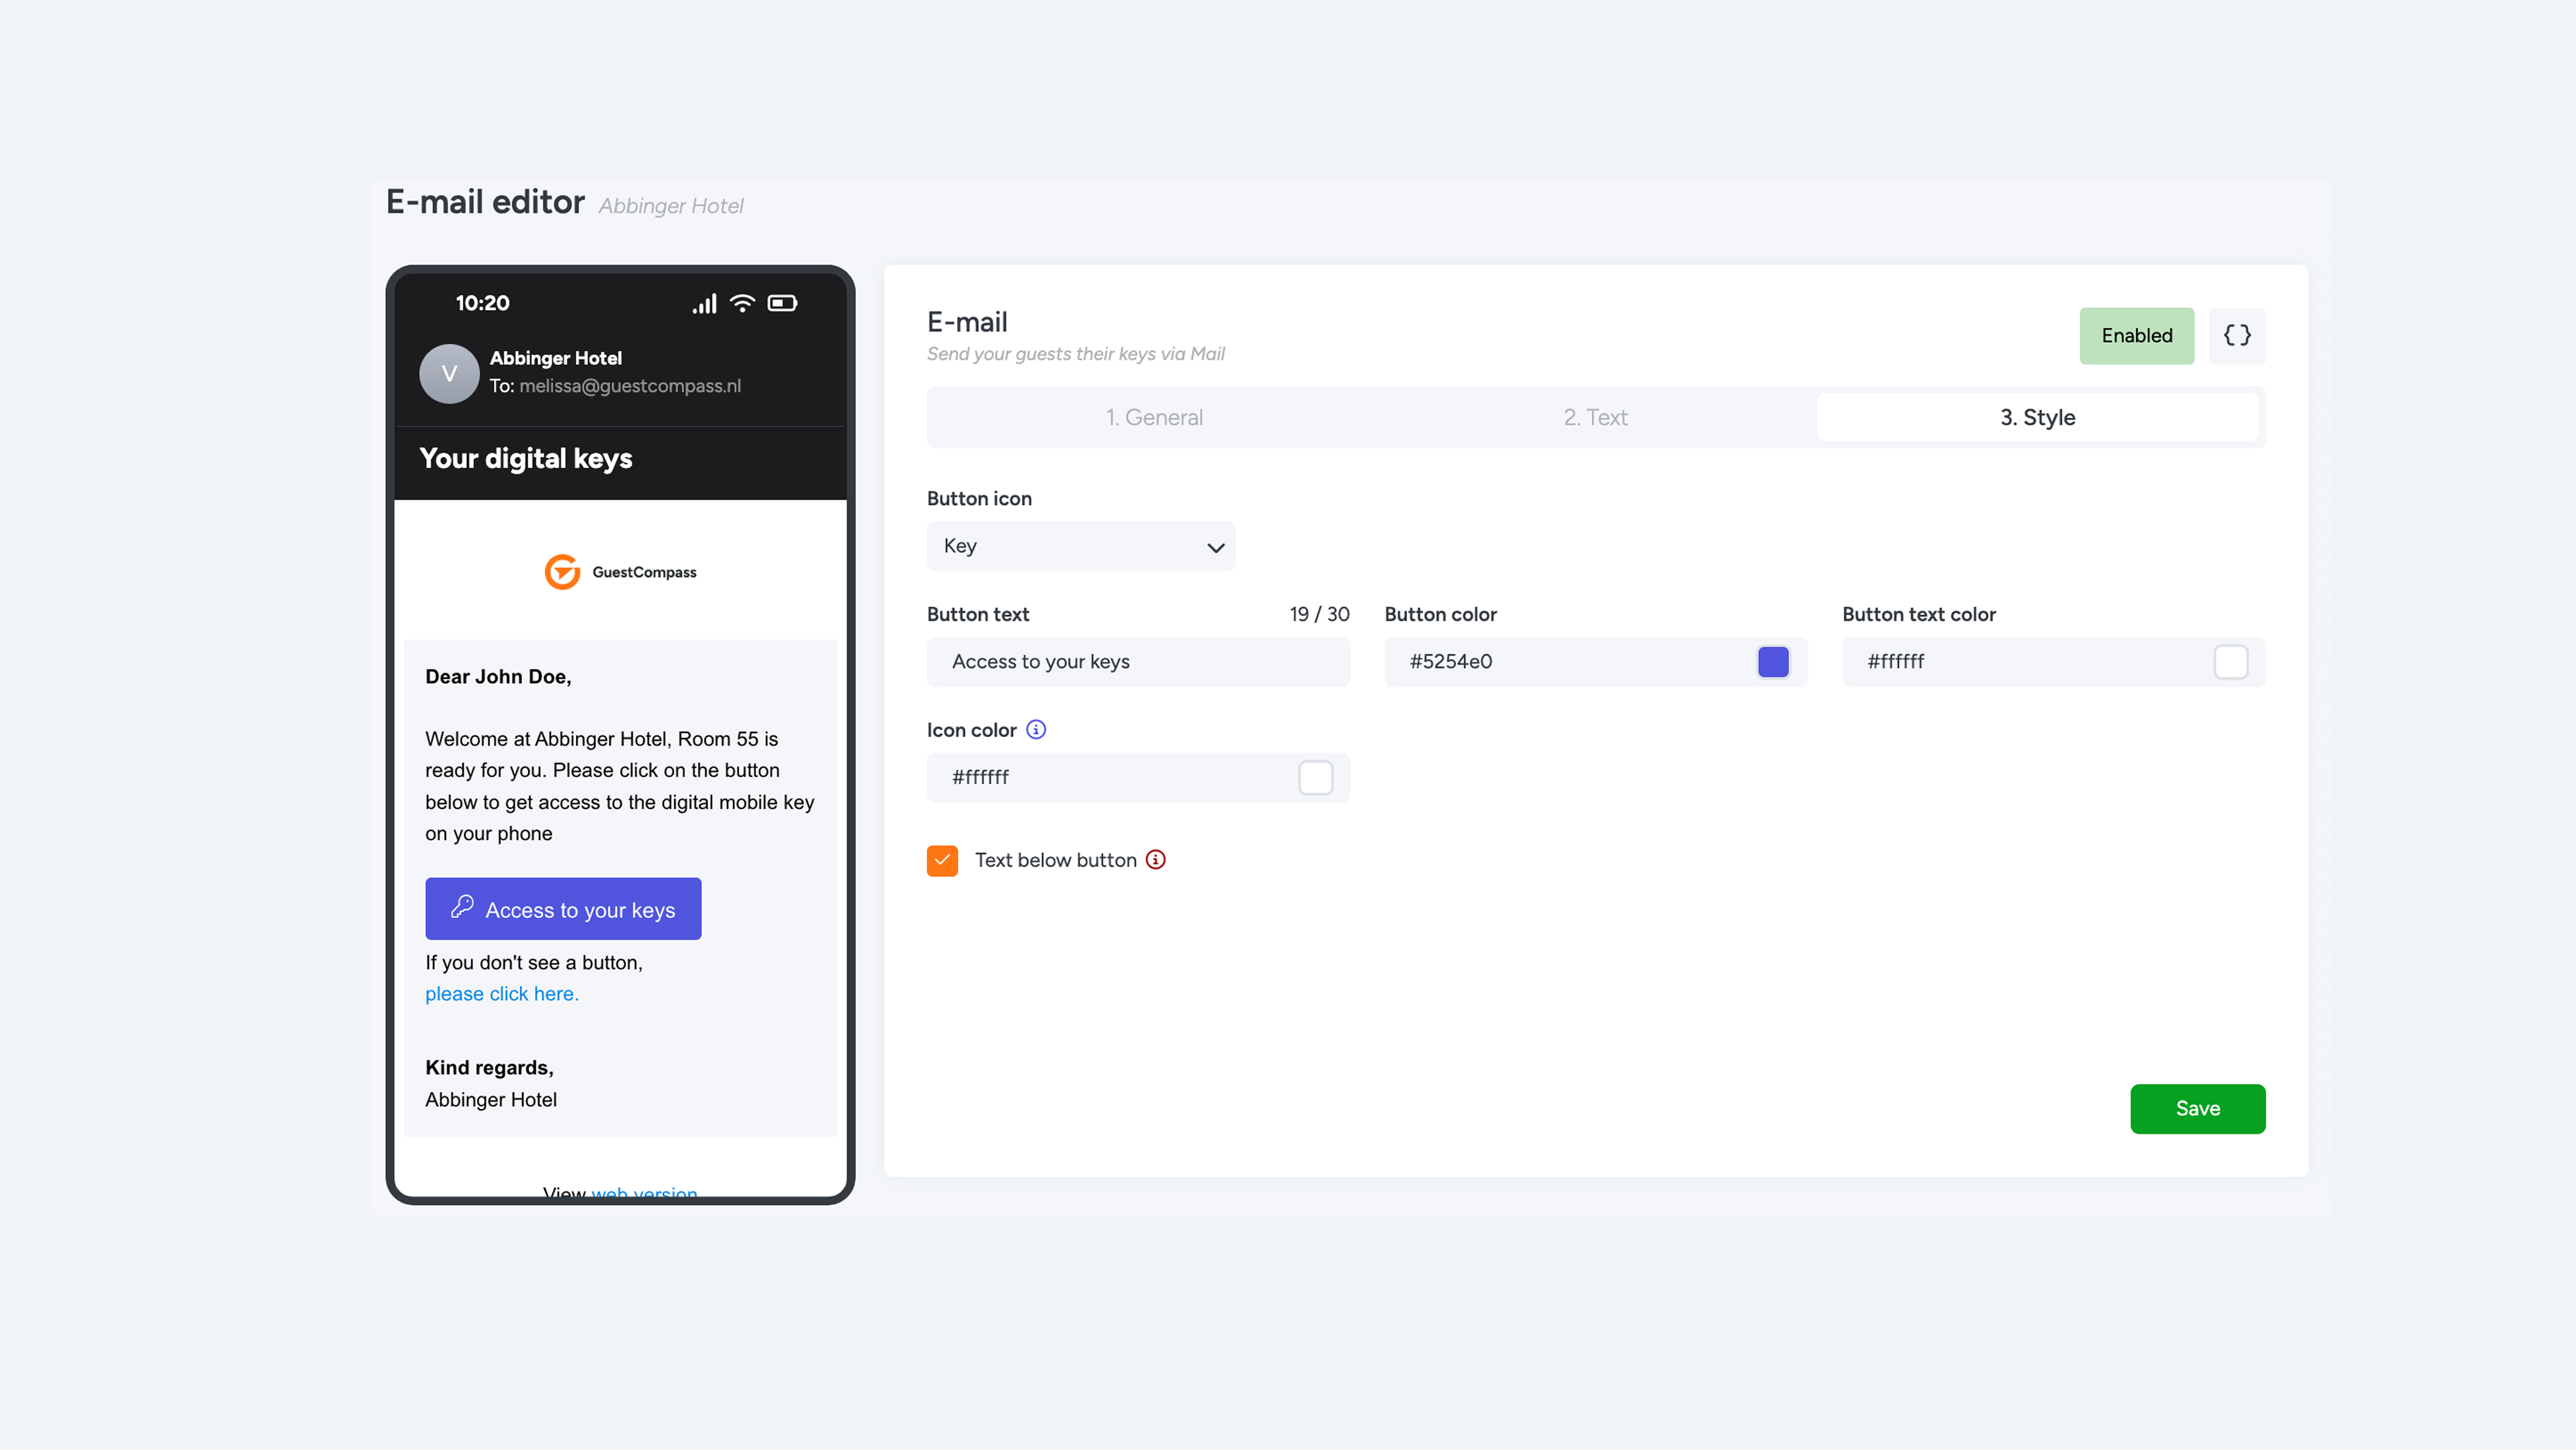
Tab 3 – Style
Choose the button icon type from the dropdown.
Set the button color and text, including the text color and icon color.
You can also display an additional text link below the button. This is useful if the button is not visible or clickable in some email programs.
Once you've completed all the settings, click the green "Save" button in the bottom right corner. You can also save each tab at any time.
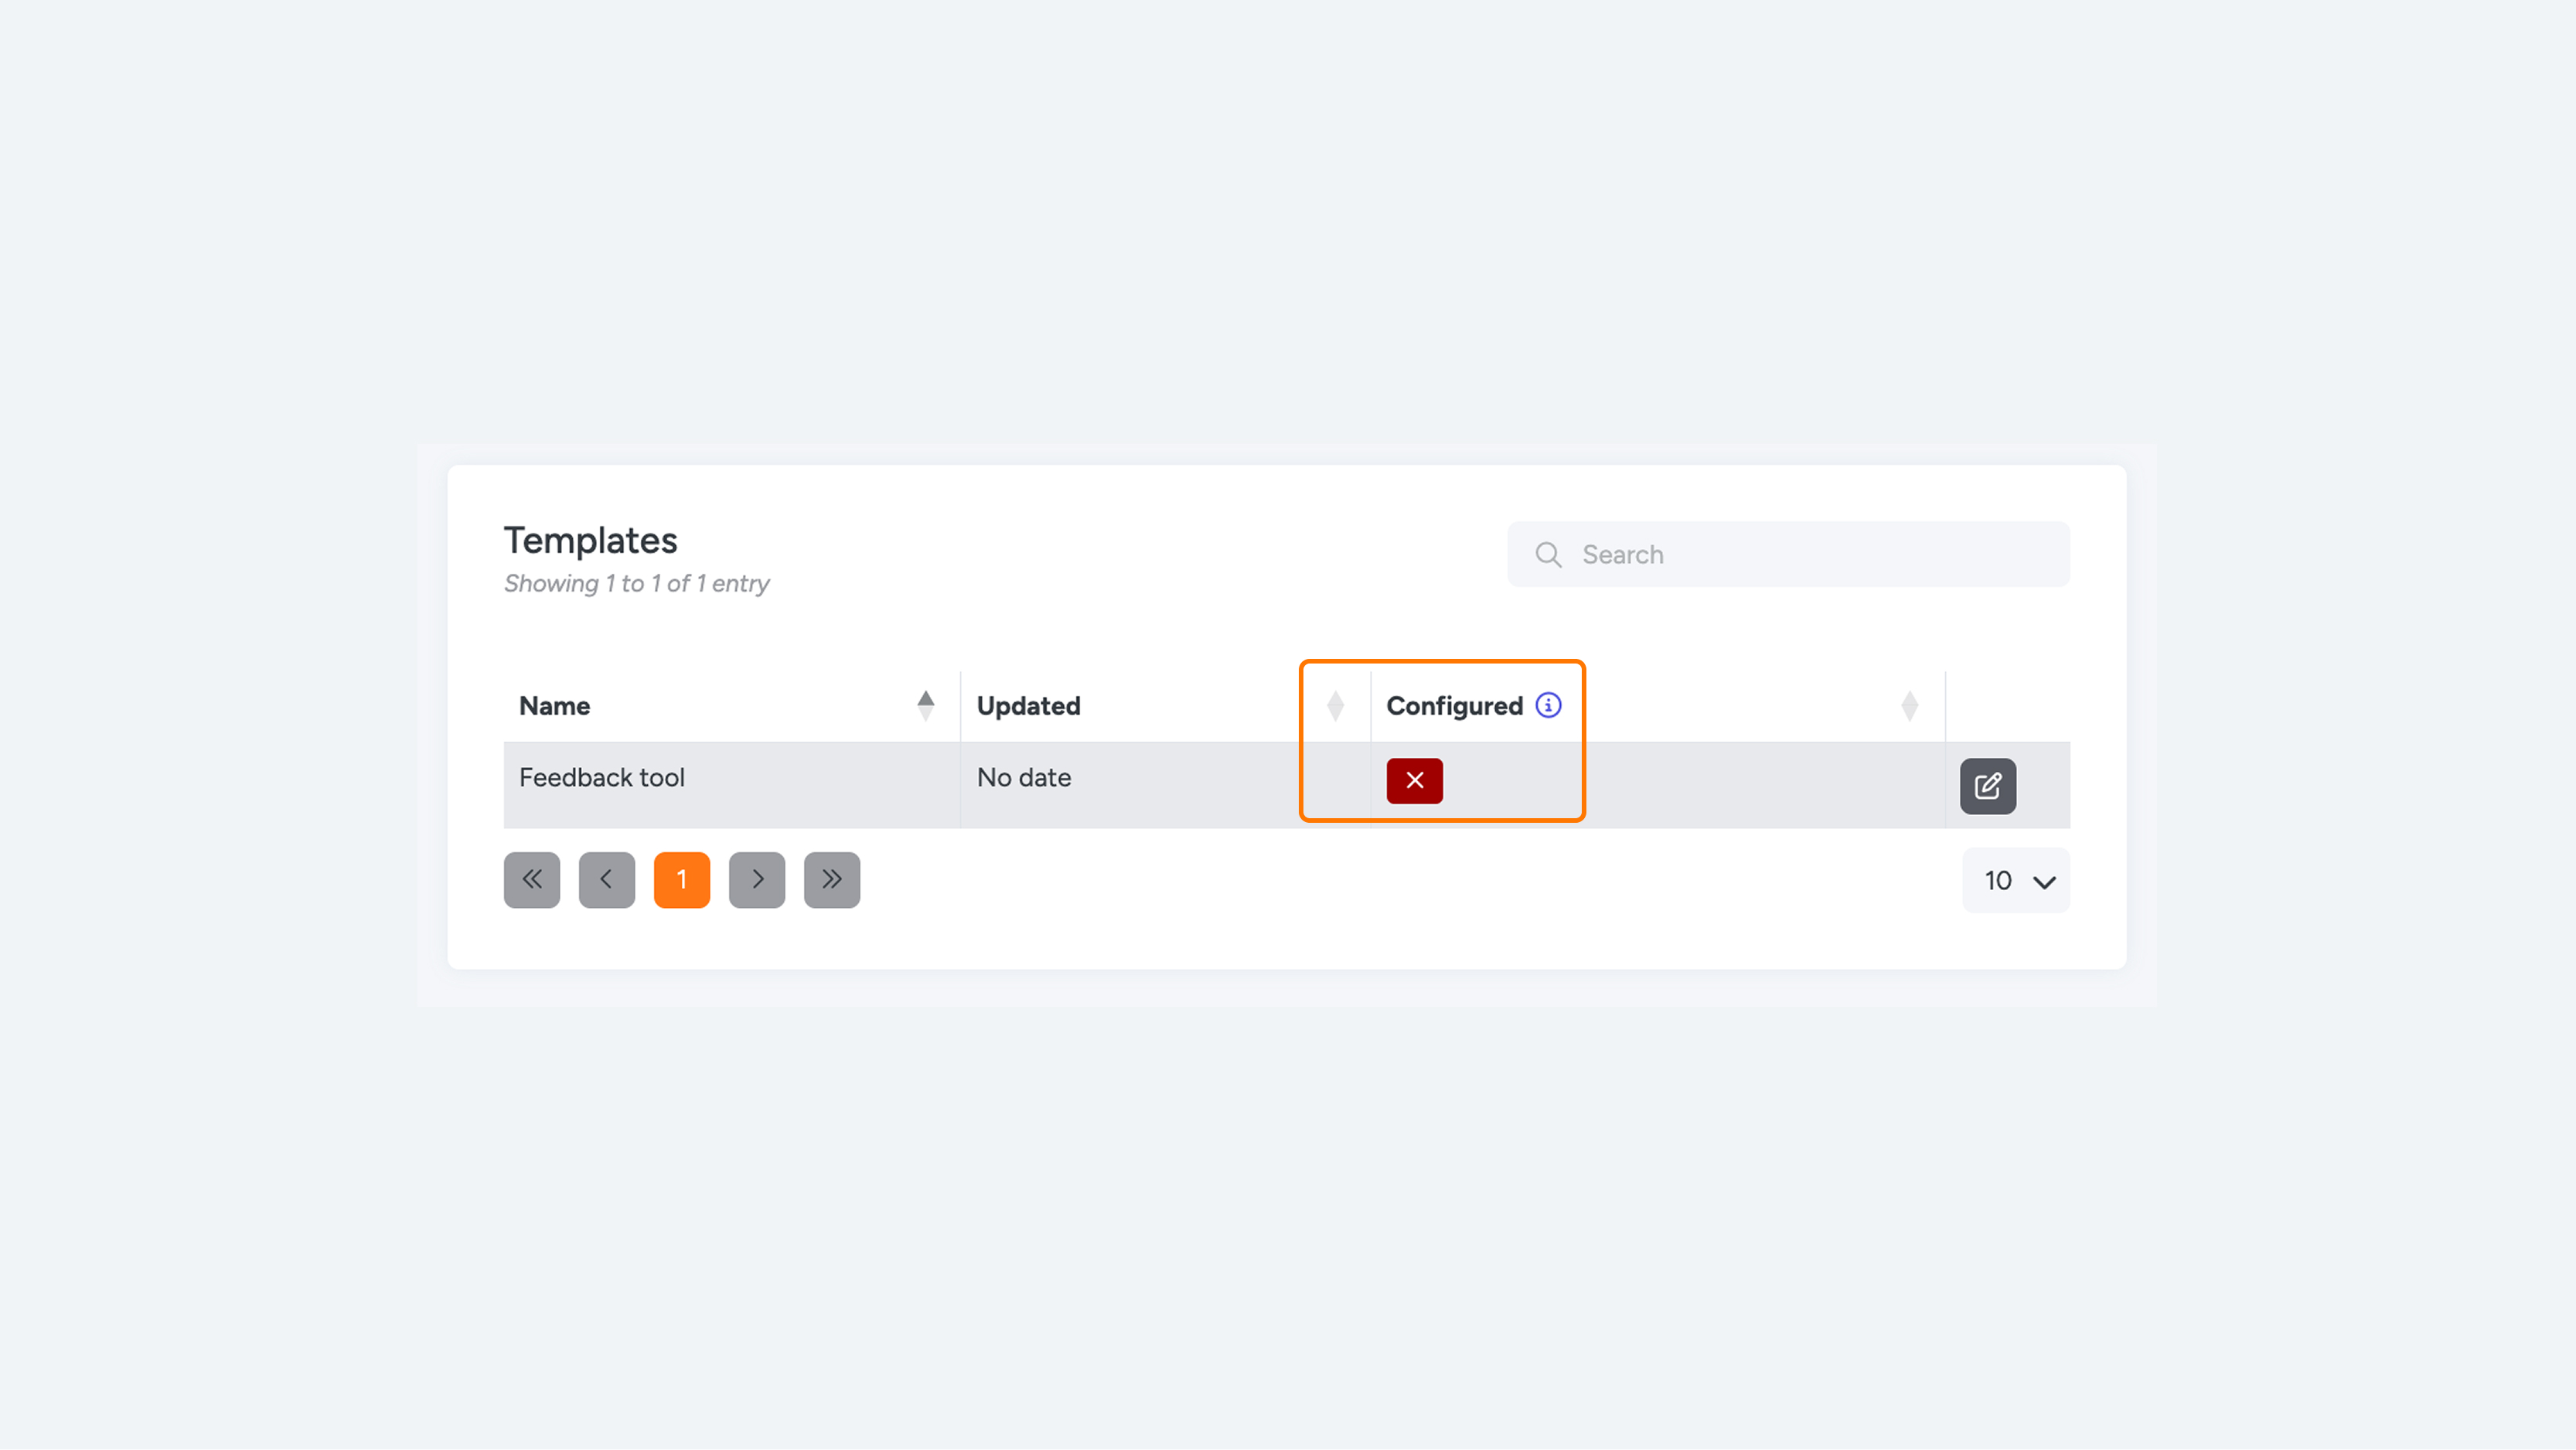
Mailing templates
Besides the standard "Room Ready" email, you can also manage other templates here, such as those for feedback tools. Under "Configured," you can see at a glance whether the template is configured correctly and ready for use.
Would you also like to use WhatsApp or SMS for these messages? Please contact support@hotek.nl. Once these channels are activated, you can enter the corresponding text in the available fields.