Creating and editing pages
Building your (Web)App starts with creating pages that you can later connect to a button module. There are two different ways to create a page.
Method 1: Creating a Page via the Sitemap
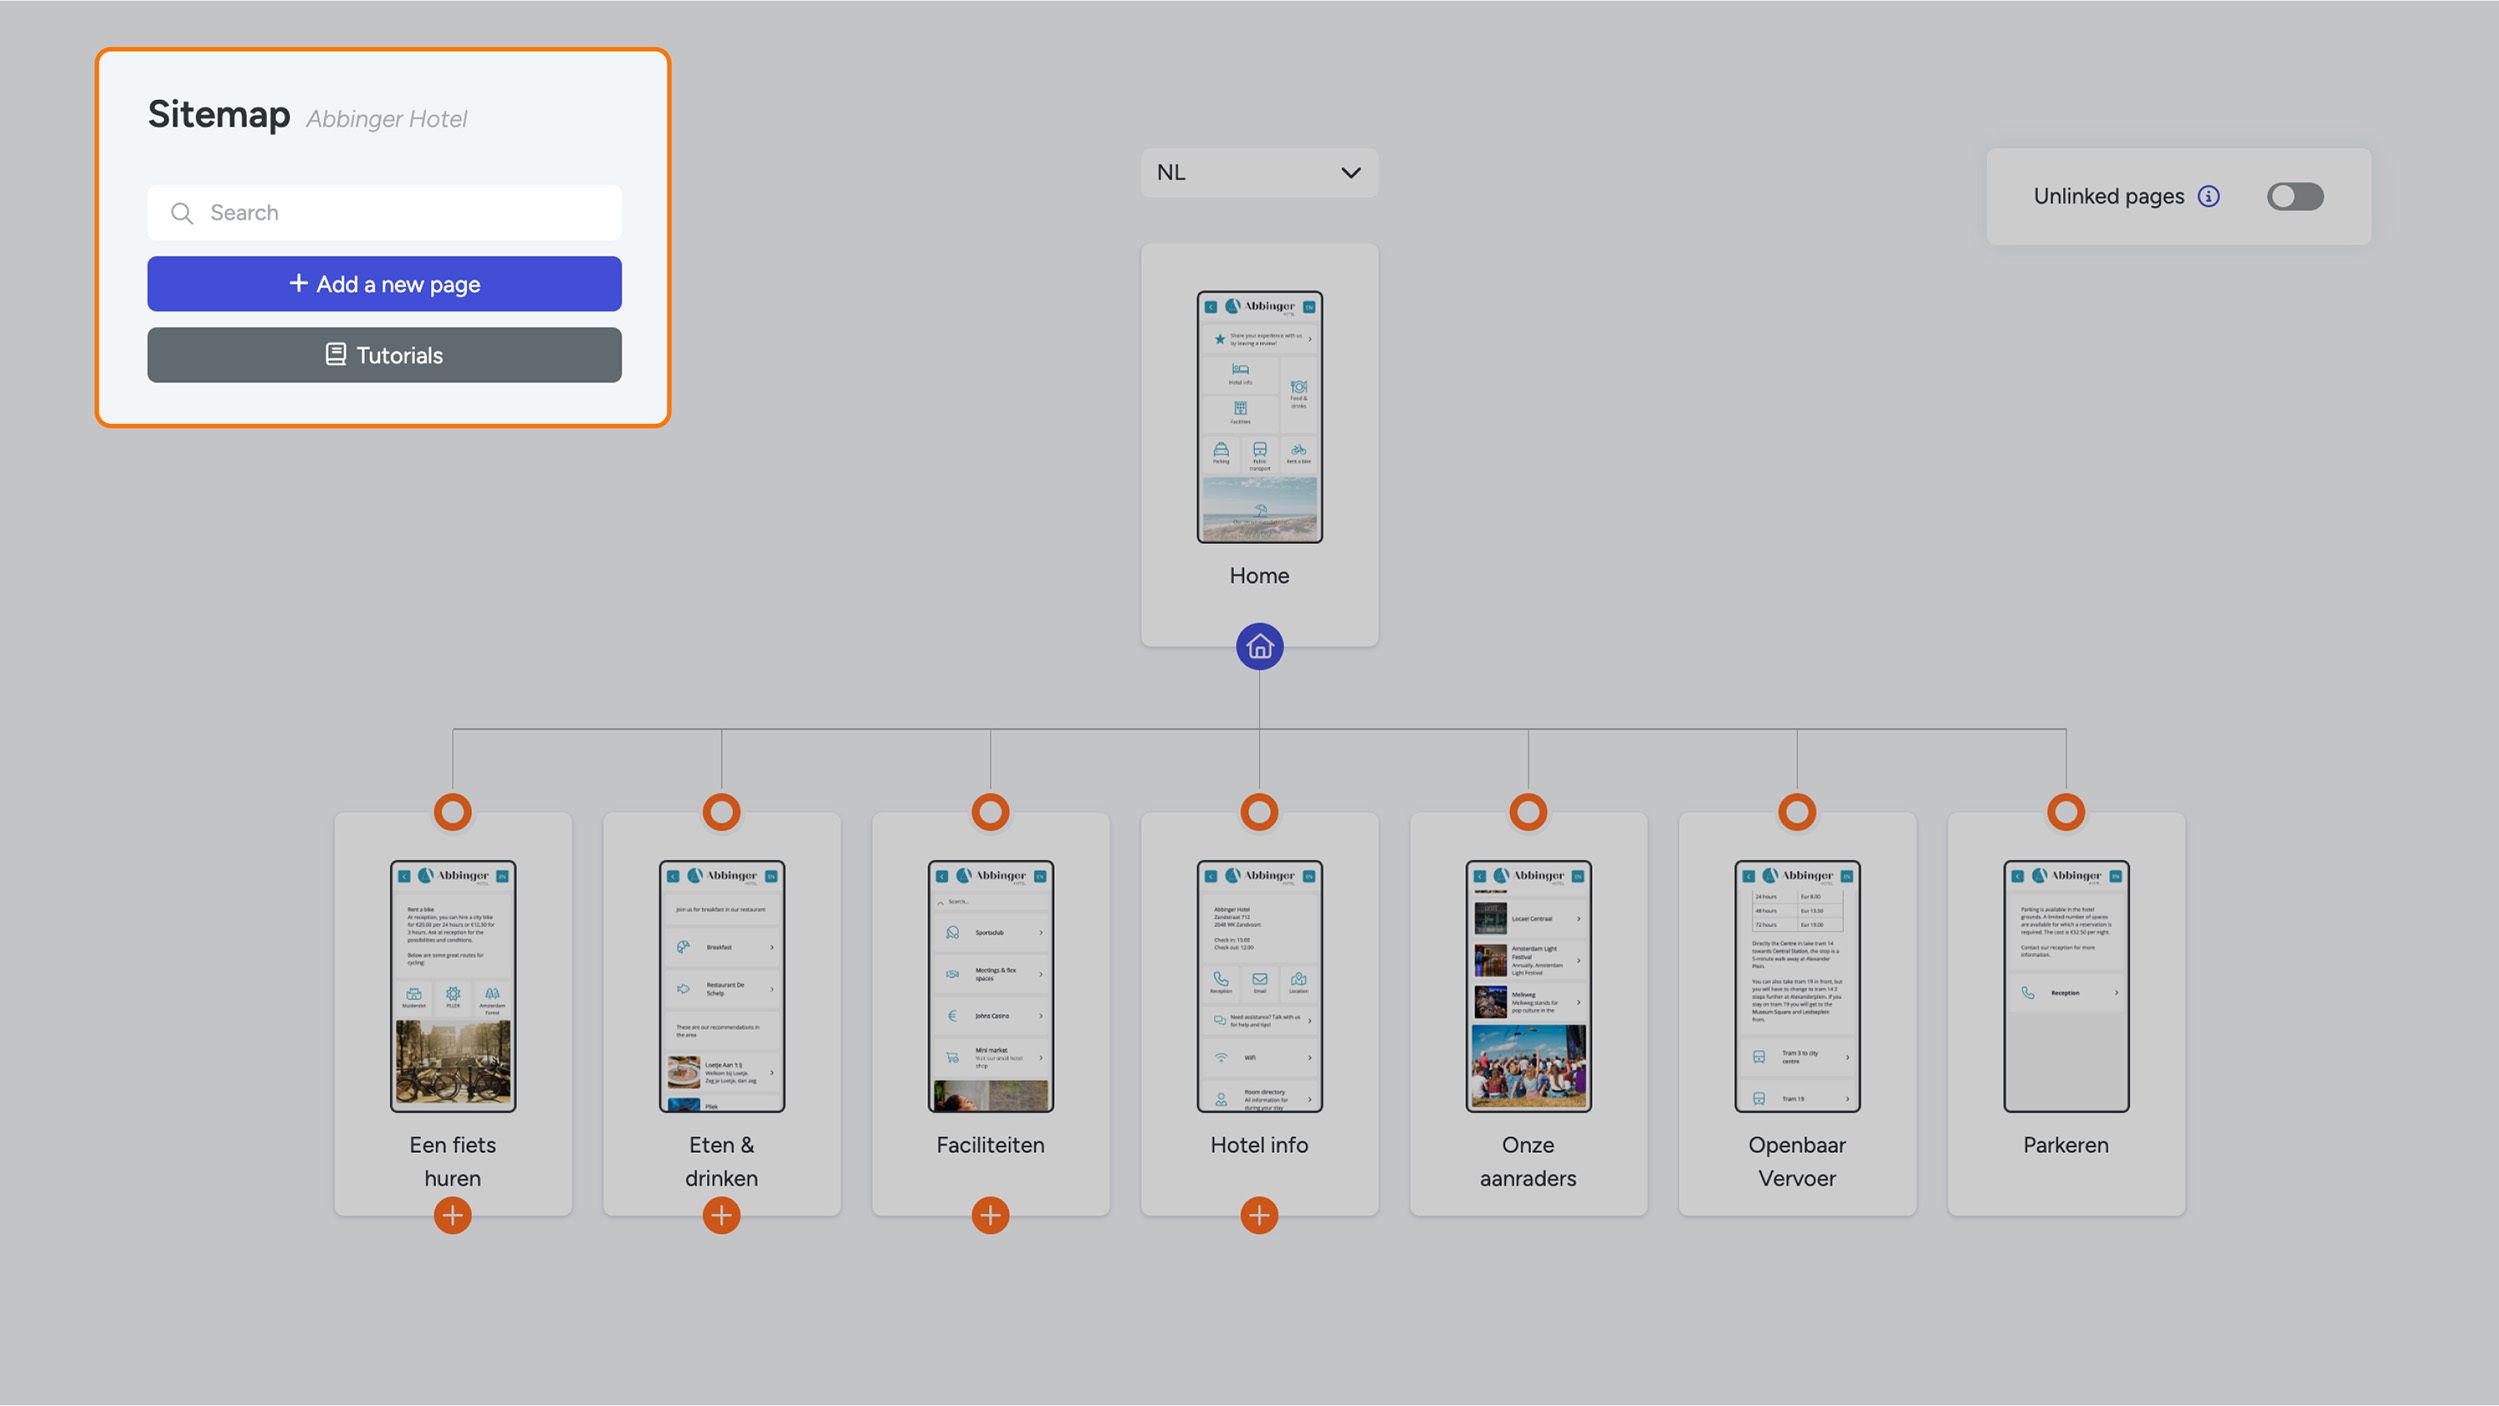
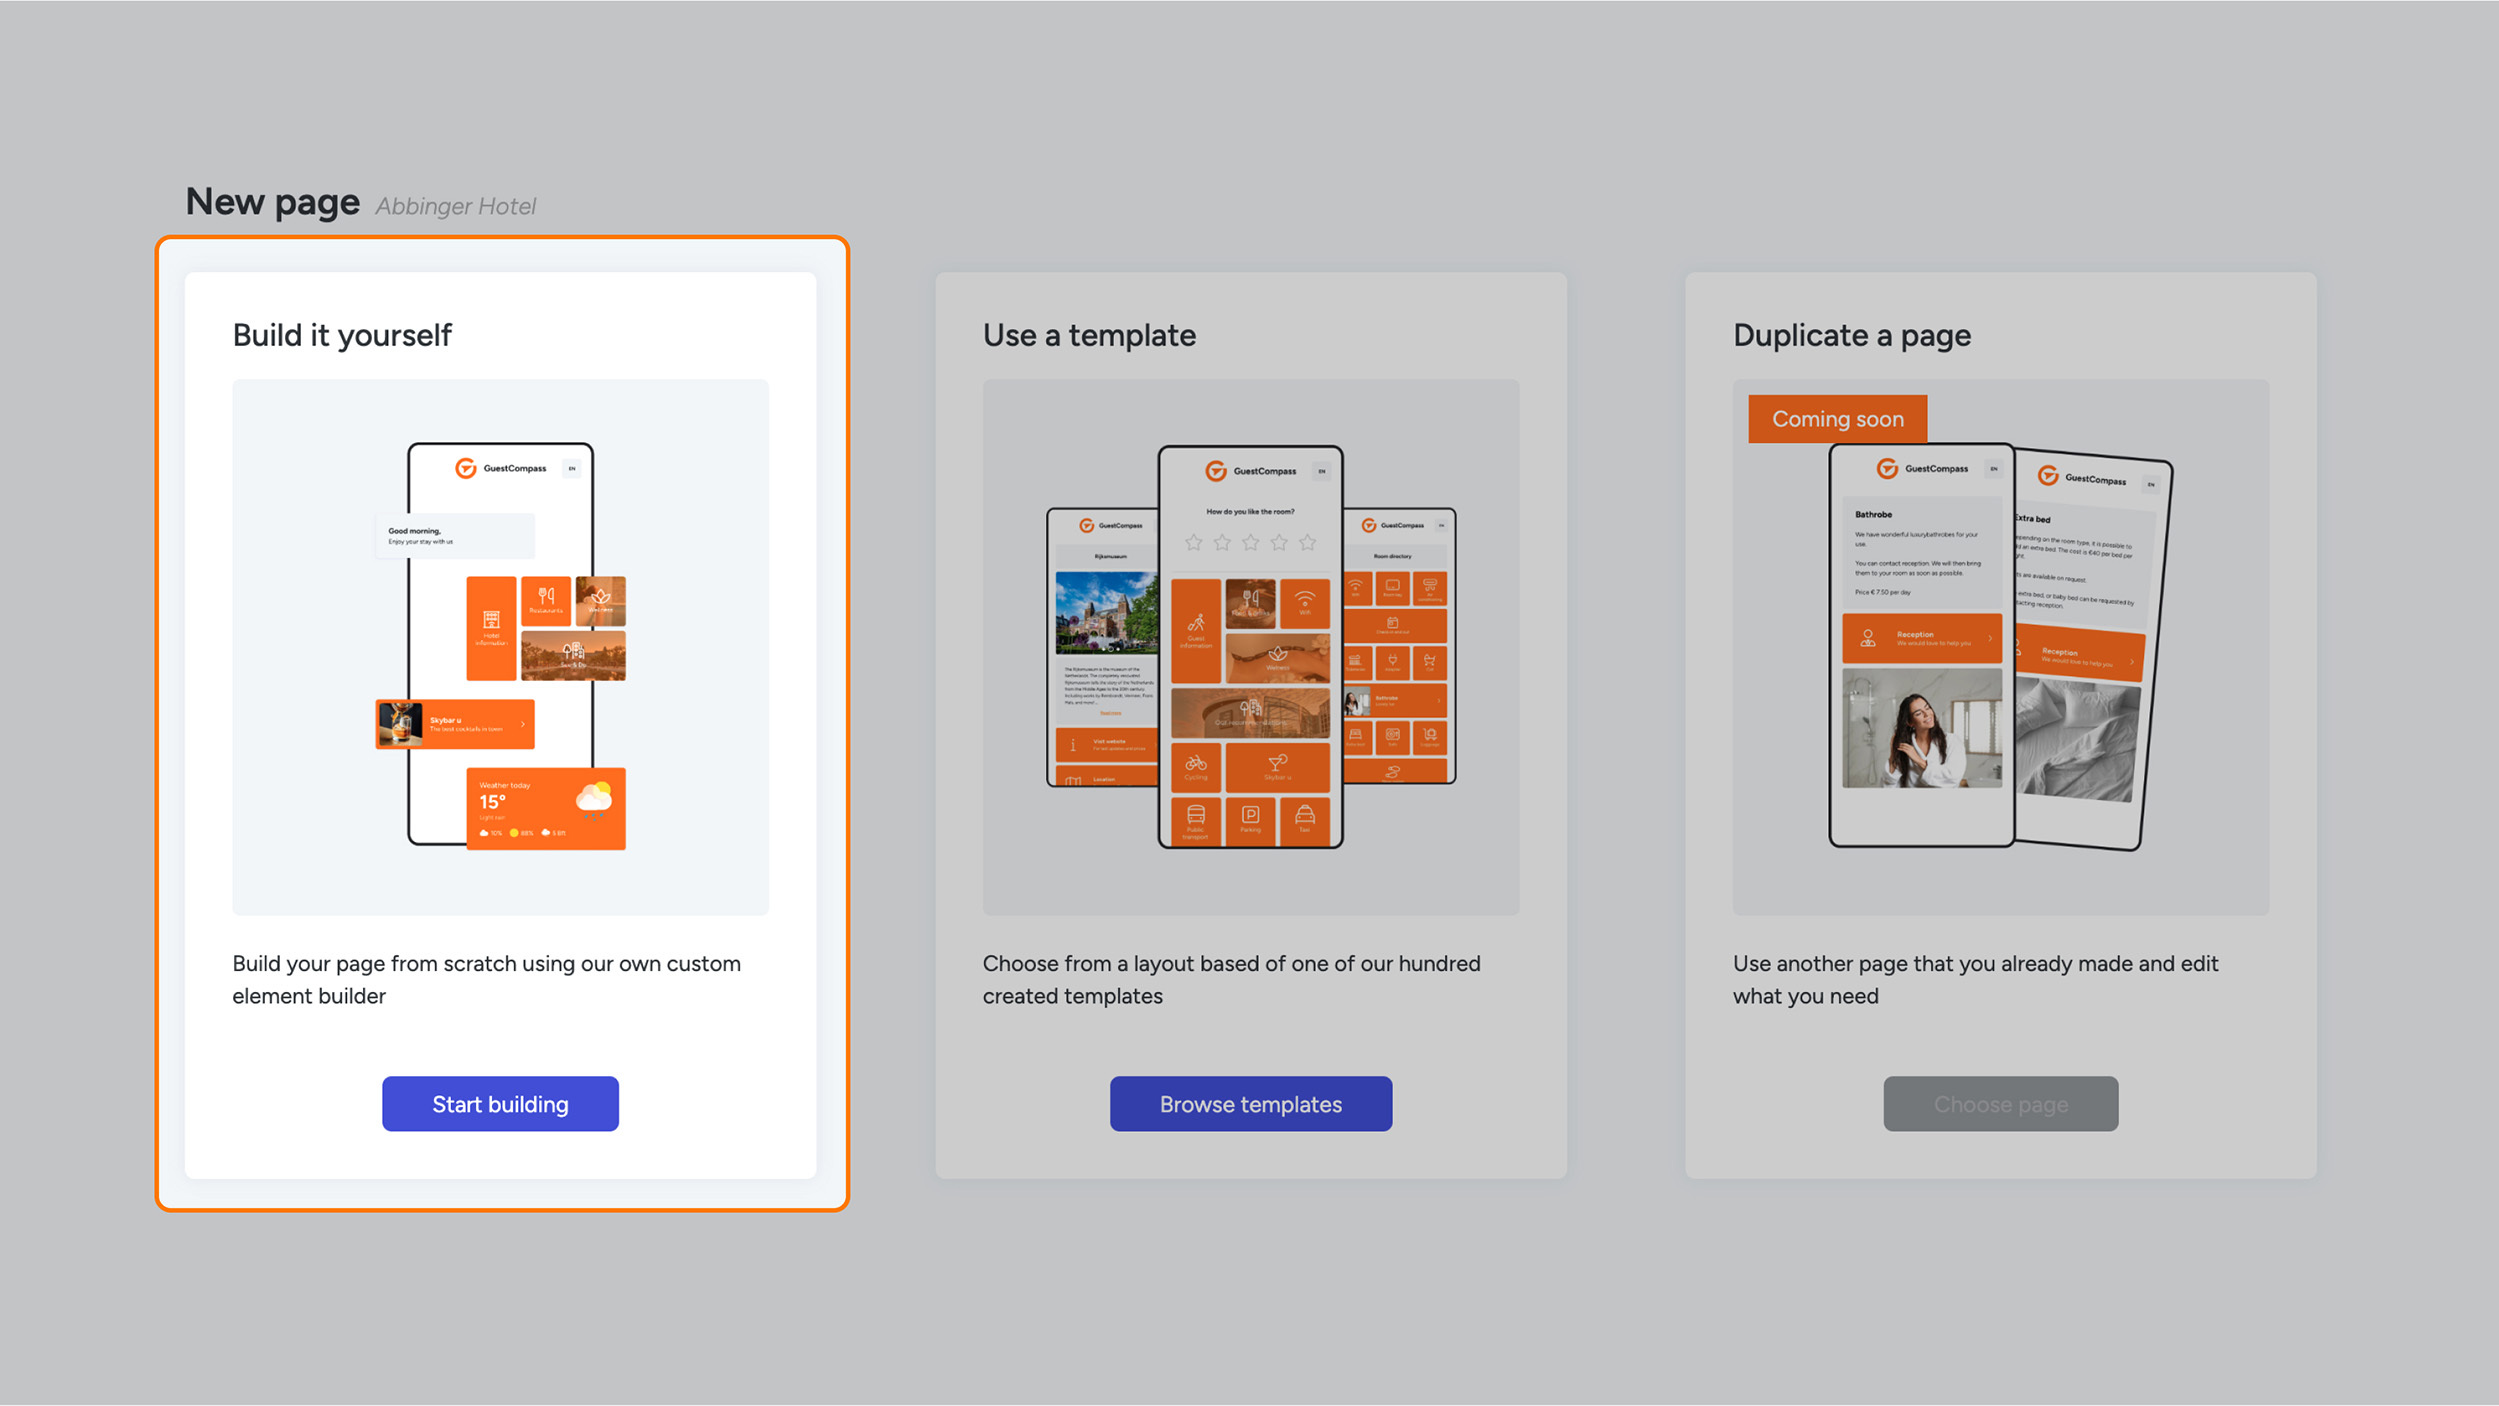
To create a new page using the sitemap, click the blue “Add a new page” button located at the top left of the screen. After clicking this button, three options will appear:
- Build it yourself
- Use a template
Duplicate a page – This option is temporarily disabled.
Select the first option, “Start building.” You will then be redirected to the page settings, where the page is automatically created. Here, you can enter the required information to further configure the page.
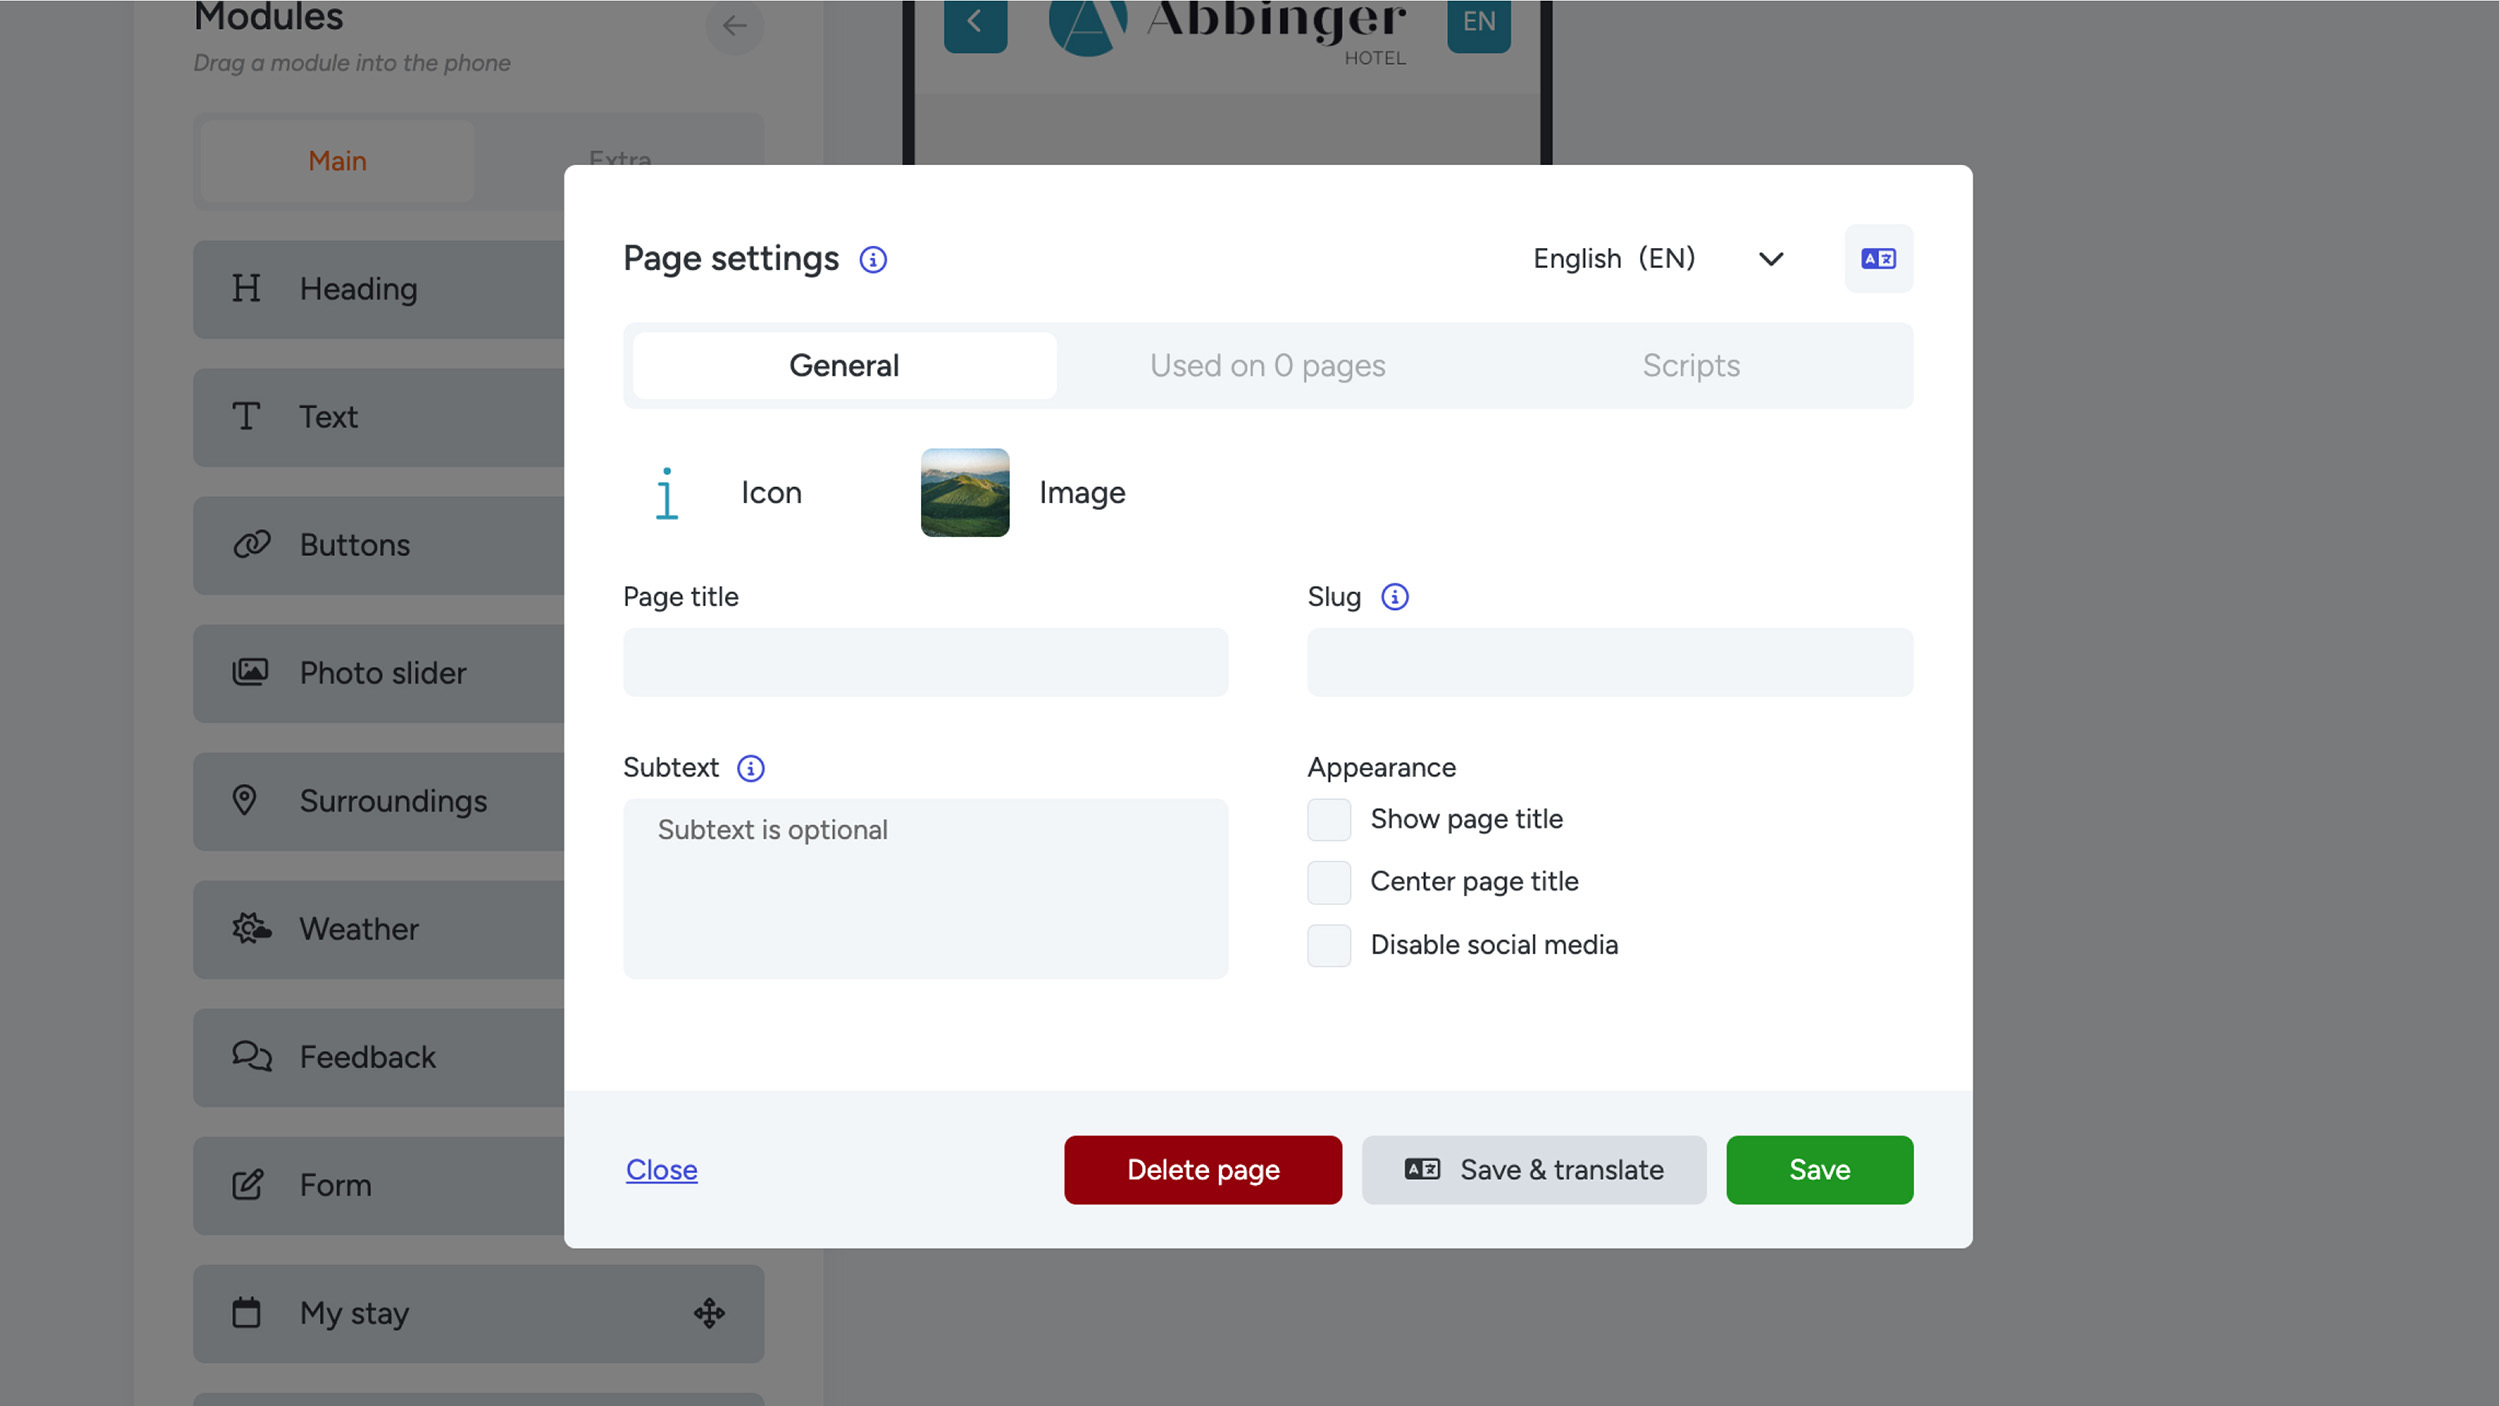
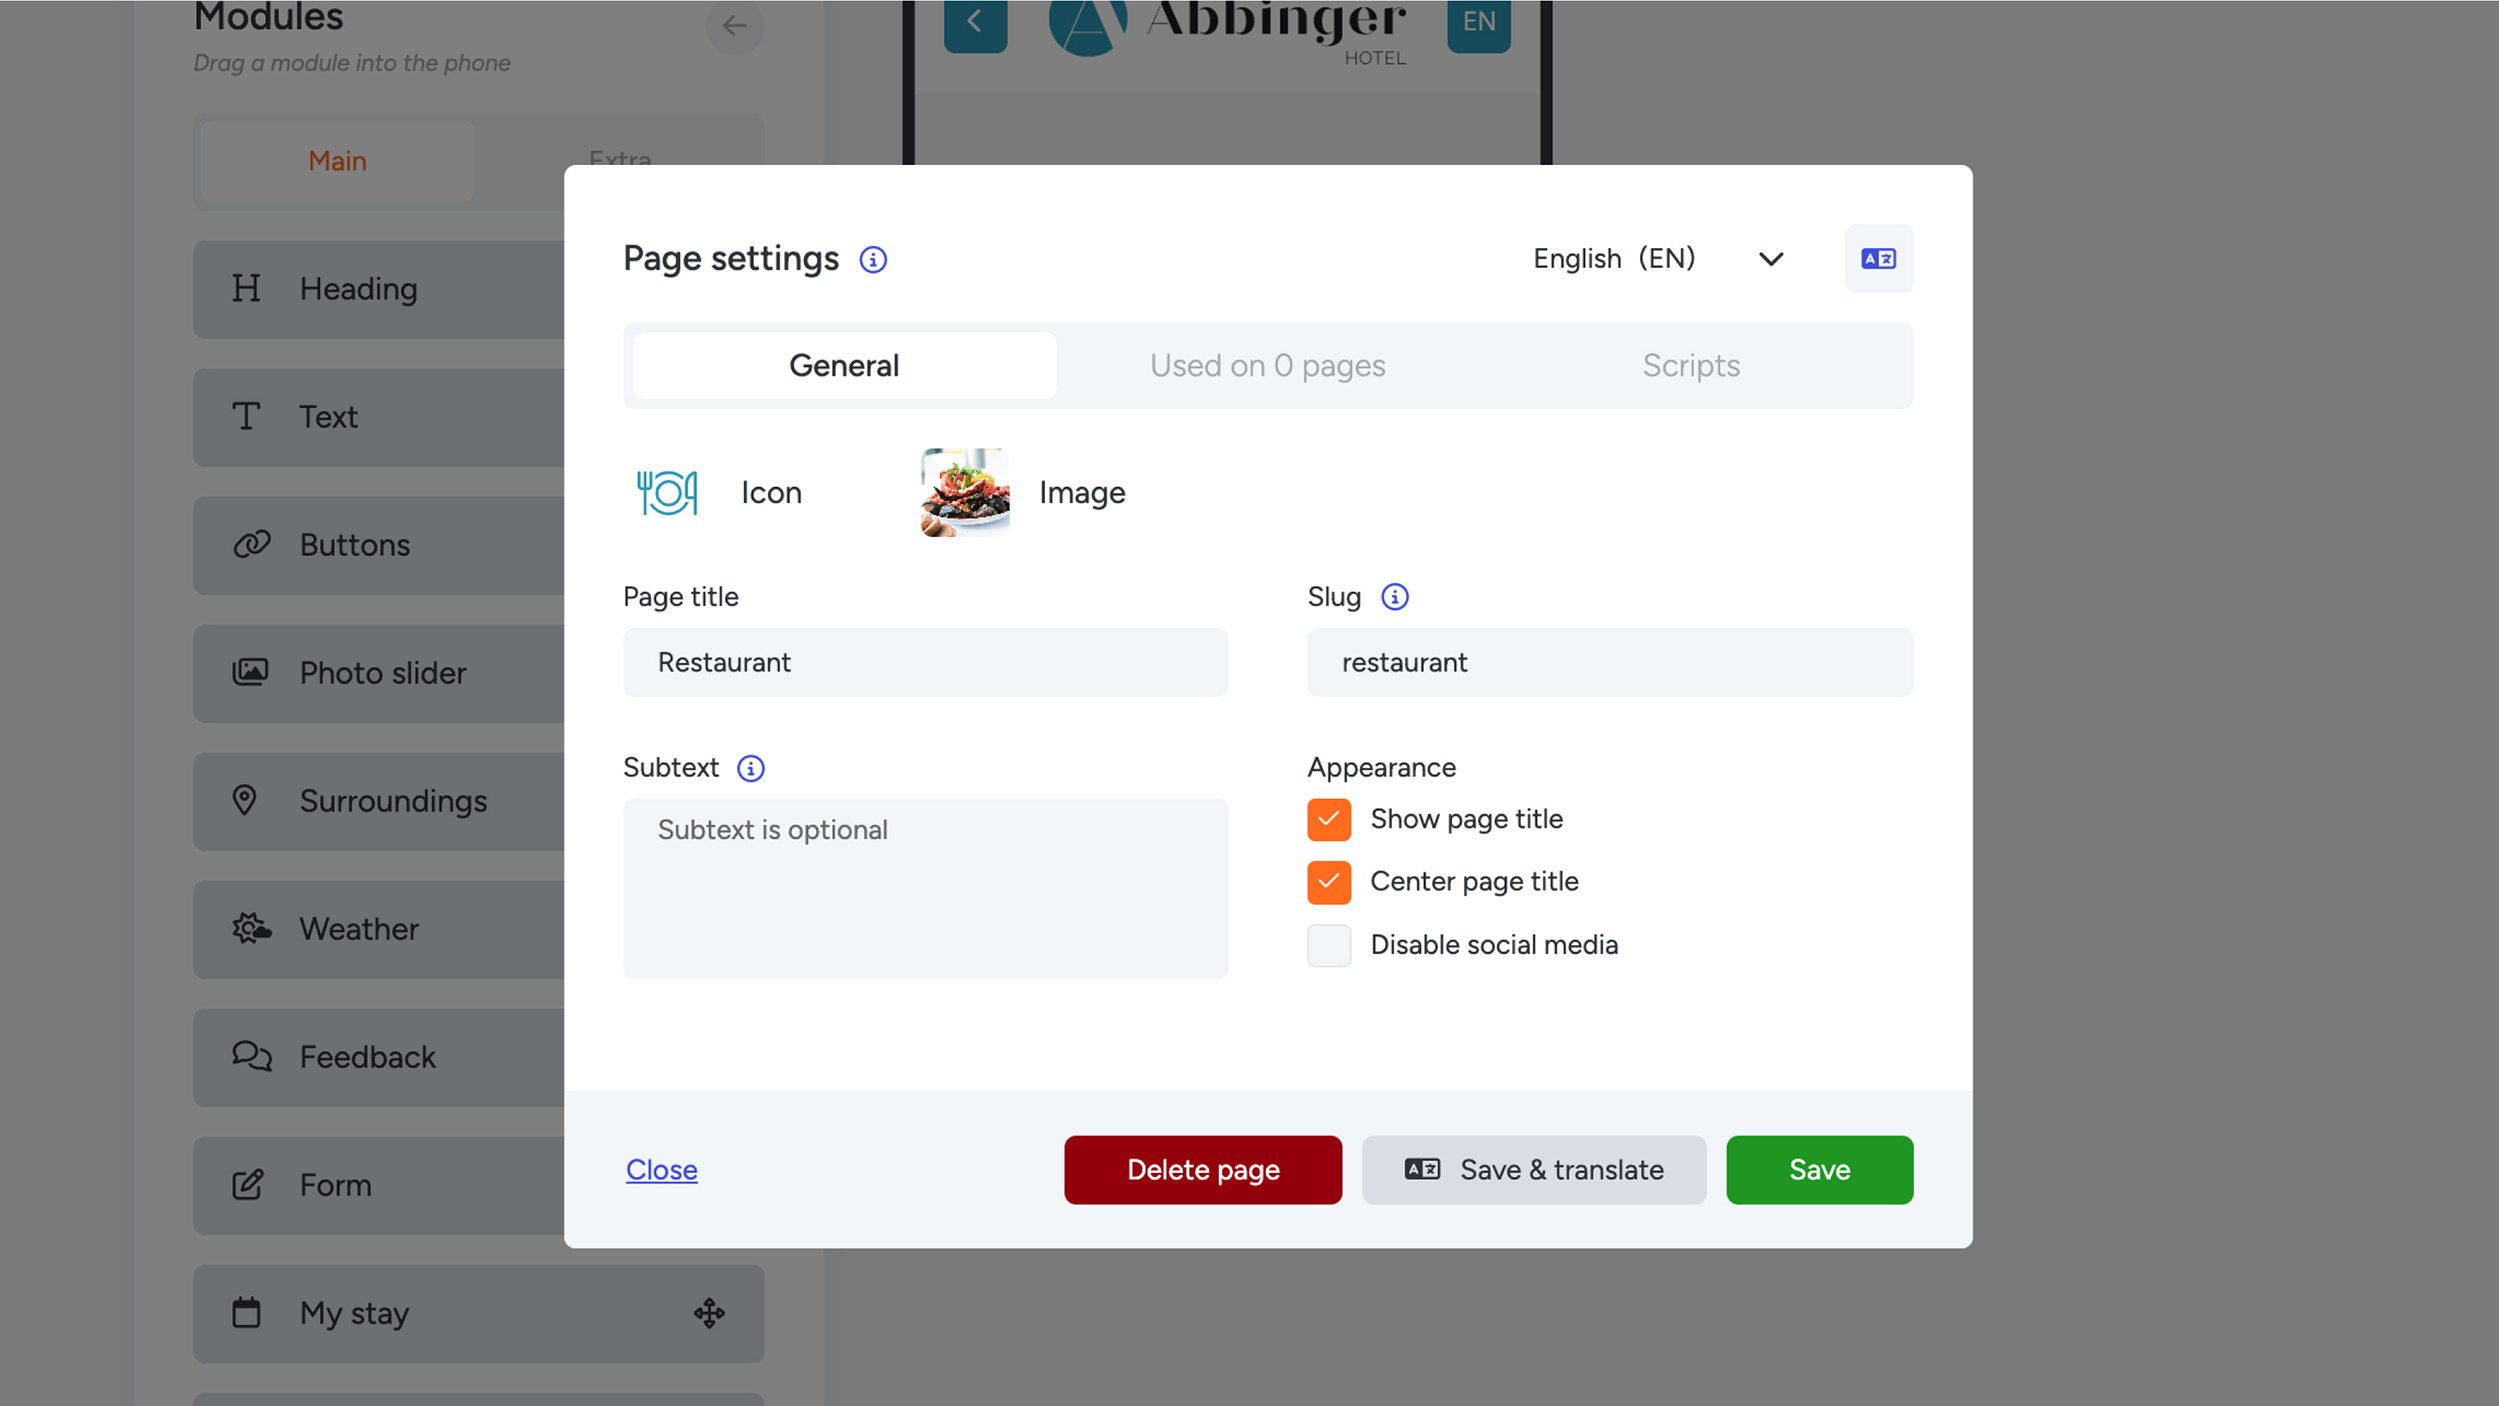
Tab 1 – General
In this tab, fill in the following fields:
- Icon: Select a suitable icon for your page. Search for the icon in English.
- Image: This image will appear in the button module if you choose a list-style button.
- Page title: The title you enter will be displayed on the buttons in the (Web)App.
- Slug: This is the last part of the URL after the slash ("/") that identifies the specific page.
- Subtext: A short summary or explanation of the page and its content, usually one or two sentences. This field is optional.
- Appearance: Check the desired display options. For example, you can centre and make the page title visible. If you have social media buttons enabled throughout your (Web)App, you can disable them specifically for this page.
At the moment the remaining two tabs — “Used on 0 pages” and “Scripts” — are not relevant when creating a page.
When you’re done, save the settings and then you can start building the page. To display the page title on the page, perform a hard refresh (Windows/Linux/Mac: Ctrl + F5, or Command + F5 on Mac). You will now see the page title at the top of the page.
Note: The page is not yet visible in the (Web)App because it hasn’t been linked to a button module. Your new page will appear under “Unlinked pages” in the sitemap and can be further edited here. You can find the sitemap in the menu under “Webapp.”
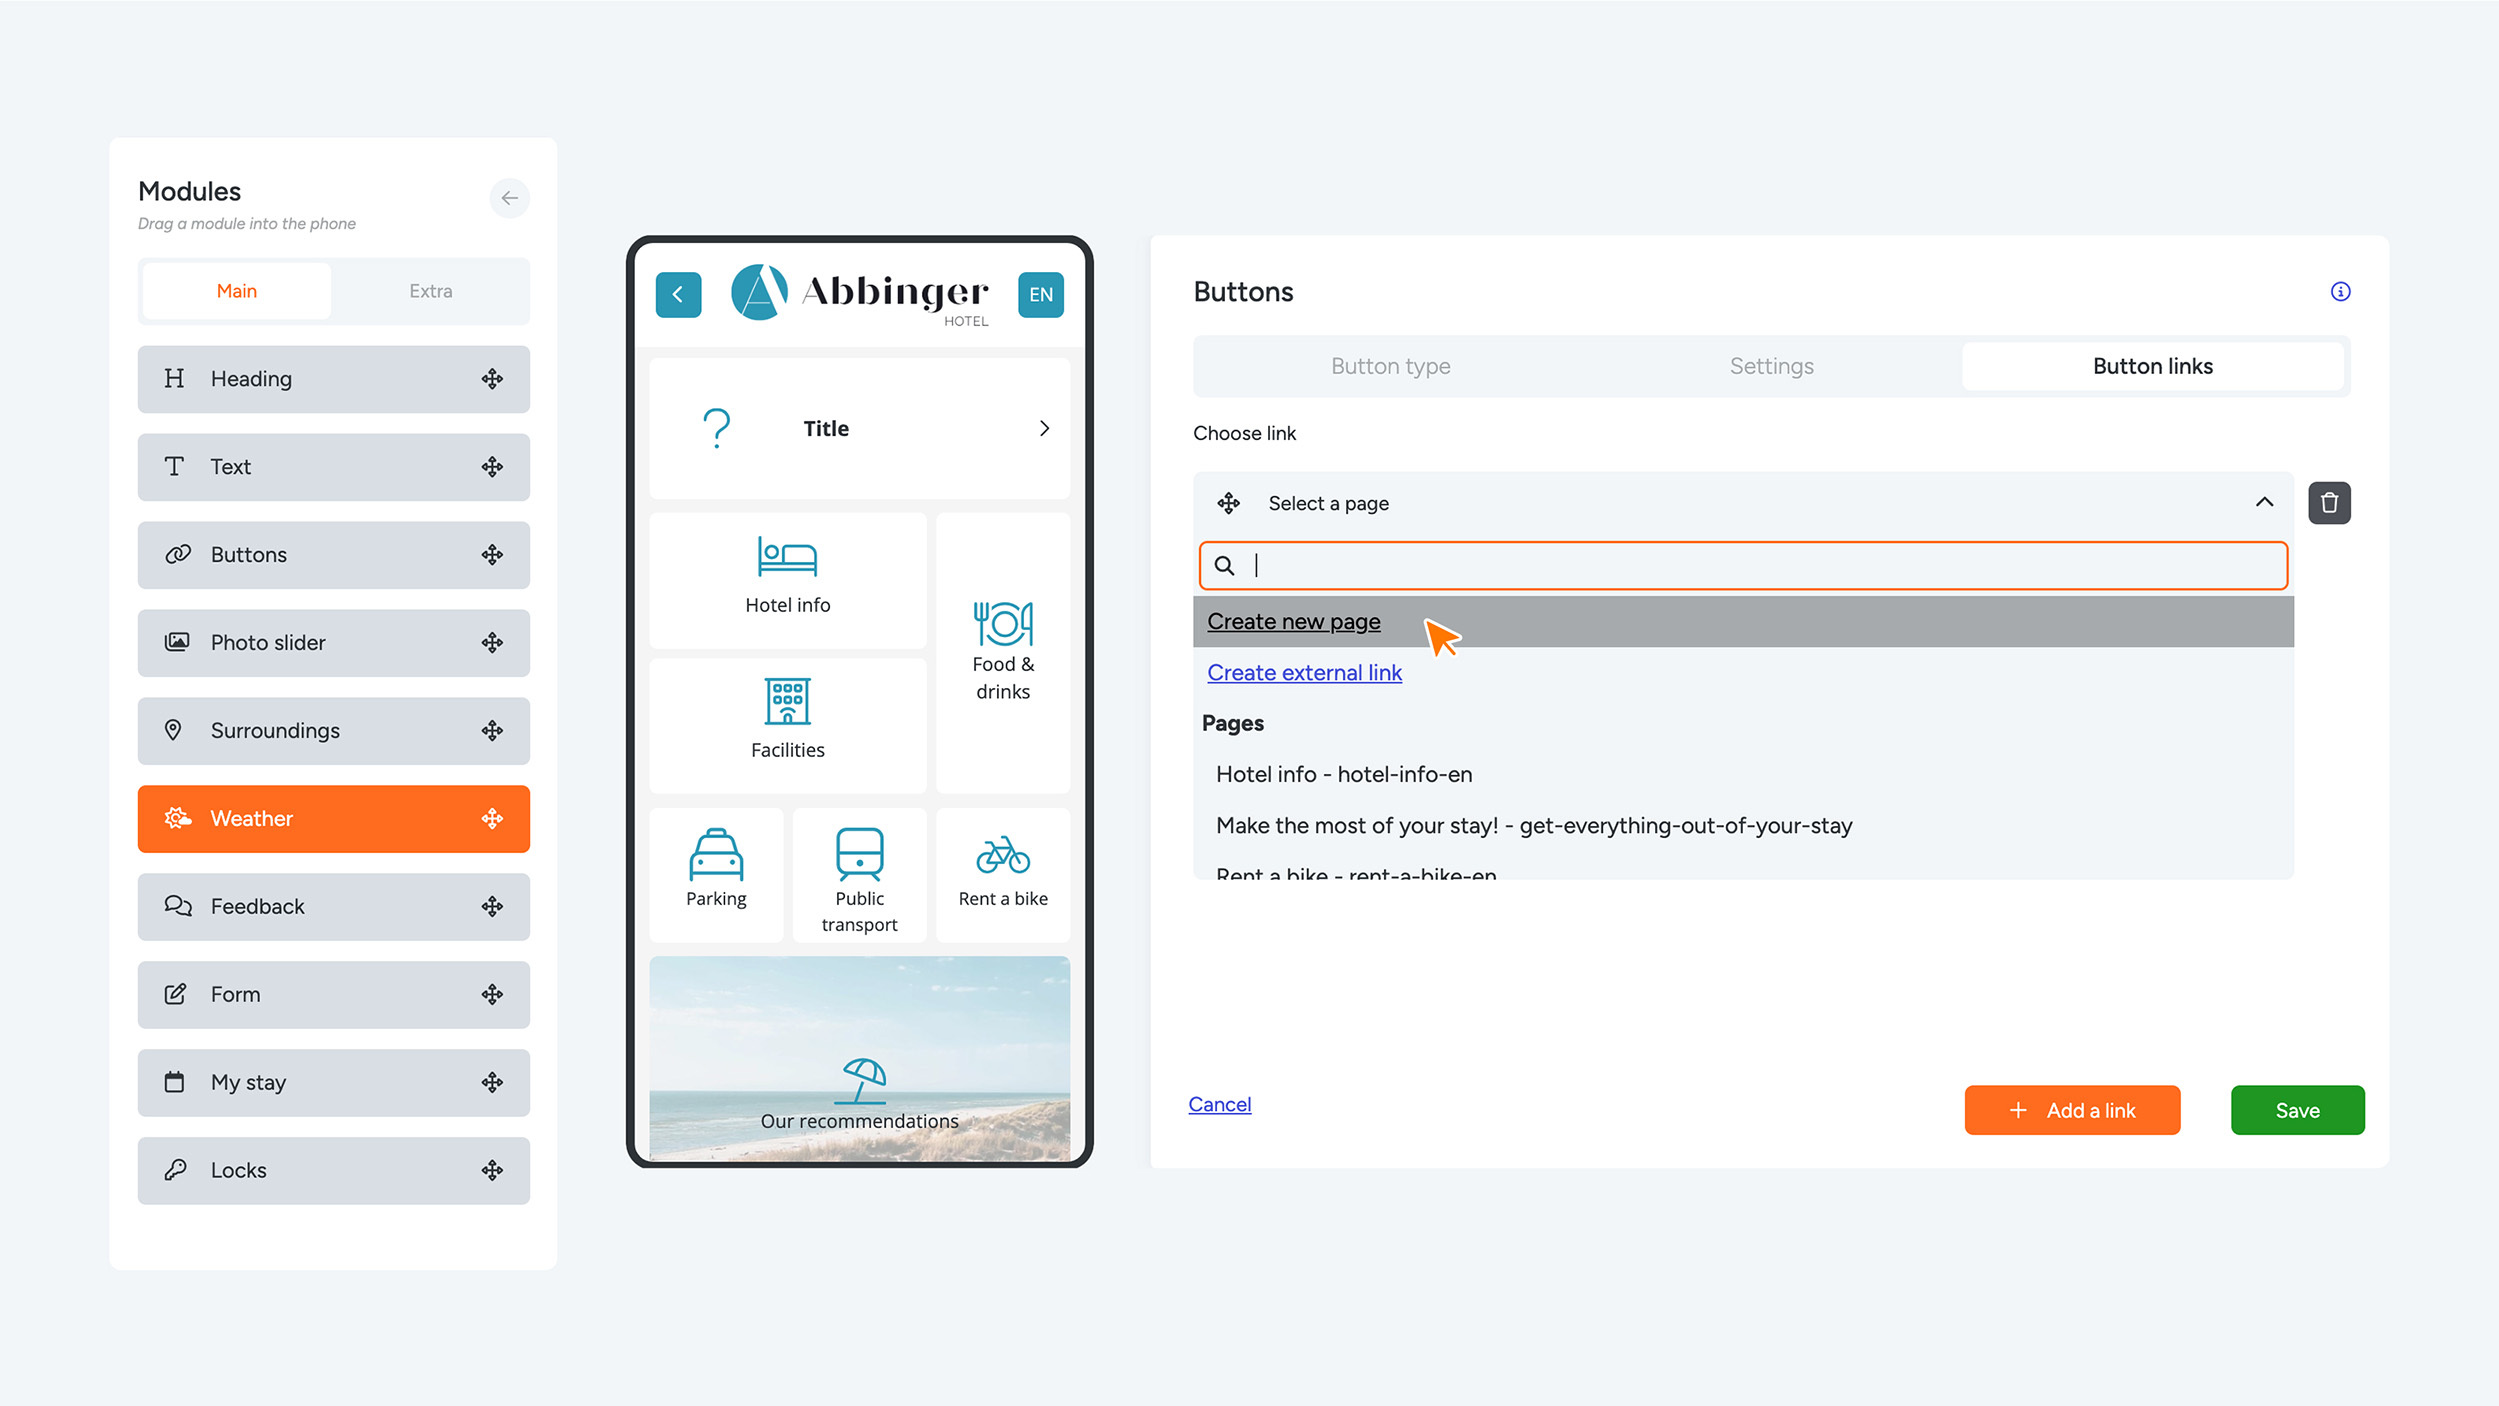
Method 2: Creating a Page via a Button Module
Another way to create a page is through a button module in the (Web)App. Place the desired button module wherever you want on the page by dragging it into the preview window.
Choose the type of button you wish to use: List, Row, or Tetris. After making your choice, fill in the button module by selecting the “Select a page” option. Then click “Create a new page” to create a new page.
Fill in the new page using the same fields described in Method 1:
- Icon
- Image
- Page title
- Slug
- Subtext
- Appearance options
Just like in Method 1, the tabs “Used on 0 pages” and “Scripts” are not relevant at this time.
After entering the information, the new page will appear in the phone preview window. Click “Save” to save the button module. If you chose a list-style button, make sure the page image is still visible. To update the image display, you can perform another hard refresh (Ctrl + F5 or Command + F5 on Mac).

Editing a Page
Editing a page is simple and quick. Follow the steps below to modify the content of a page:
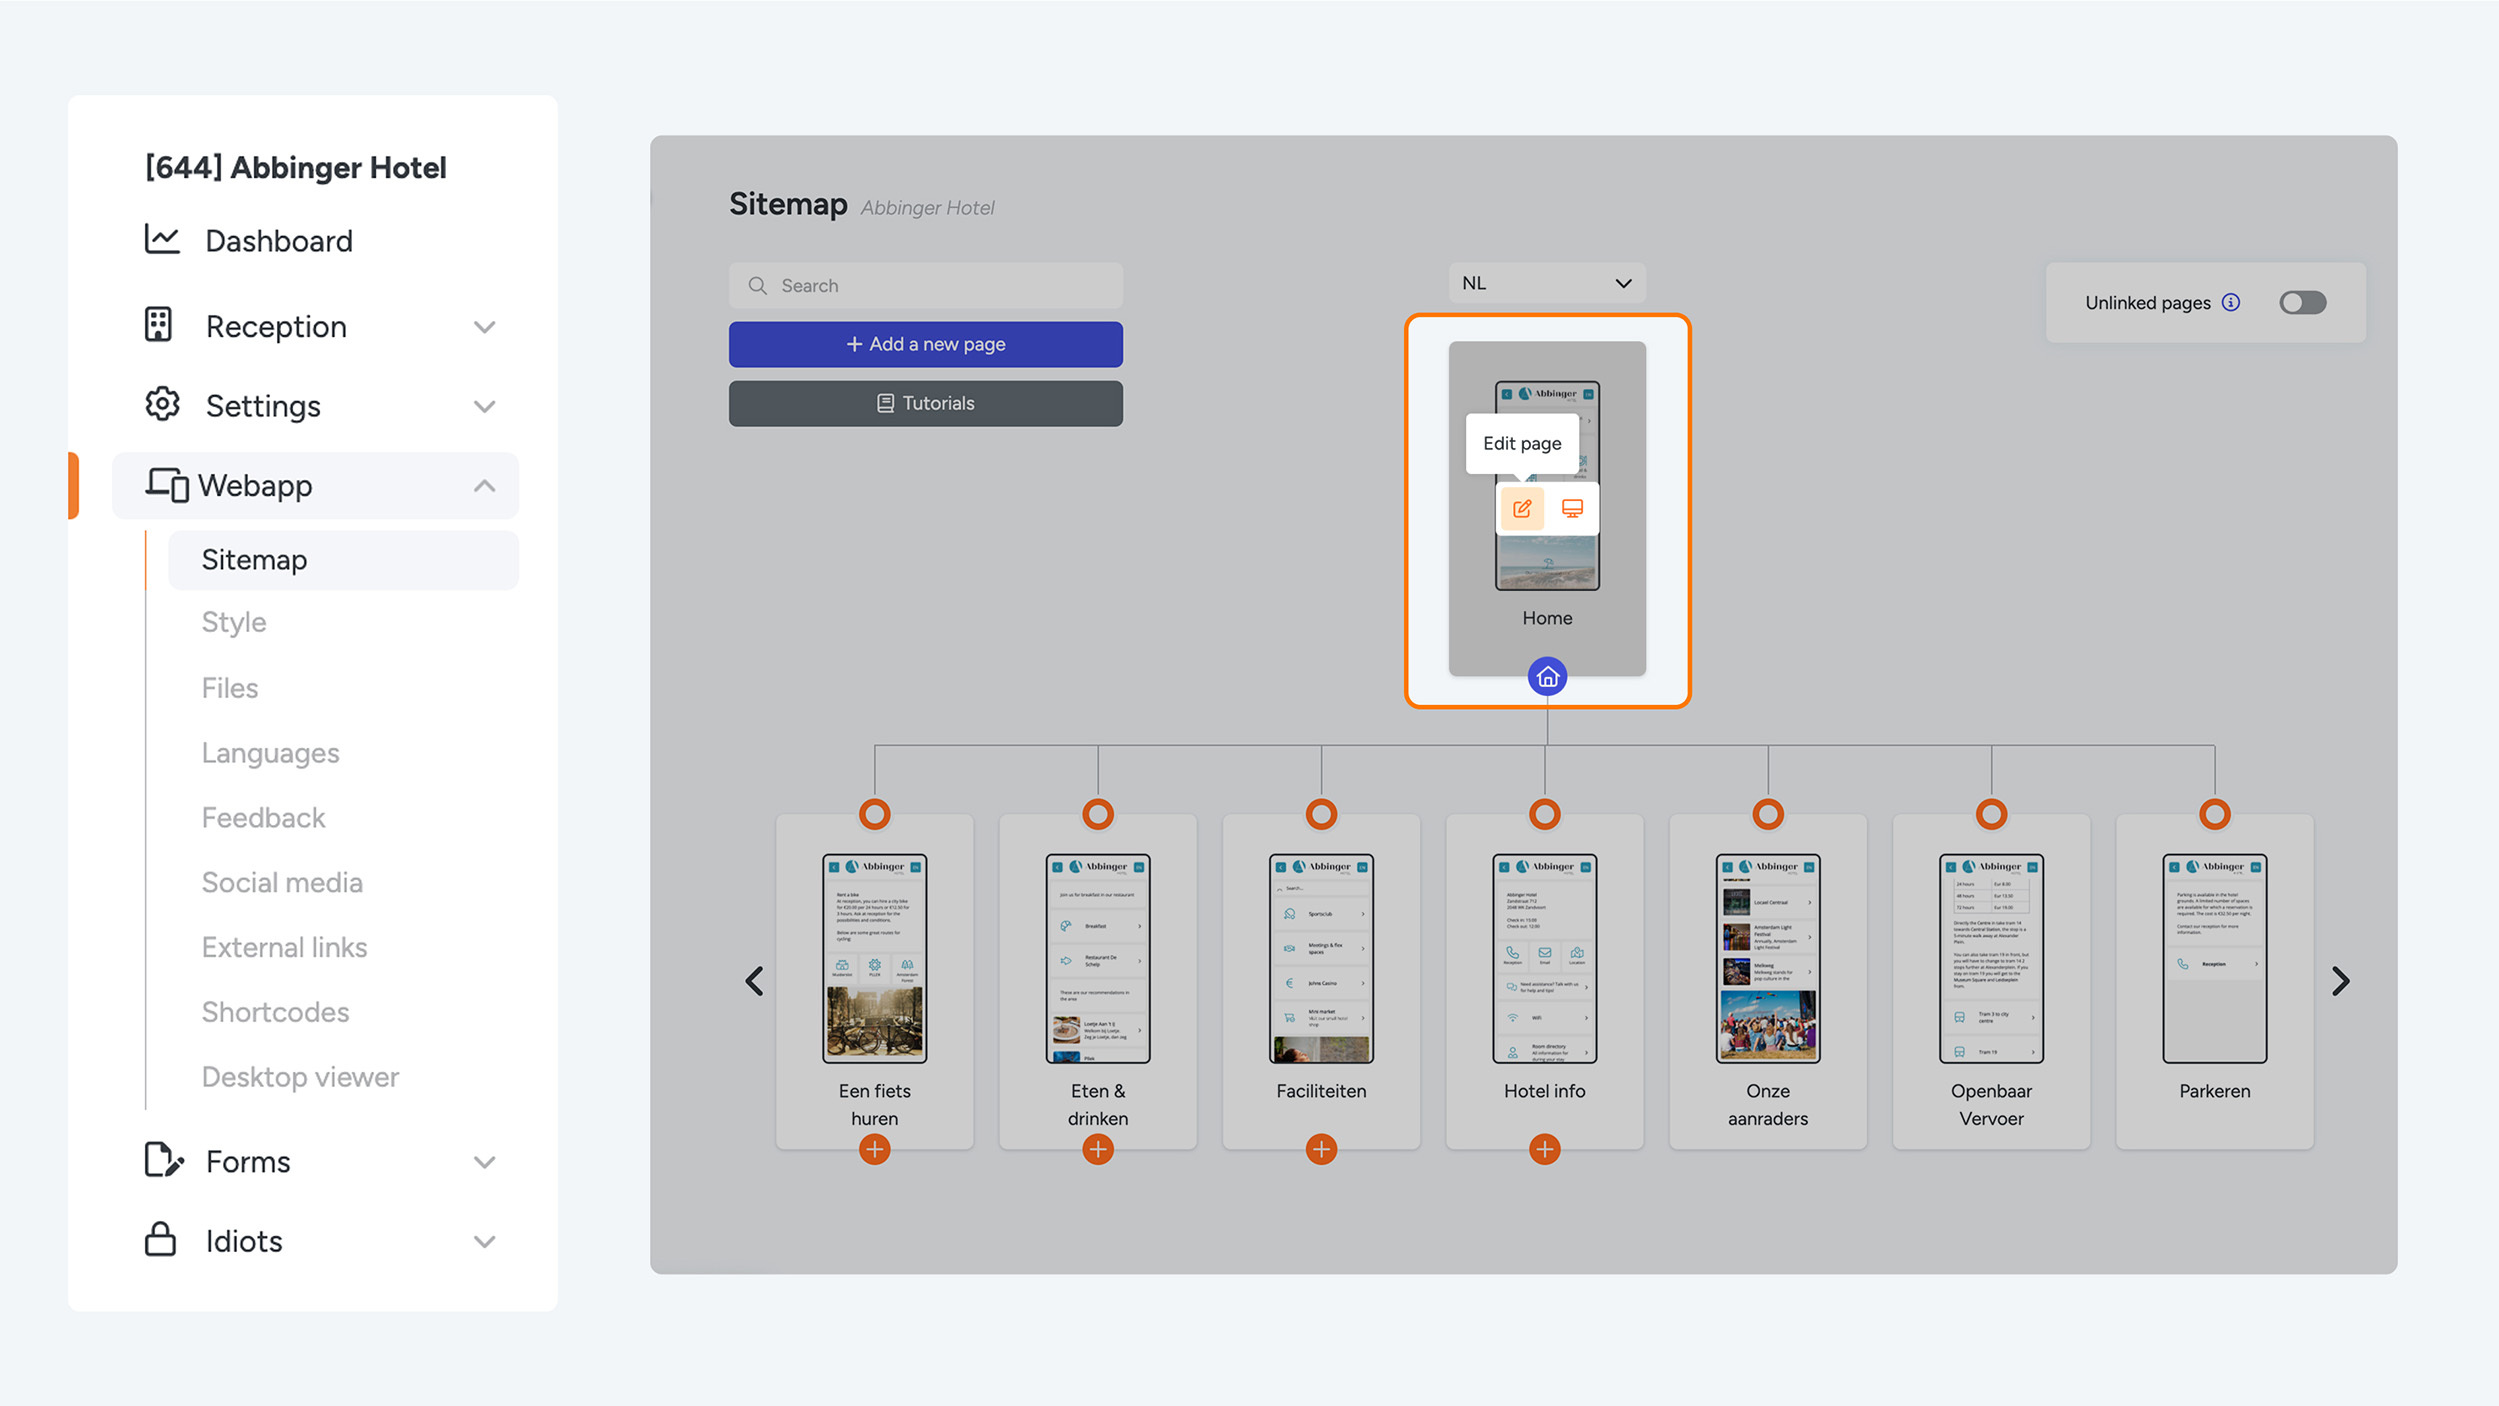
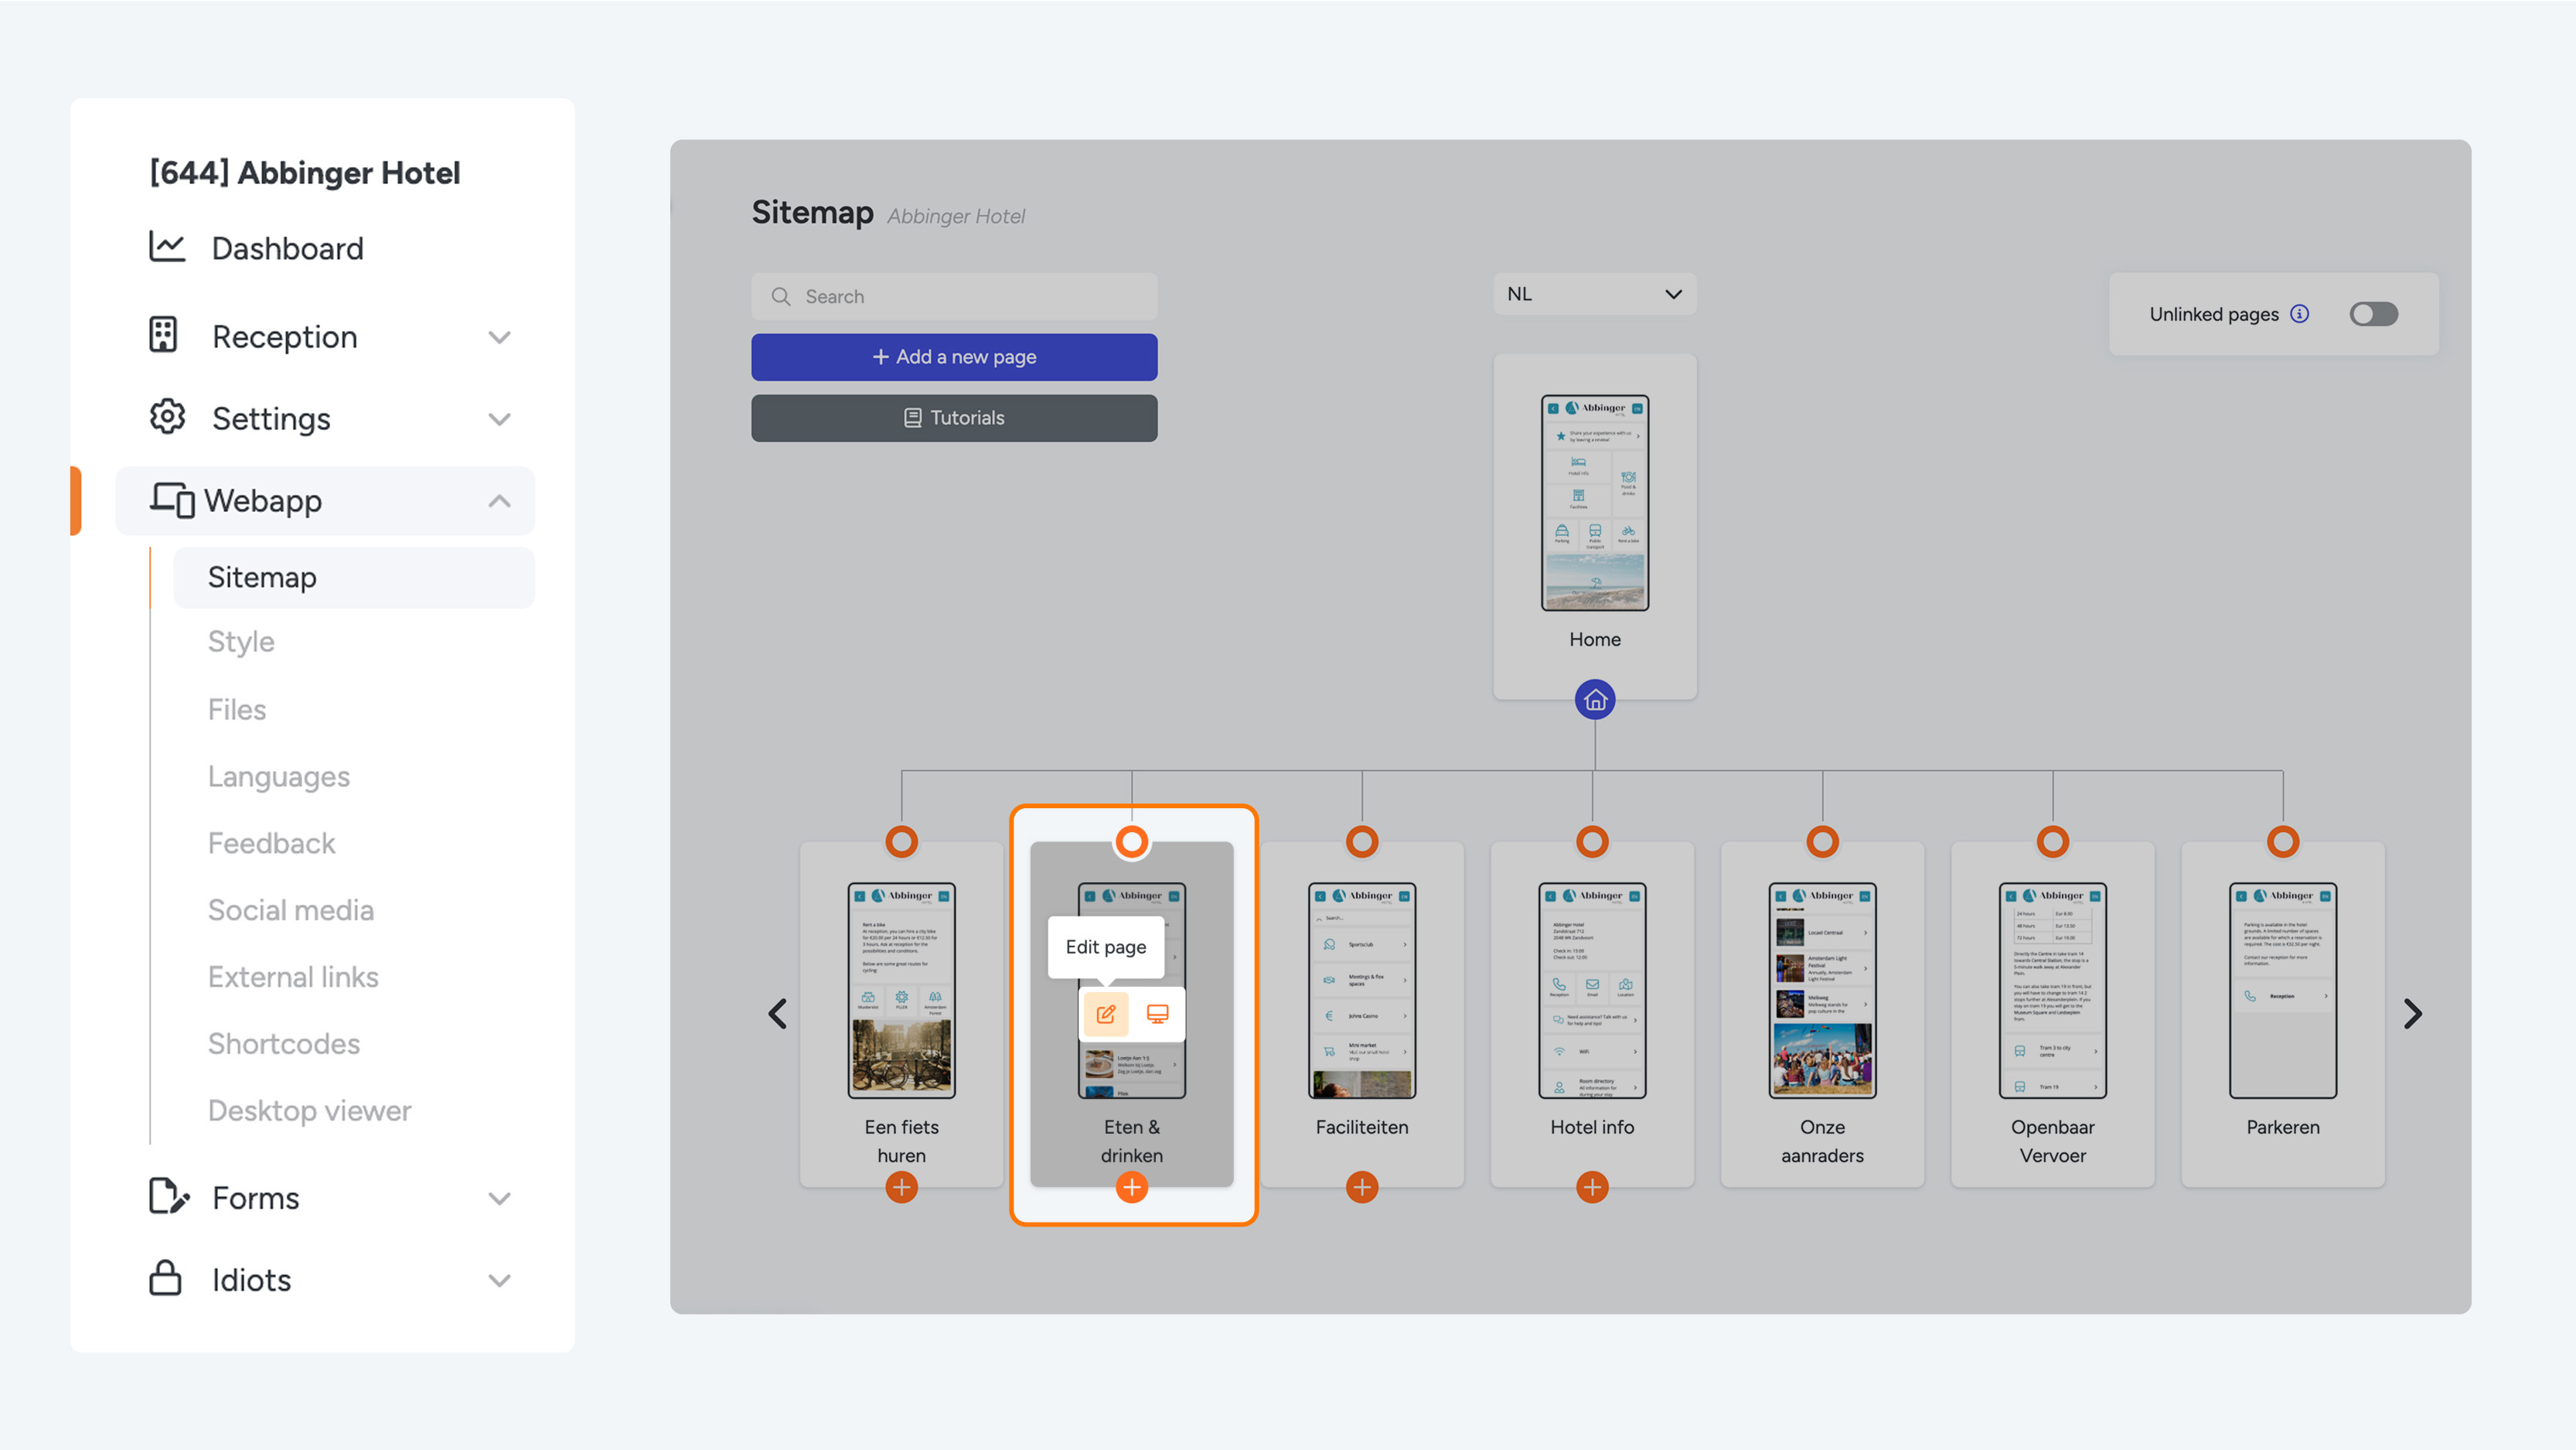
- Go to the Sitemap: Navigate to the sitemap of your (Web)App. Here you will see an overview of all existing pages, structured in a clear tree layout.
- Hover over the desired page: Move your mouse over the page you want to edit, whether it is under “Unlinked Pages” or already linked in the sitemap. When you select the page, several options will appear.
- Click the pencil icon: Click the pencil icon (edit page). This opens the page with the phone preview and modules, where you can adjust the content, layout, and other settings of the page.
By following these simple steps, you can quickly make changes to your pages and further personalize and optimize your (Web)App.
For more details about pages and Unlinked Pages, you can continue reading on the Sitemap page for more information.