Buttons
Building the (Web)App: Pages and Navigation
When developing your (Web)App, you connect different pages to each other, creating a clear and organized structure. This structure is visually displayed in the sitemap, which can be found under the “Webapp” section in the menu. The sitemap provides a clear overview of all pages and their relationships within the (Web)App.
Choose the Right Navigation Buttons for the (Web)App
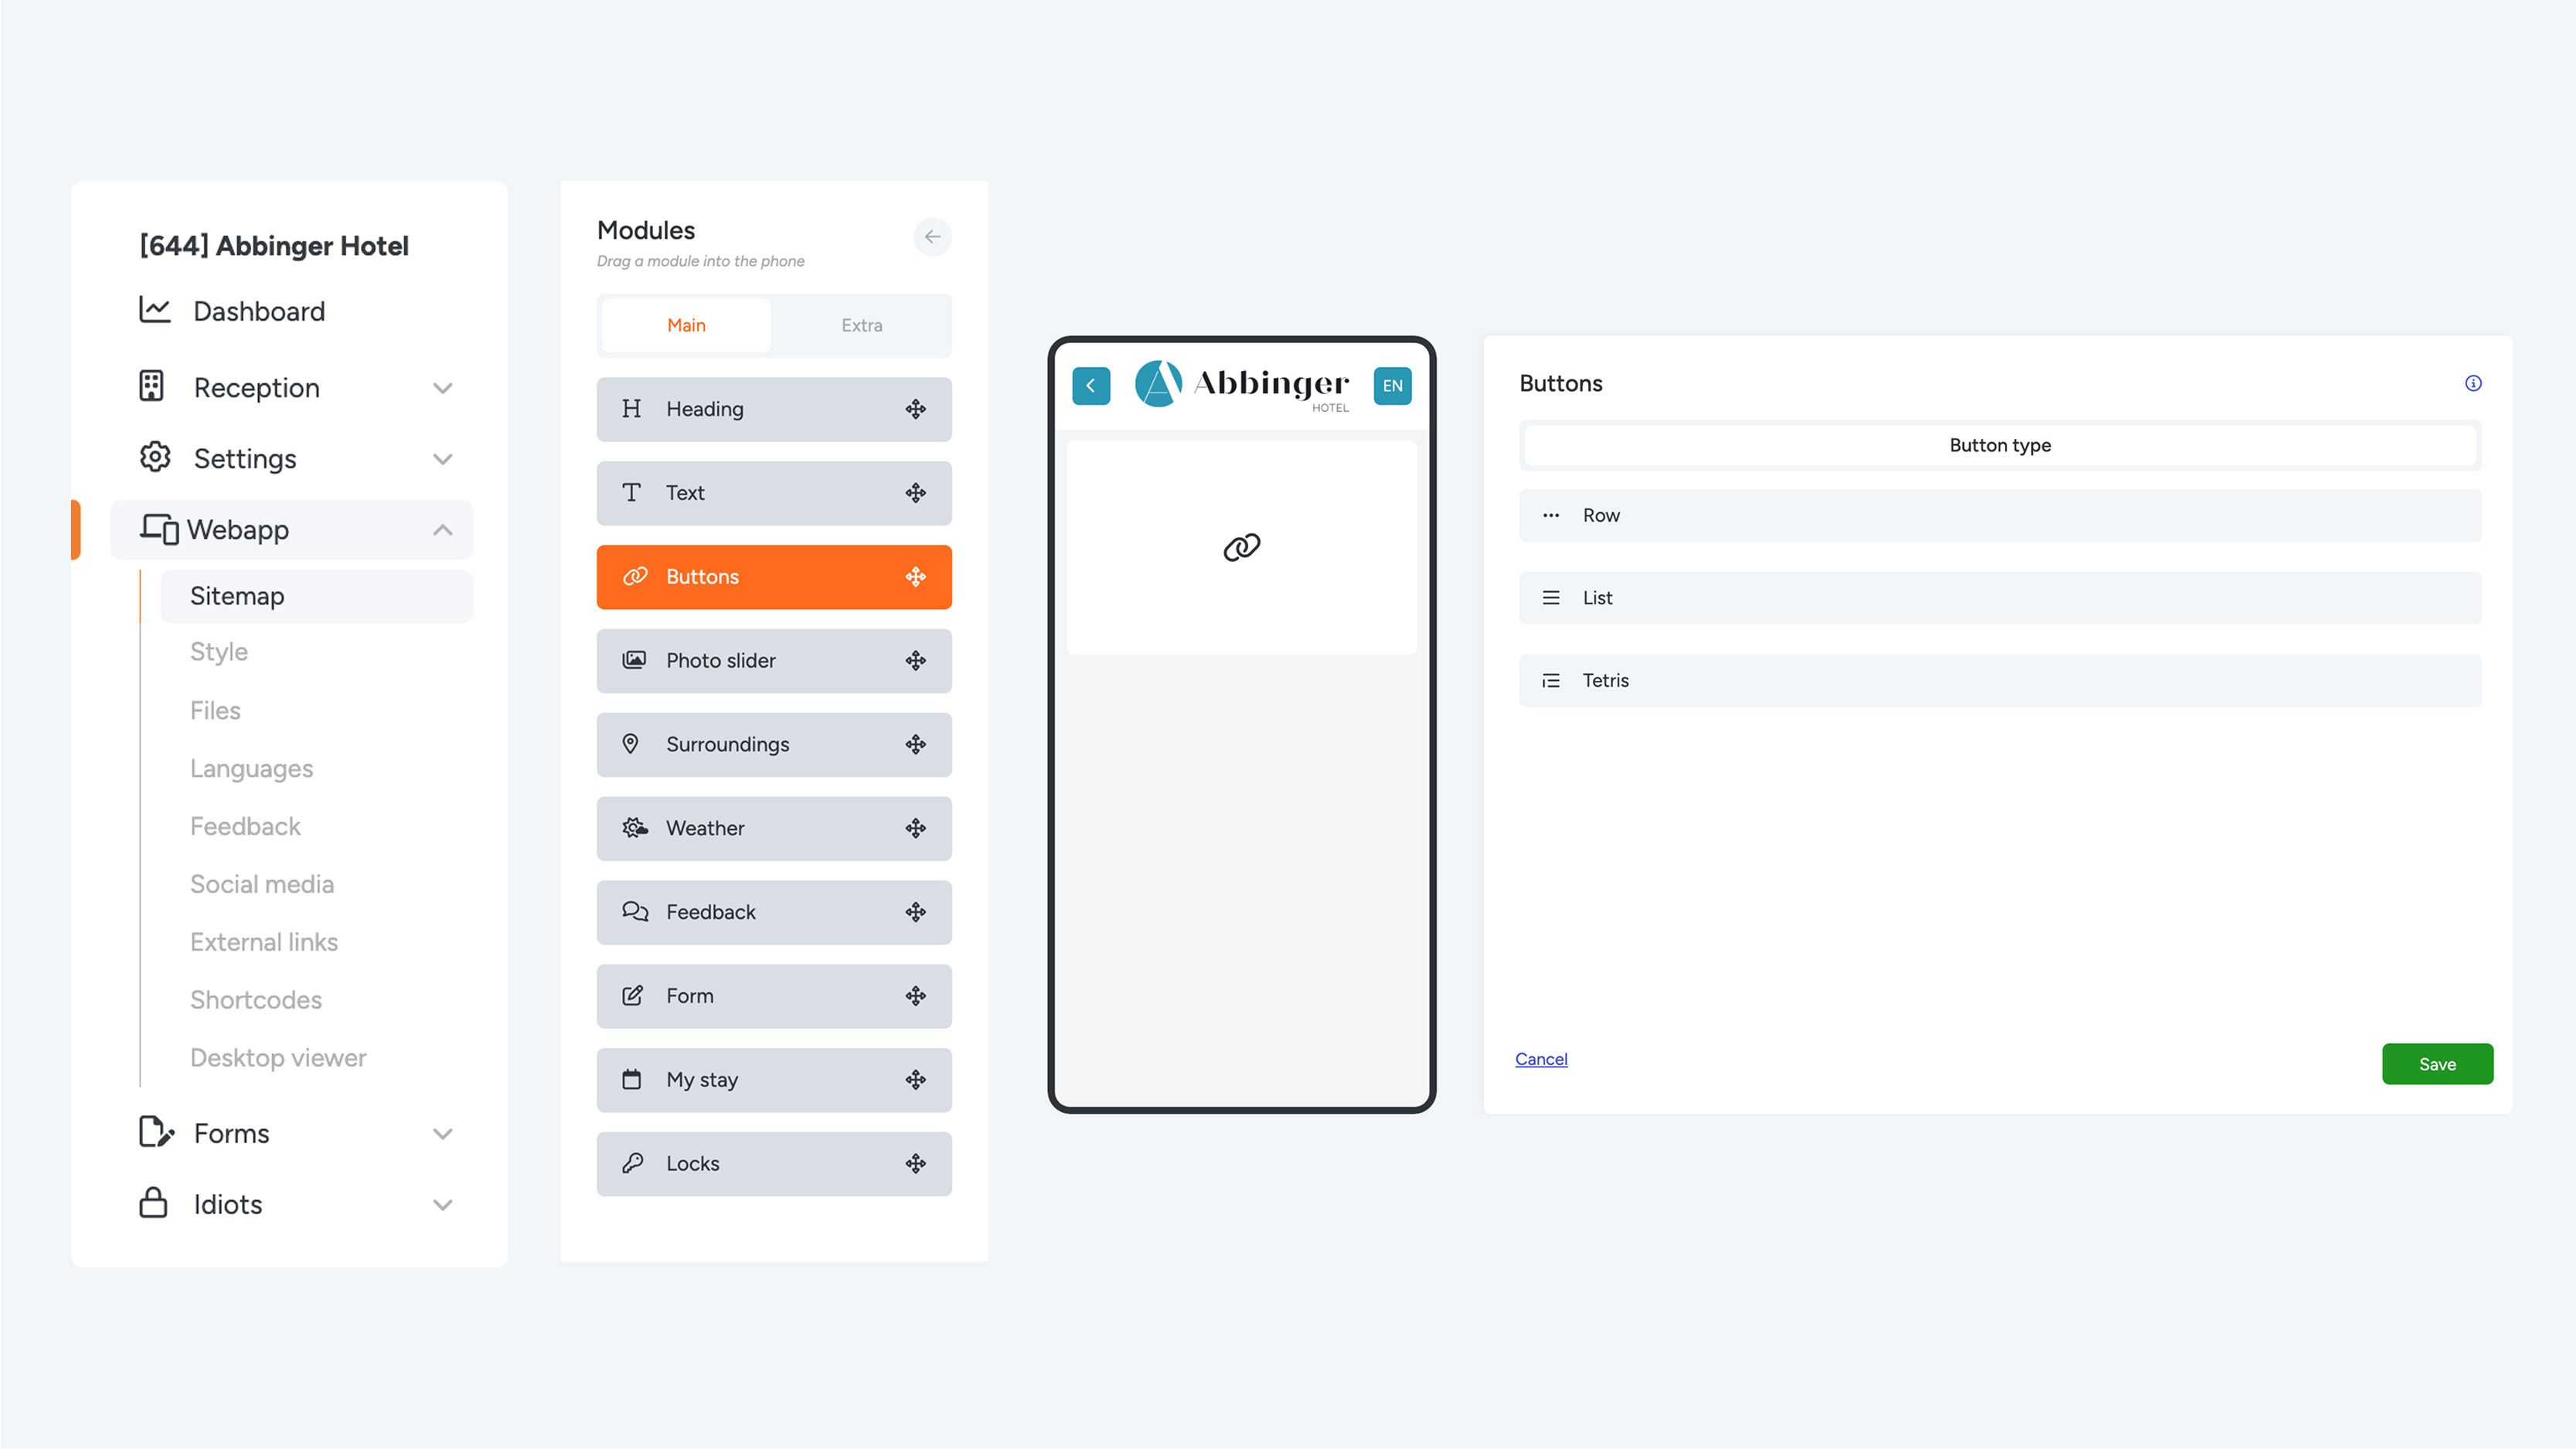
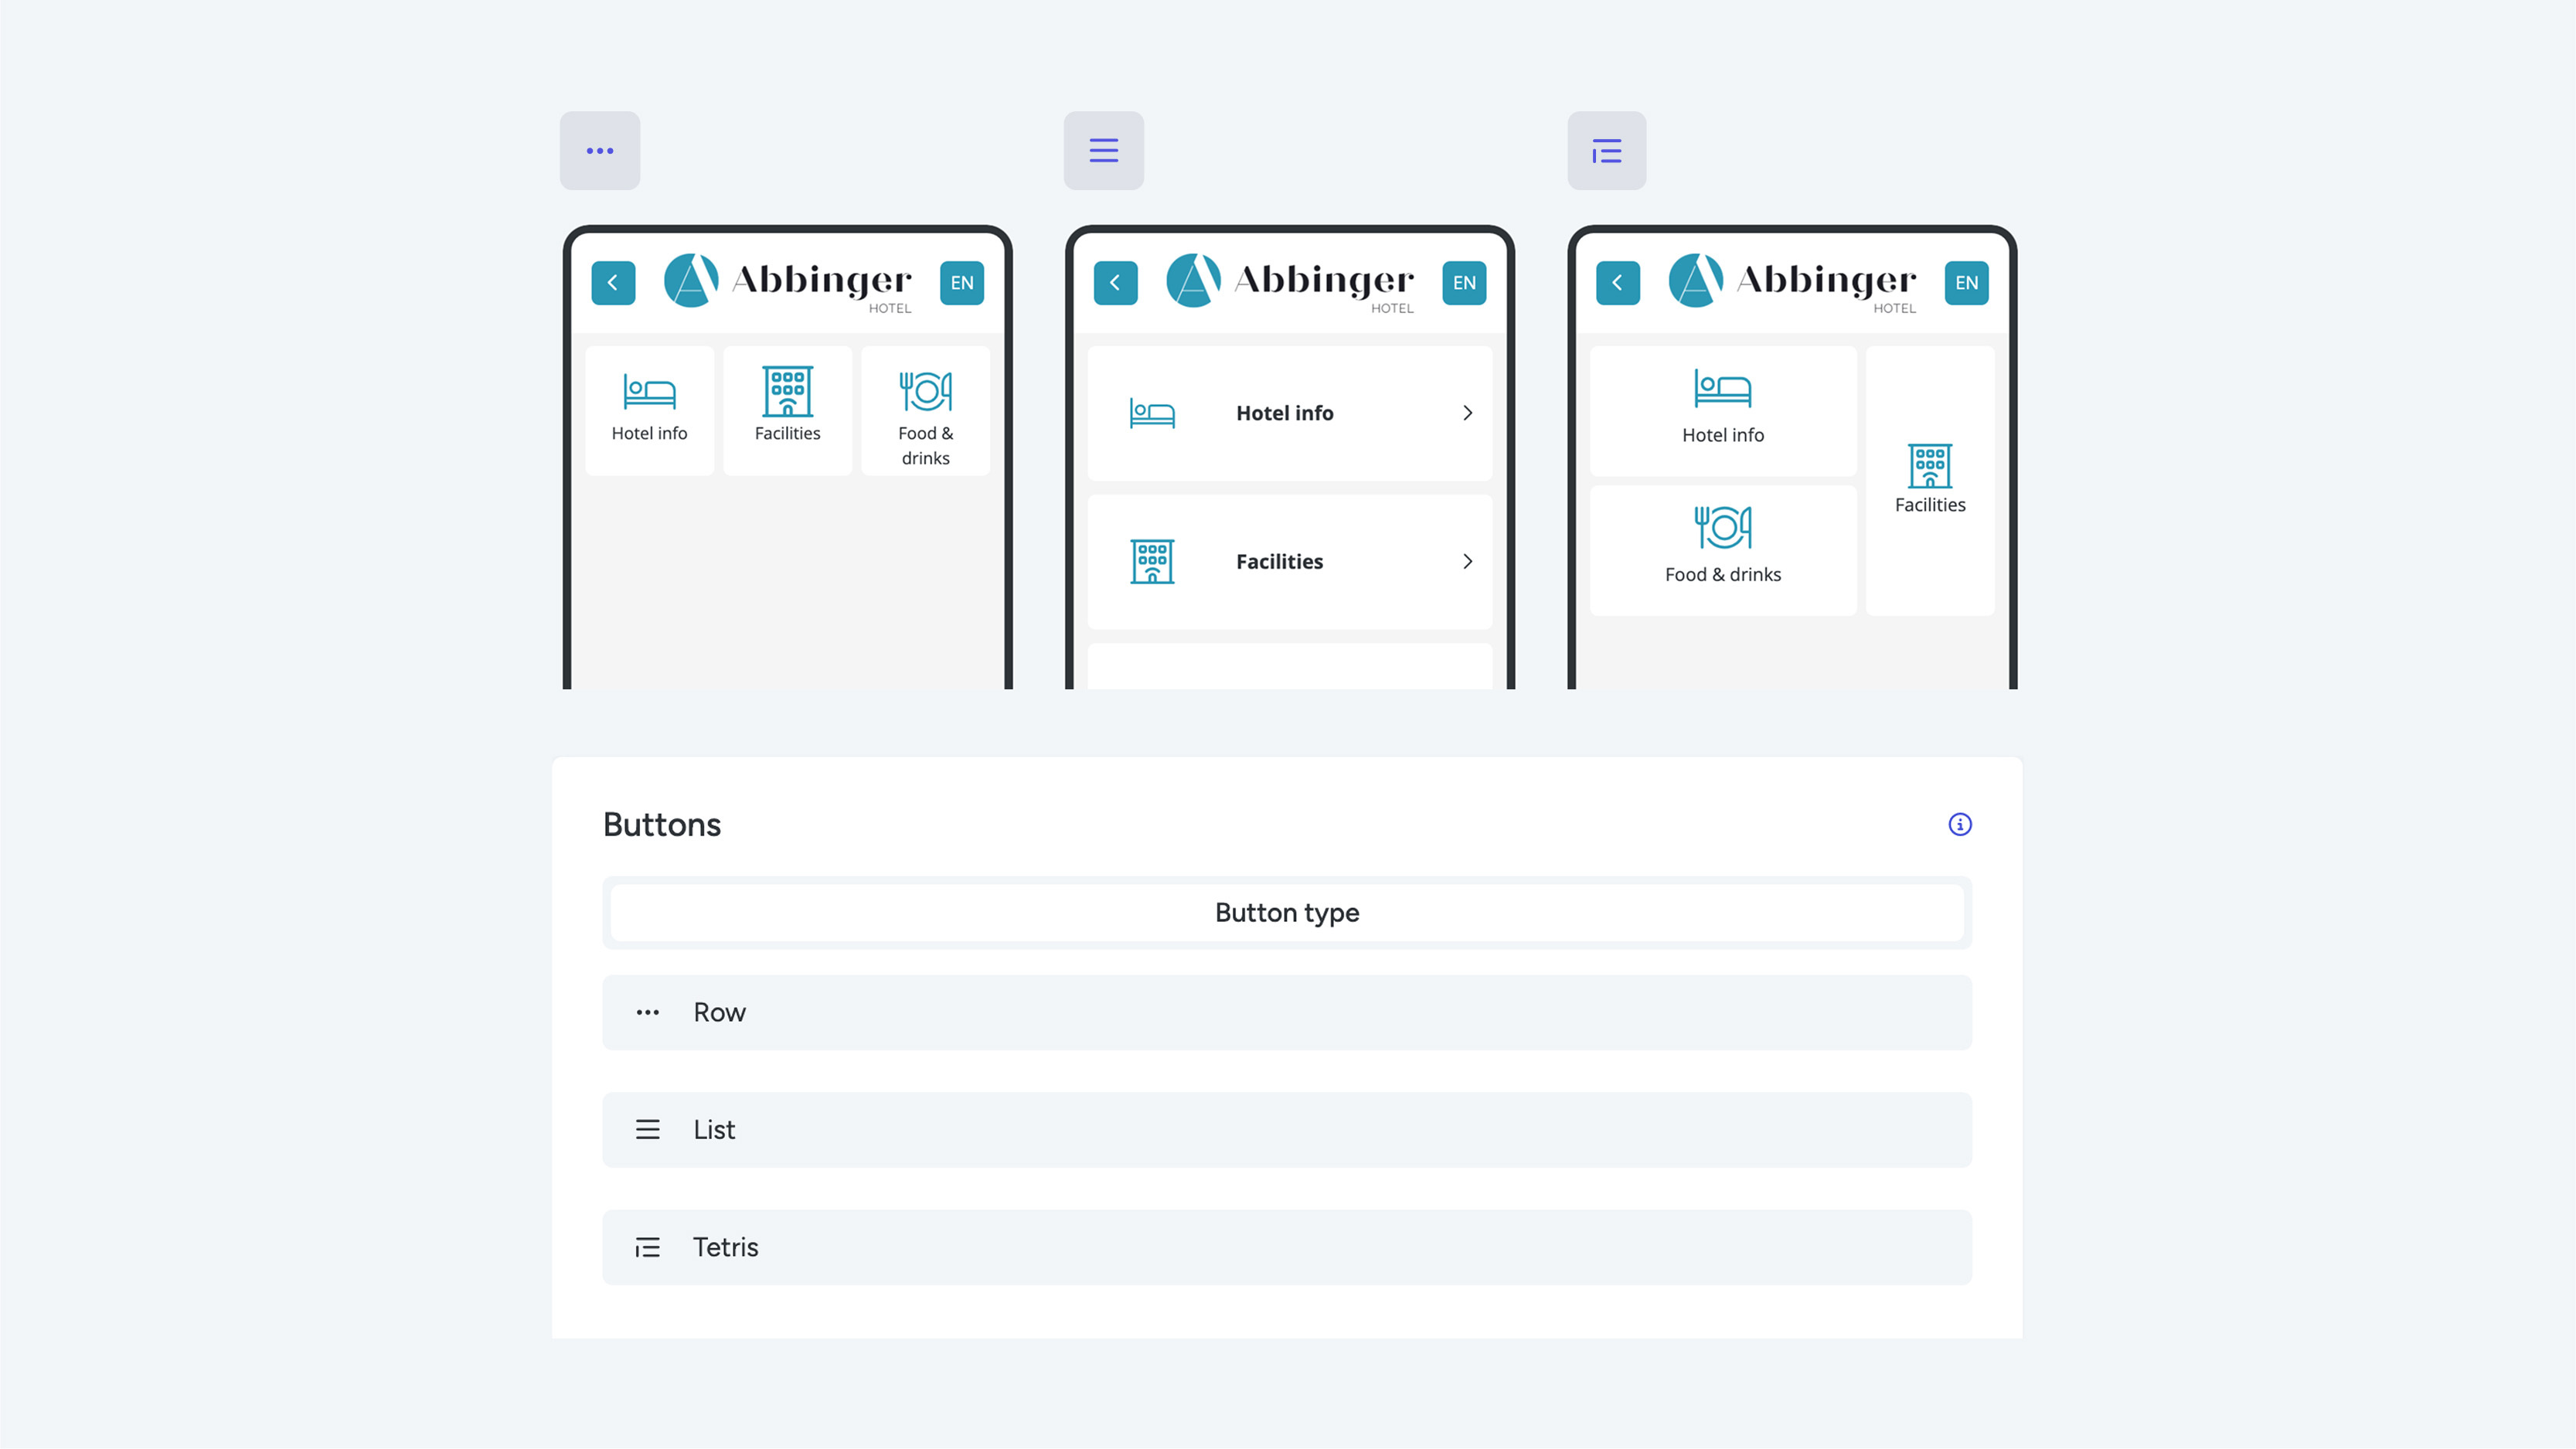
During the design of your (Web)App, you can choose from three different navigation button types:
- Row
- List
- Tetris
When you select one of these options, a settings menu appears where you can configure the buttons further.
Row Buttons
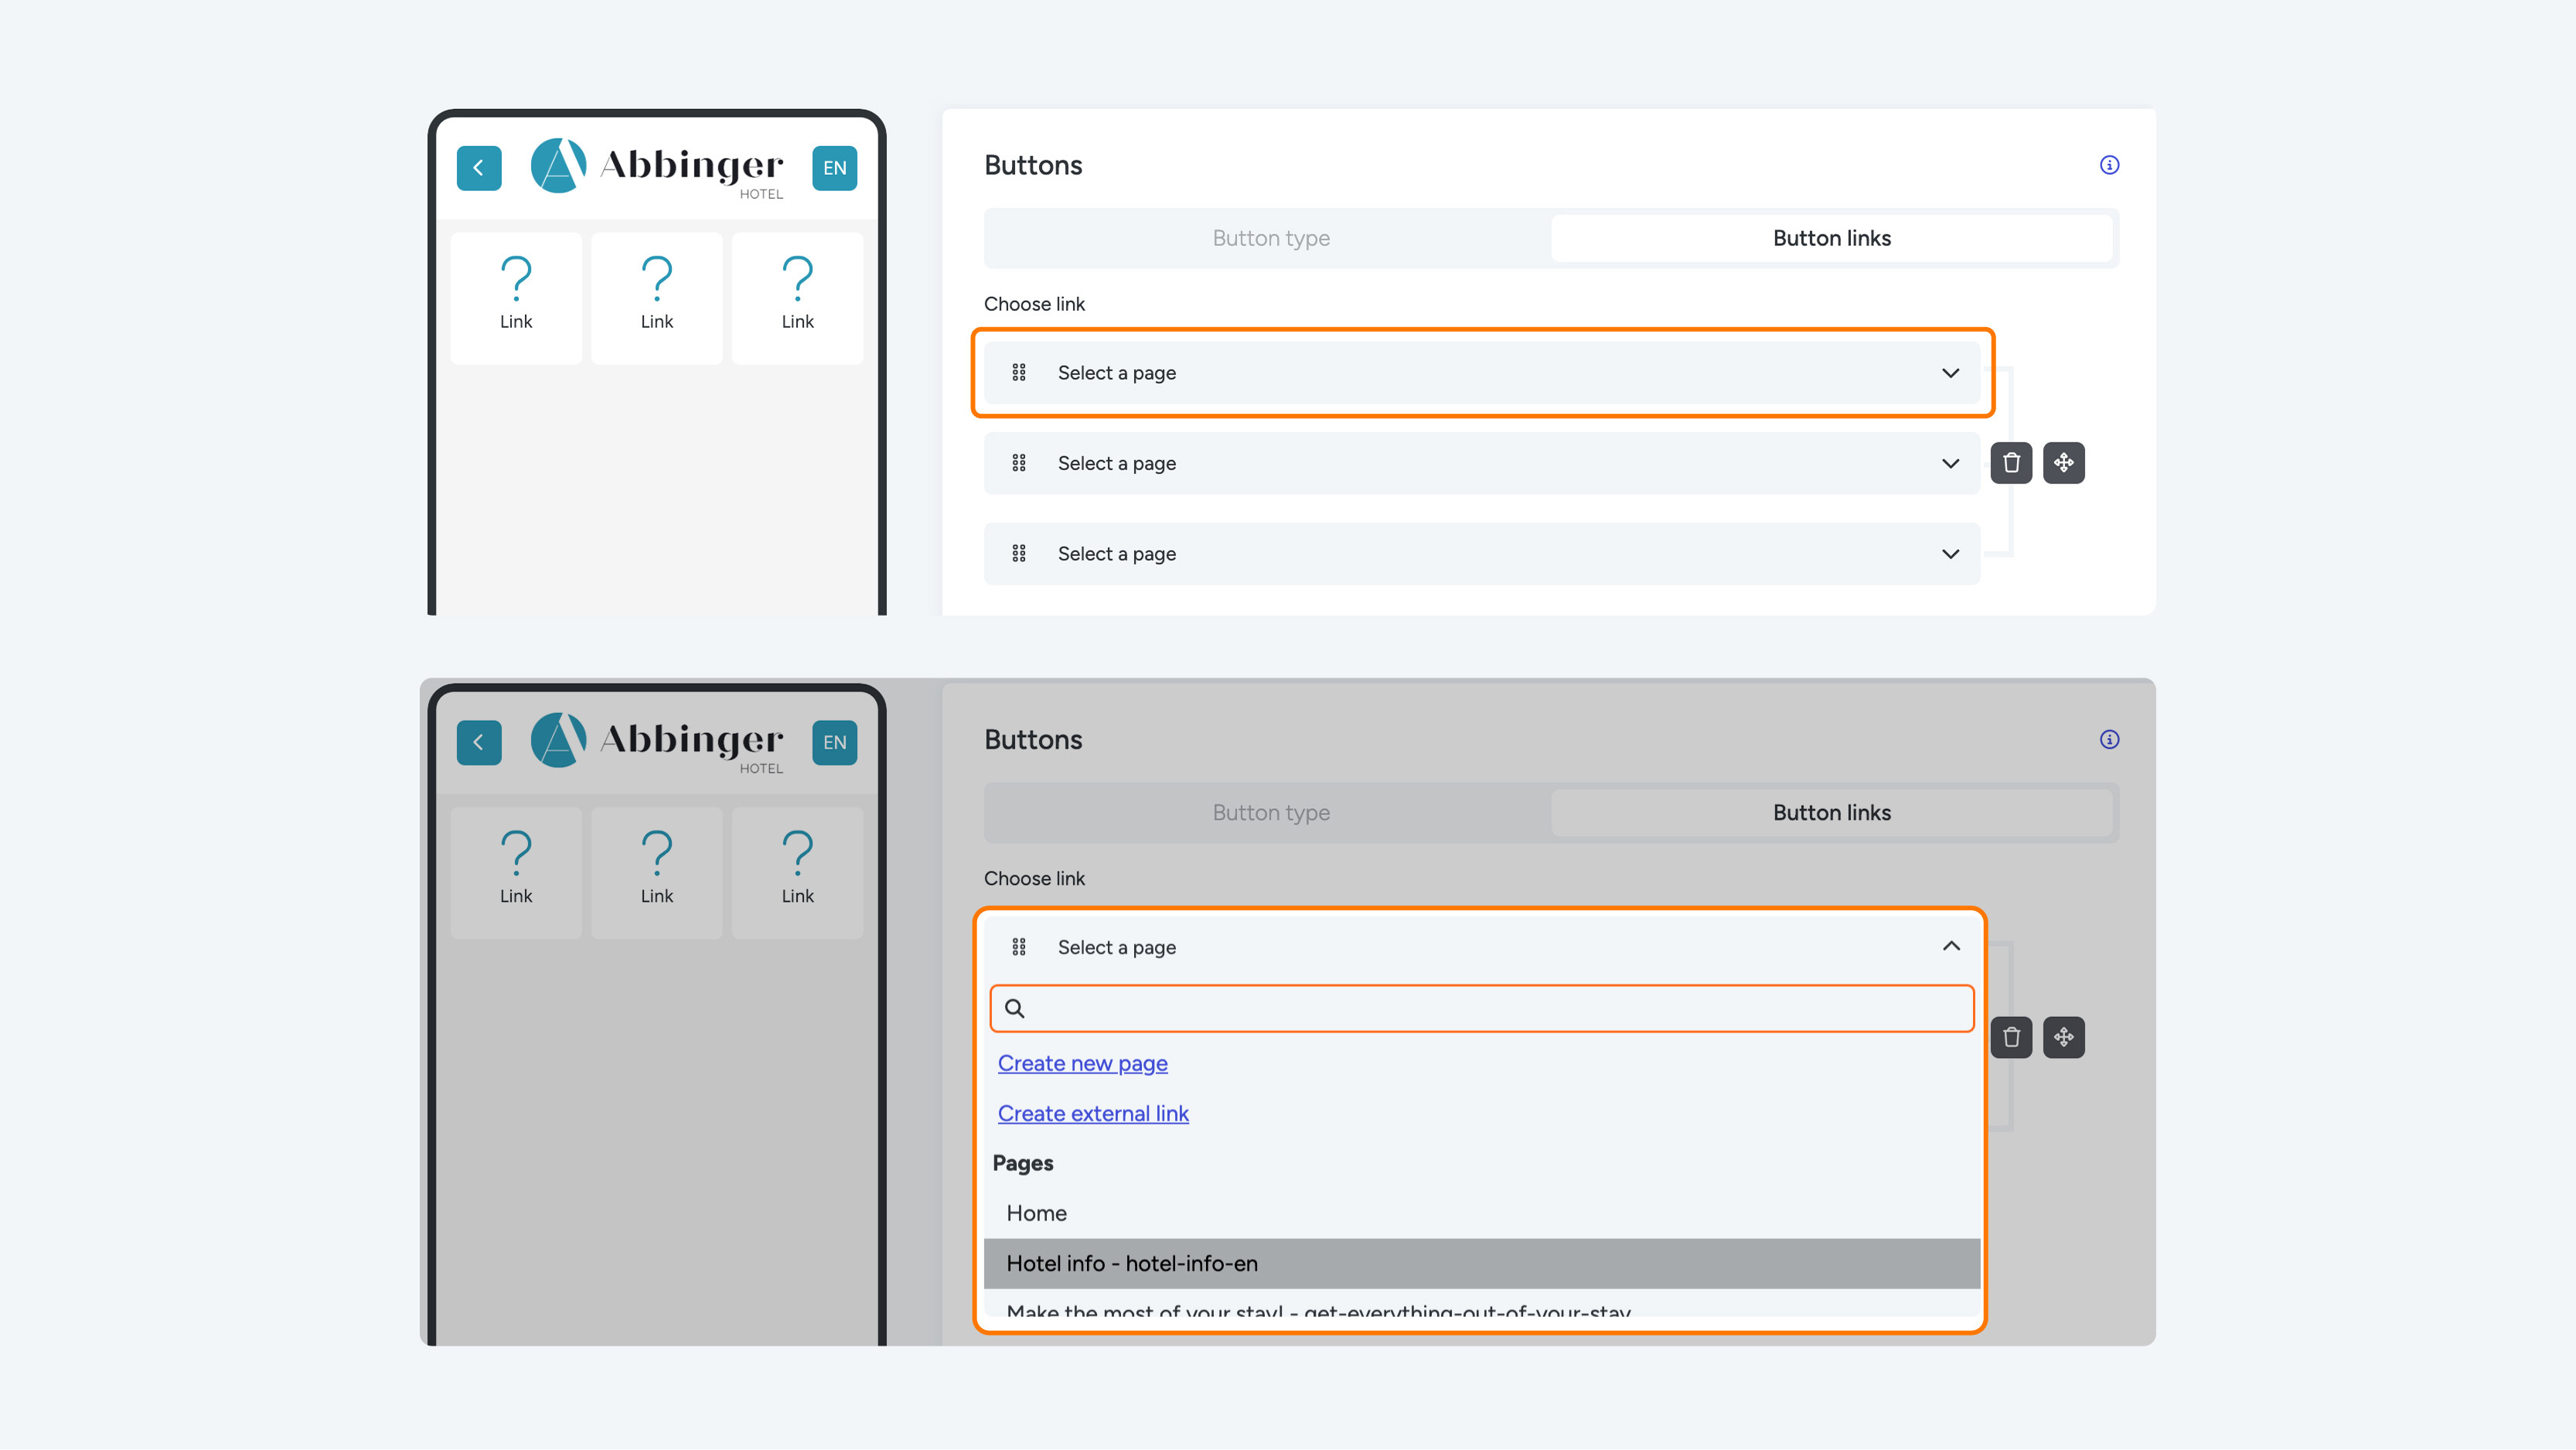
When you choose Row buttons, three dropdown menus will appear on your screen. In the first dropdown menu, called “Select a page,” a list of all available pages is displayed. Here you can choose from the following options:
- Add new page
- Add external link
- Add existing page (scroll down the list)
Once you make a selection, the dropdown collapses, and the selected option becomes visible in one of the three dropdown menus. Note: You cannot save the module until the other two dropdown menus are also filled.
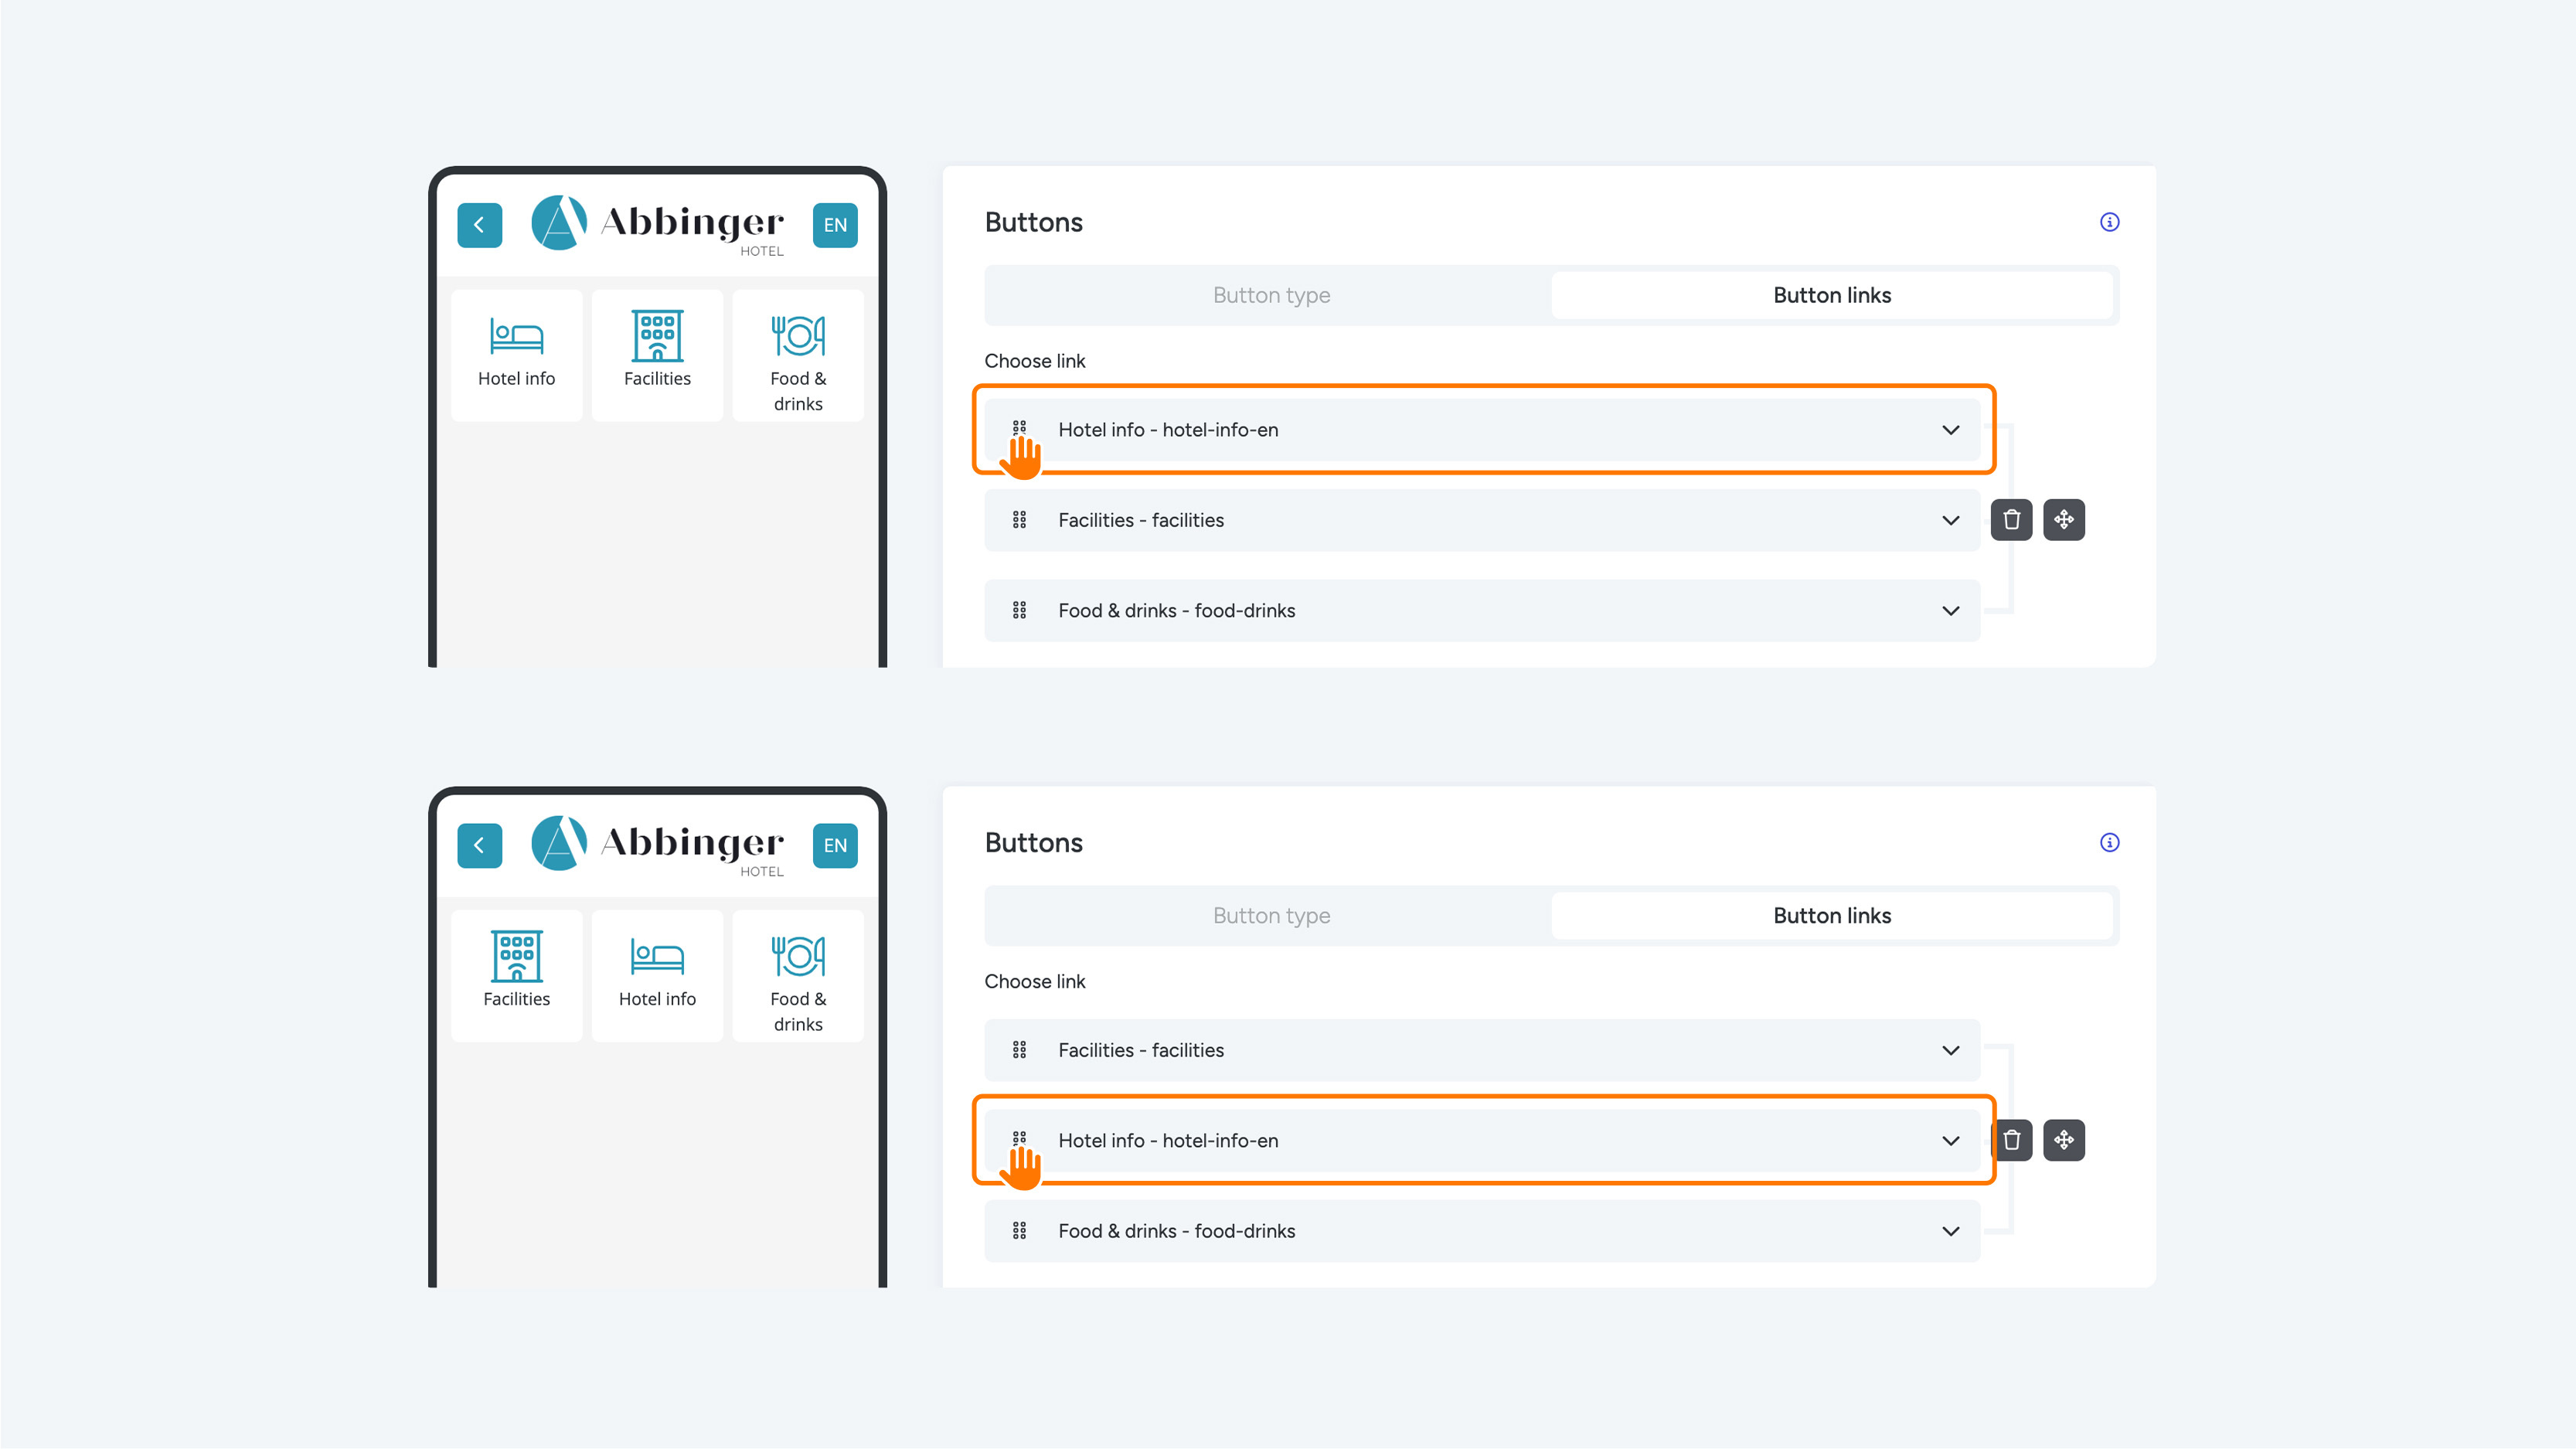
After setting the other dropdowns, you can easily adjust the order of the buttons. Drag the title using the drag & drop icon to the desired position in the row.
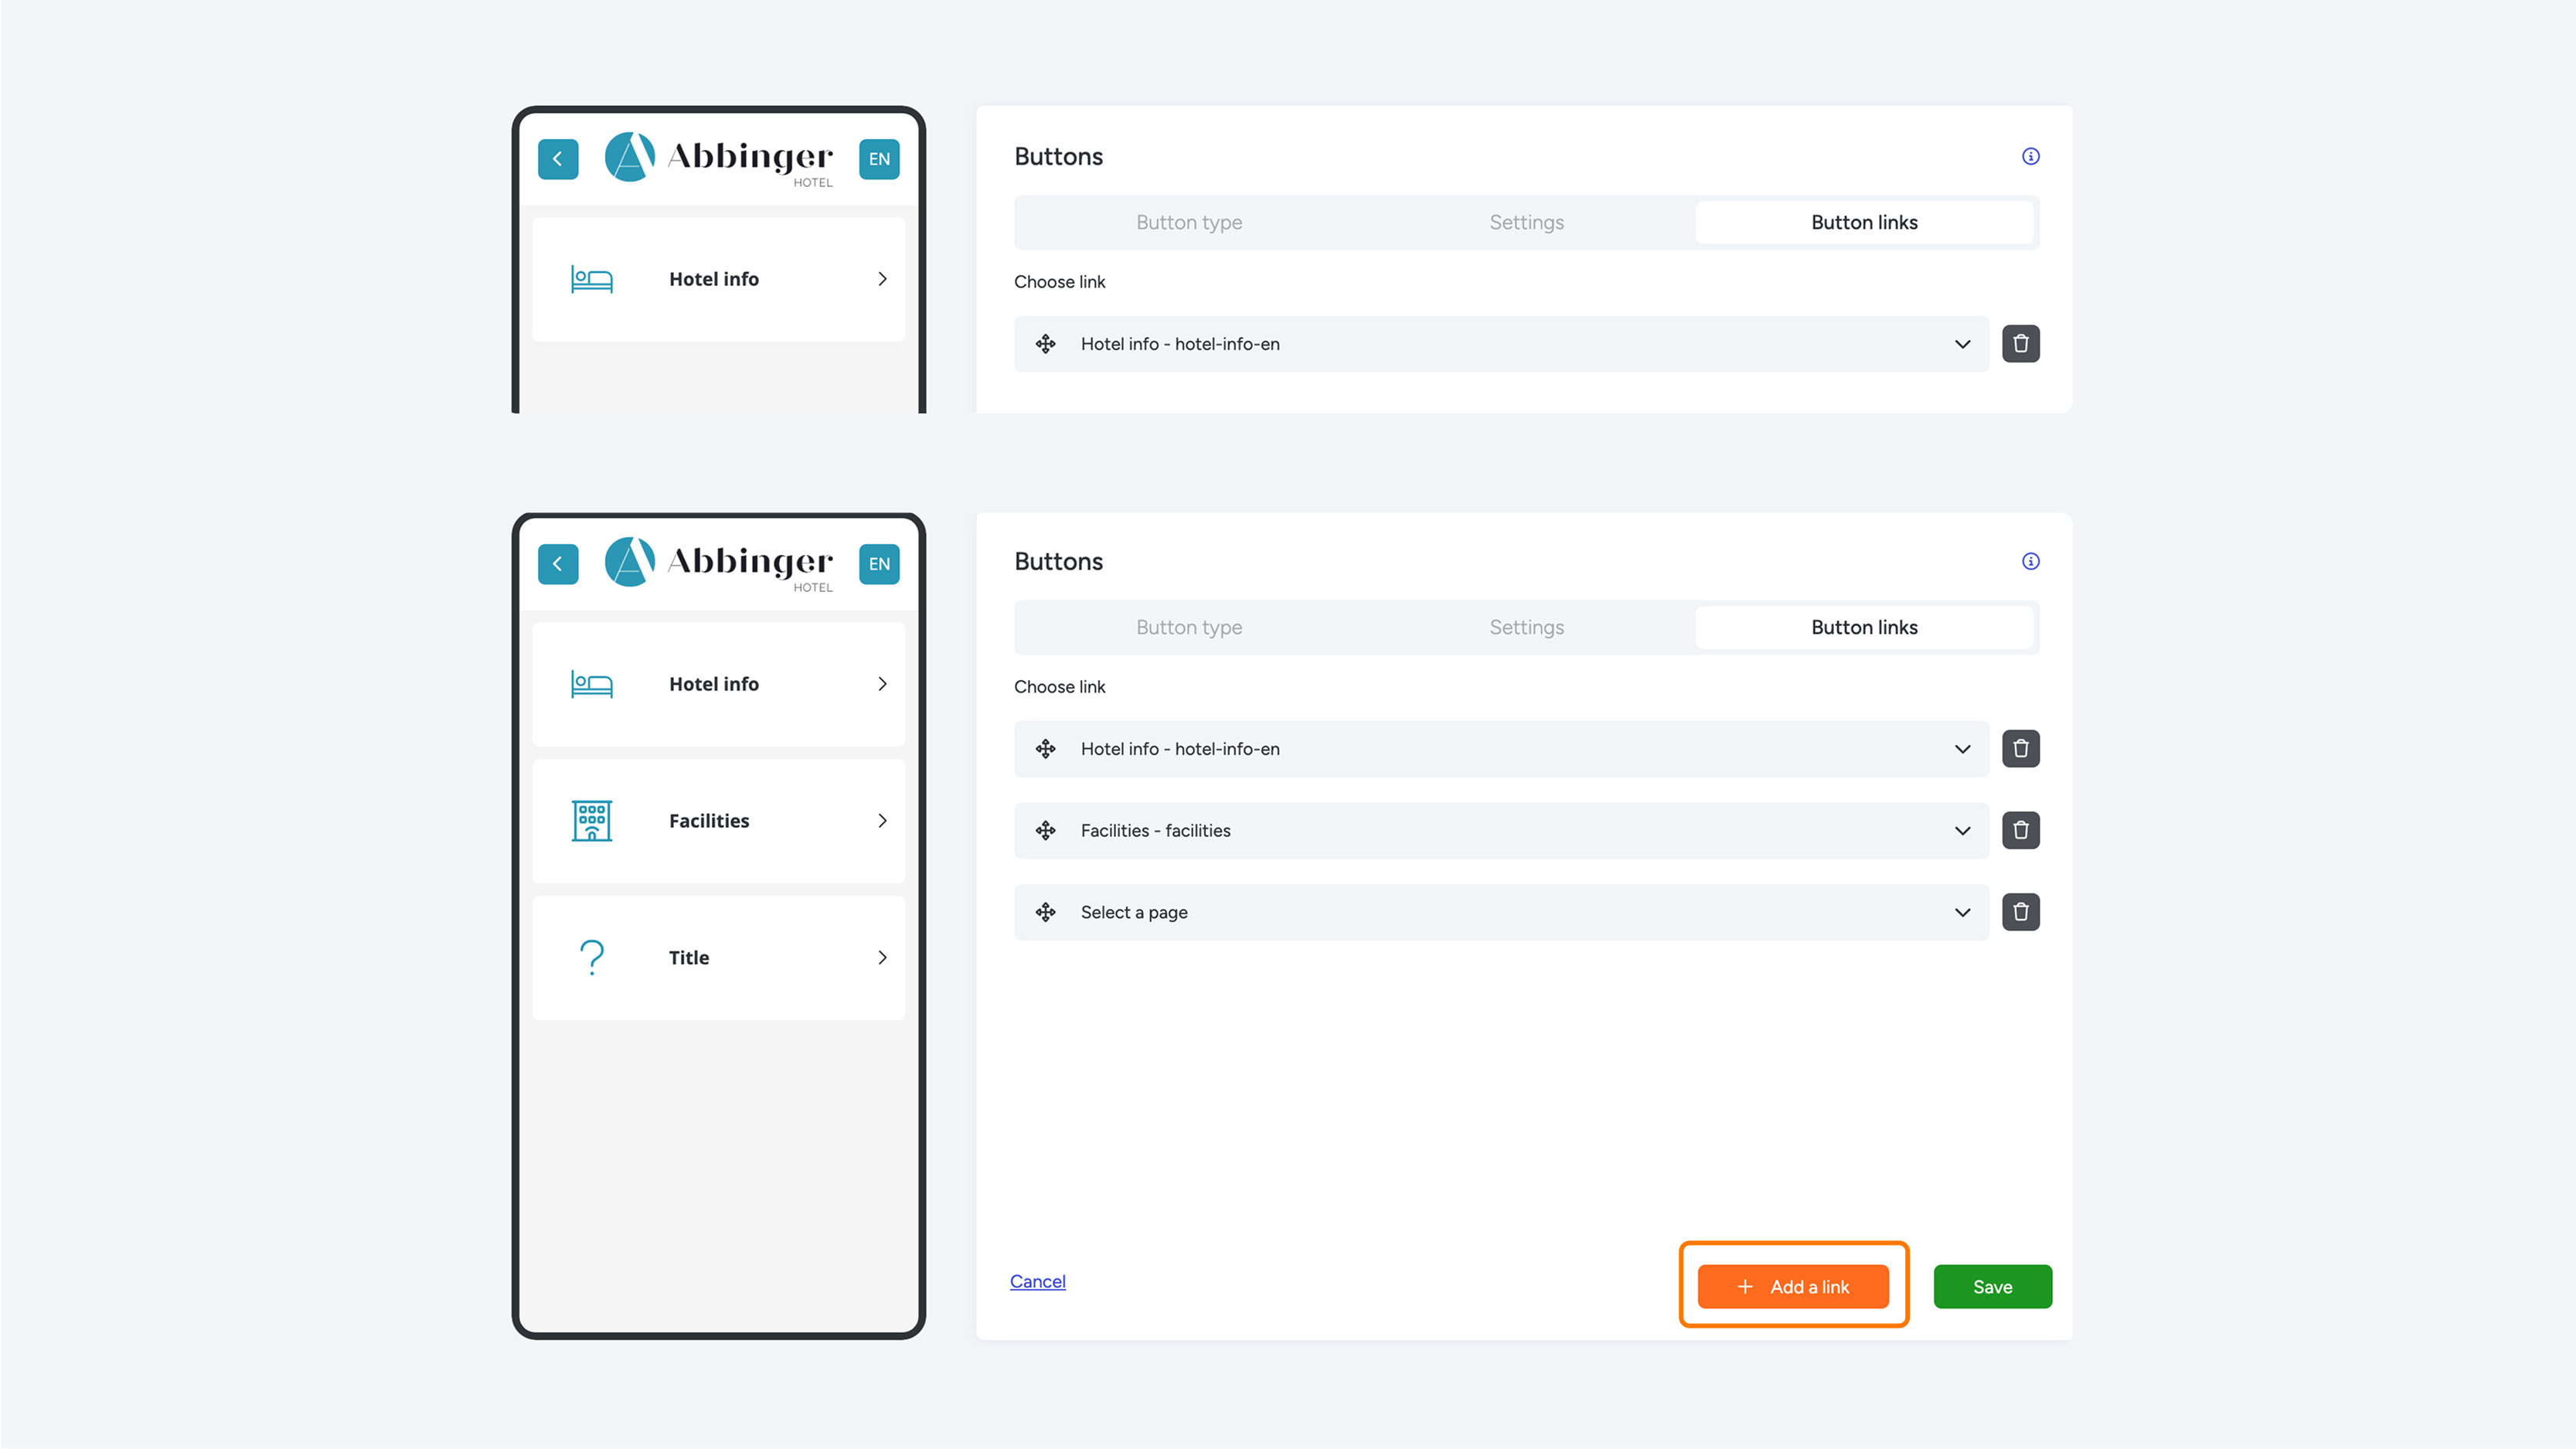
Want more than 3 buttons side by side in the module? Click the orange “Add a link” button. This adds three new dropdown menus to the settings, which will also appear in the mobile view of your app. You can now place more Row buttons next to (and below) each other.
Important: When choosing Row, you must always select three pages in the dropdown. A row with only one or two pages is not possible. In that case, choose a List or Tetris button instead.
List Buttons
When you choose a List button, it spans the full width of the screen. In the second tab, “Settings,” you can choose an icon or image. If you select an icon, you can later pick one from the icon library. If you select an image, you can upload one yourself or choose from existing files. Additionally, you can optionally add a subtext, which is a short explanation or sentence that appears below the title.
When using a List button, a dropdown menu appears on the screen. In the first dropdown menu, called “Select a page,” you see a list of all available pages. You can choose from the following options:
- Add new page
- Add external link
- Add existing page (scroll down the list)
After configuring the other dropdown menus, you can easily adjust the button order. Drag the title to the desired position in the list using the drag & drop icon.

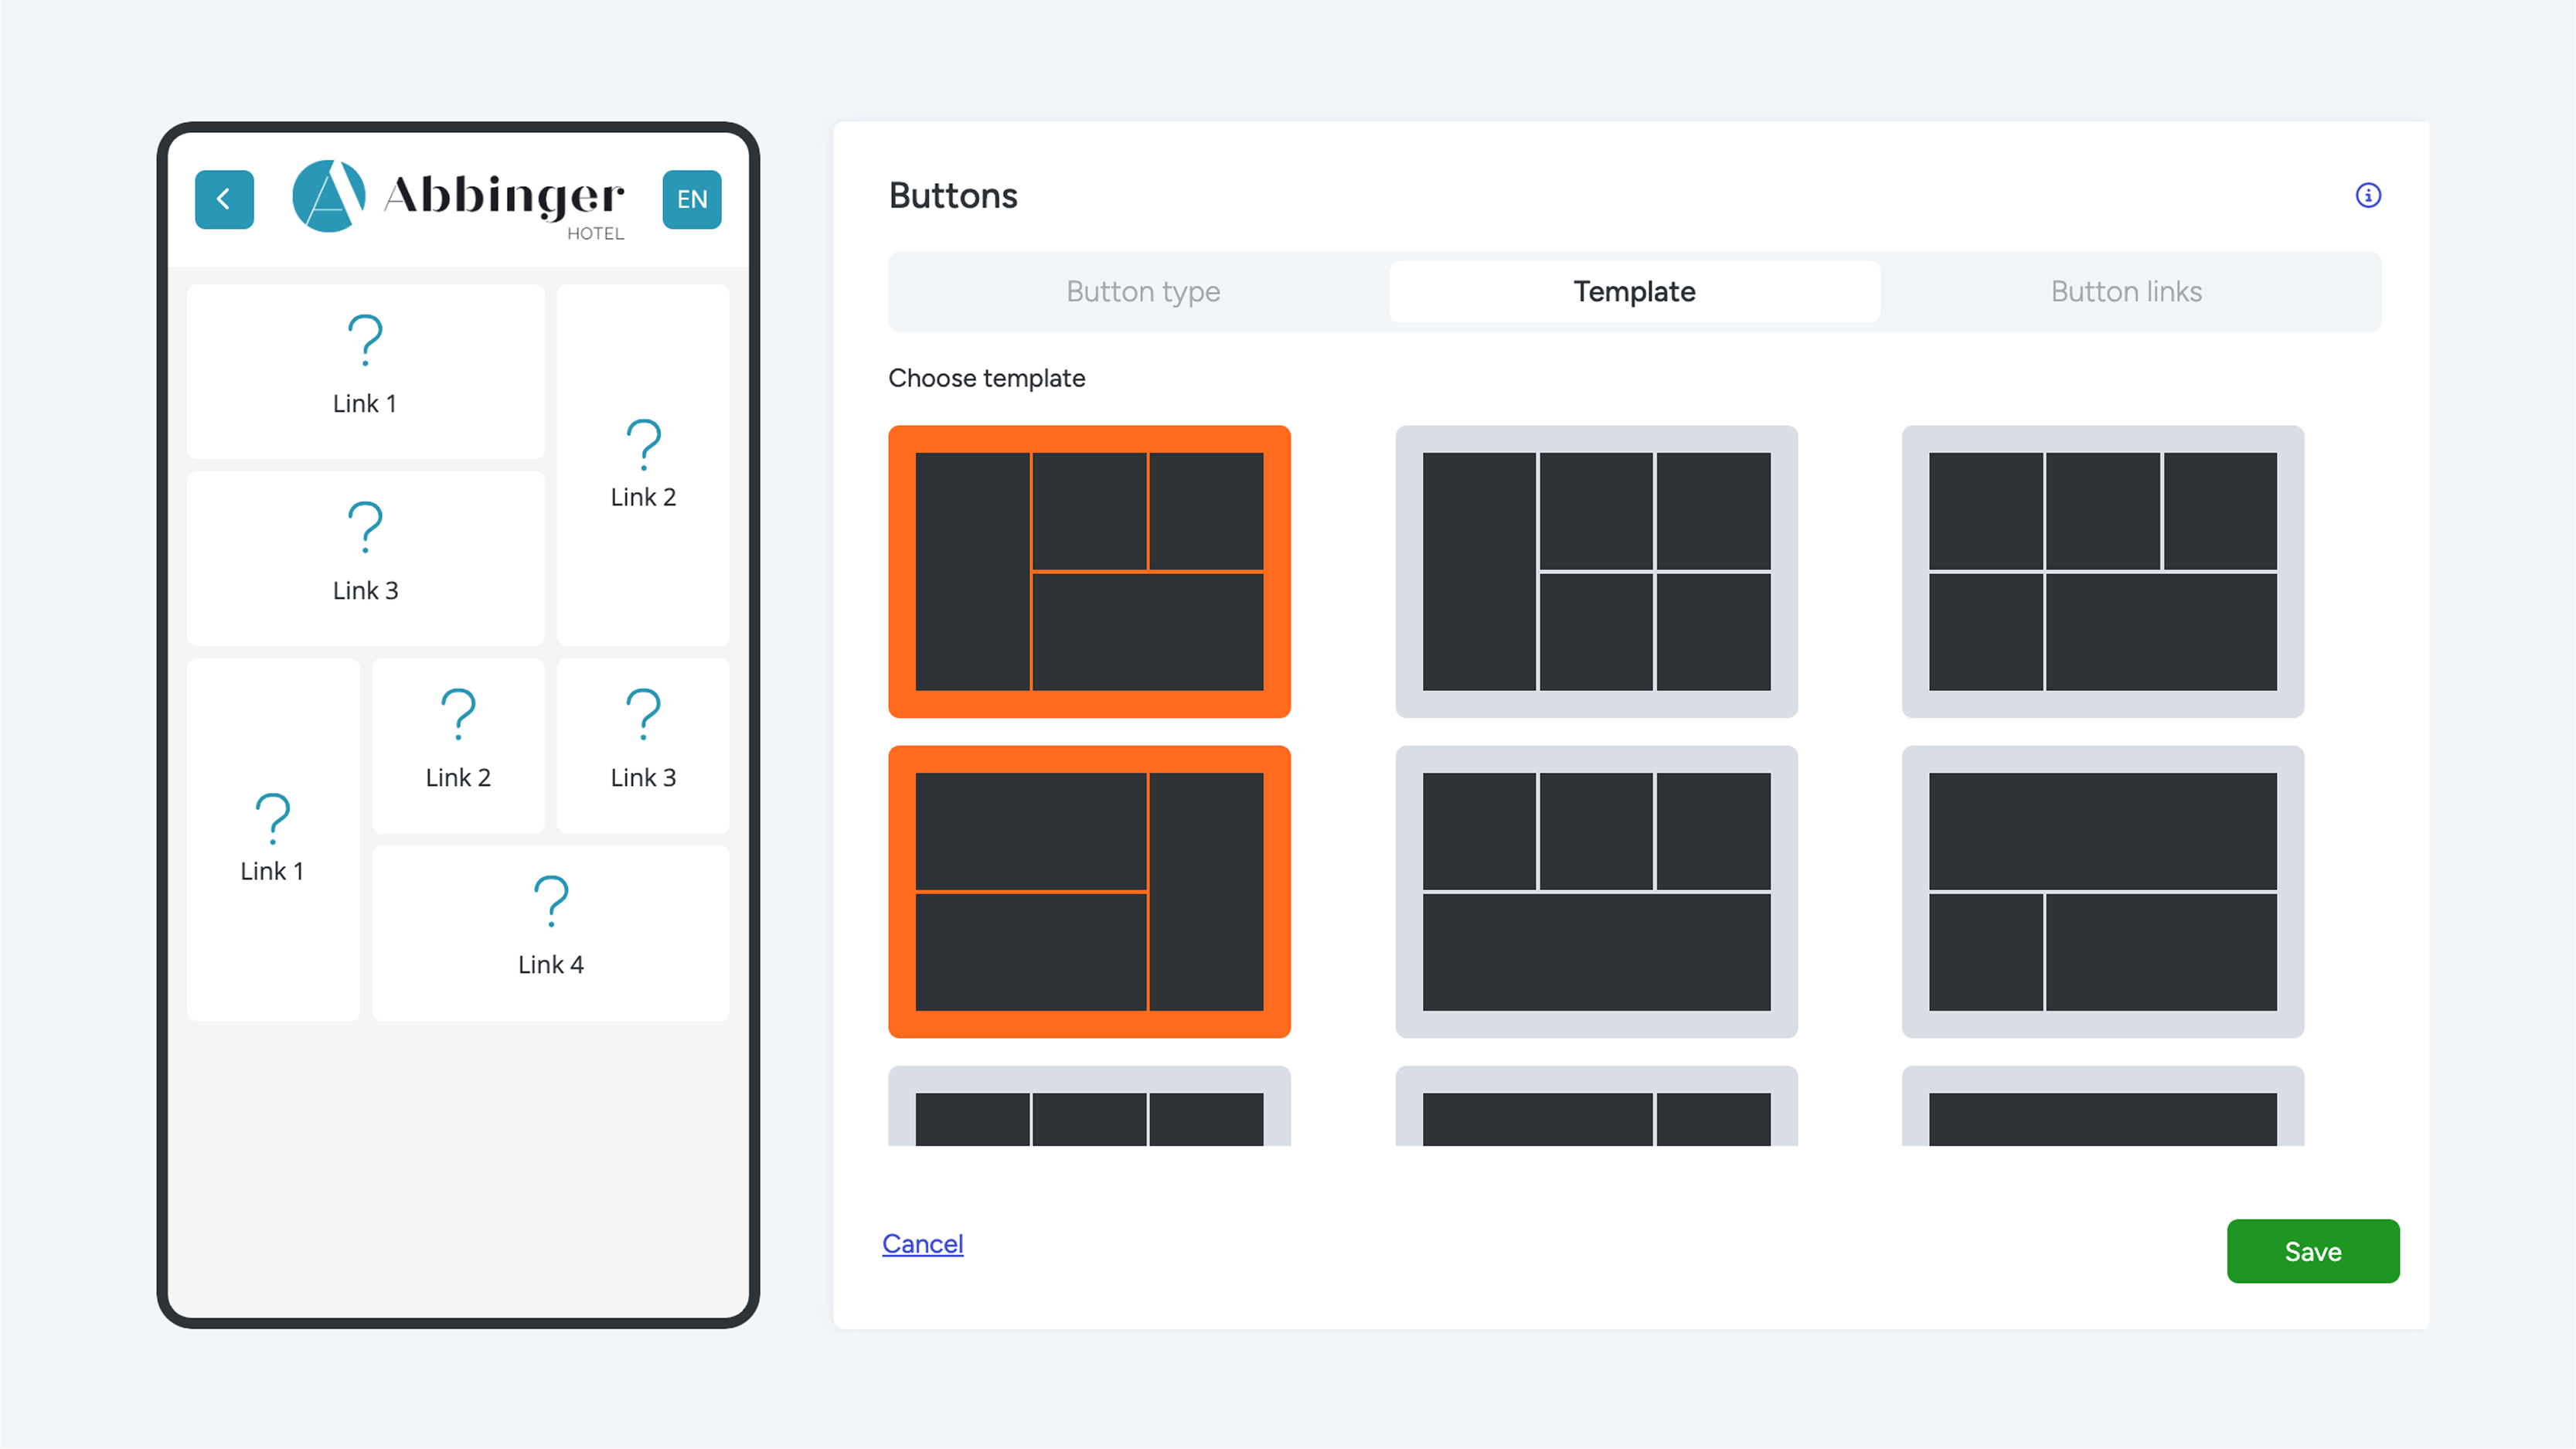
Tetris Buttons
If you want to combine images and icons, the Tetris button is an excellent choice. This option is ideal for grouping multiple pages in a single module, for example, when creating a room map.
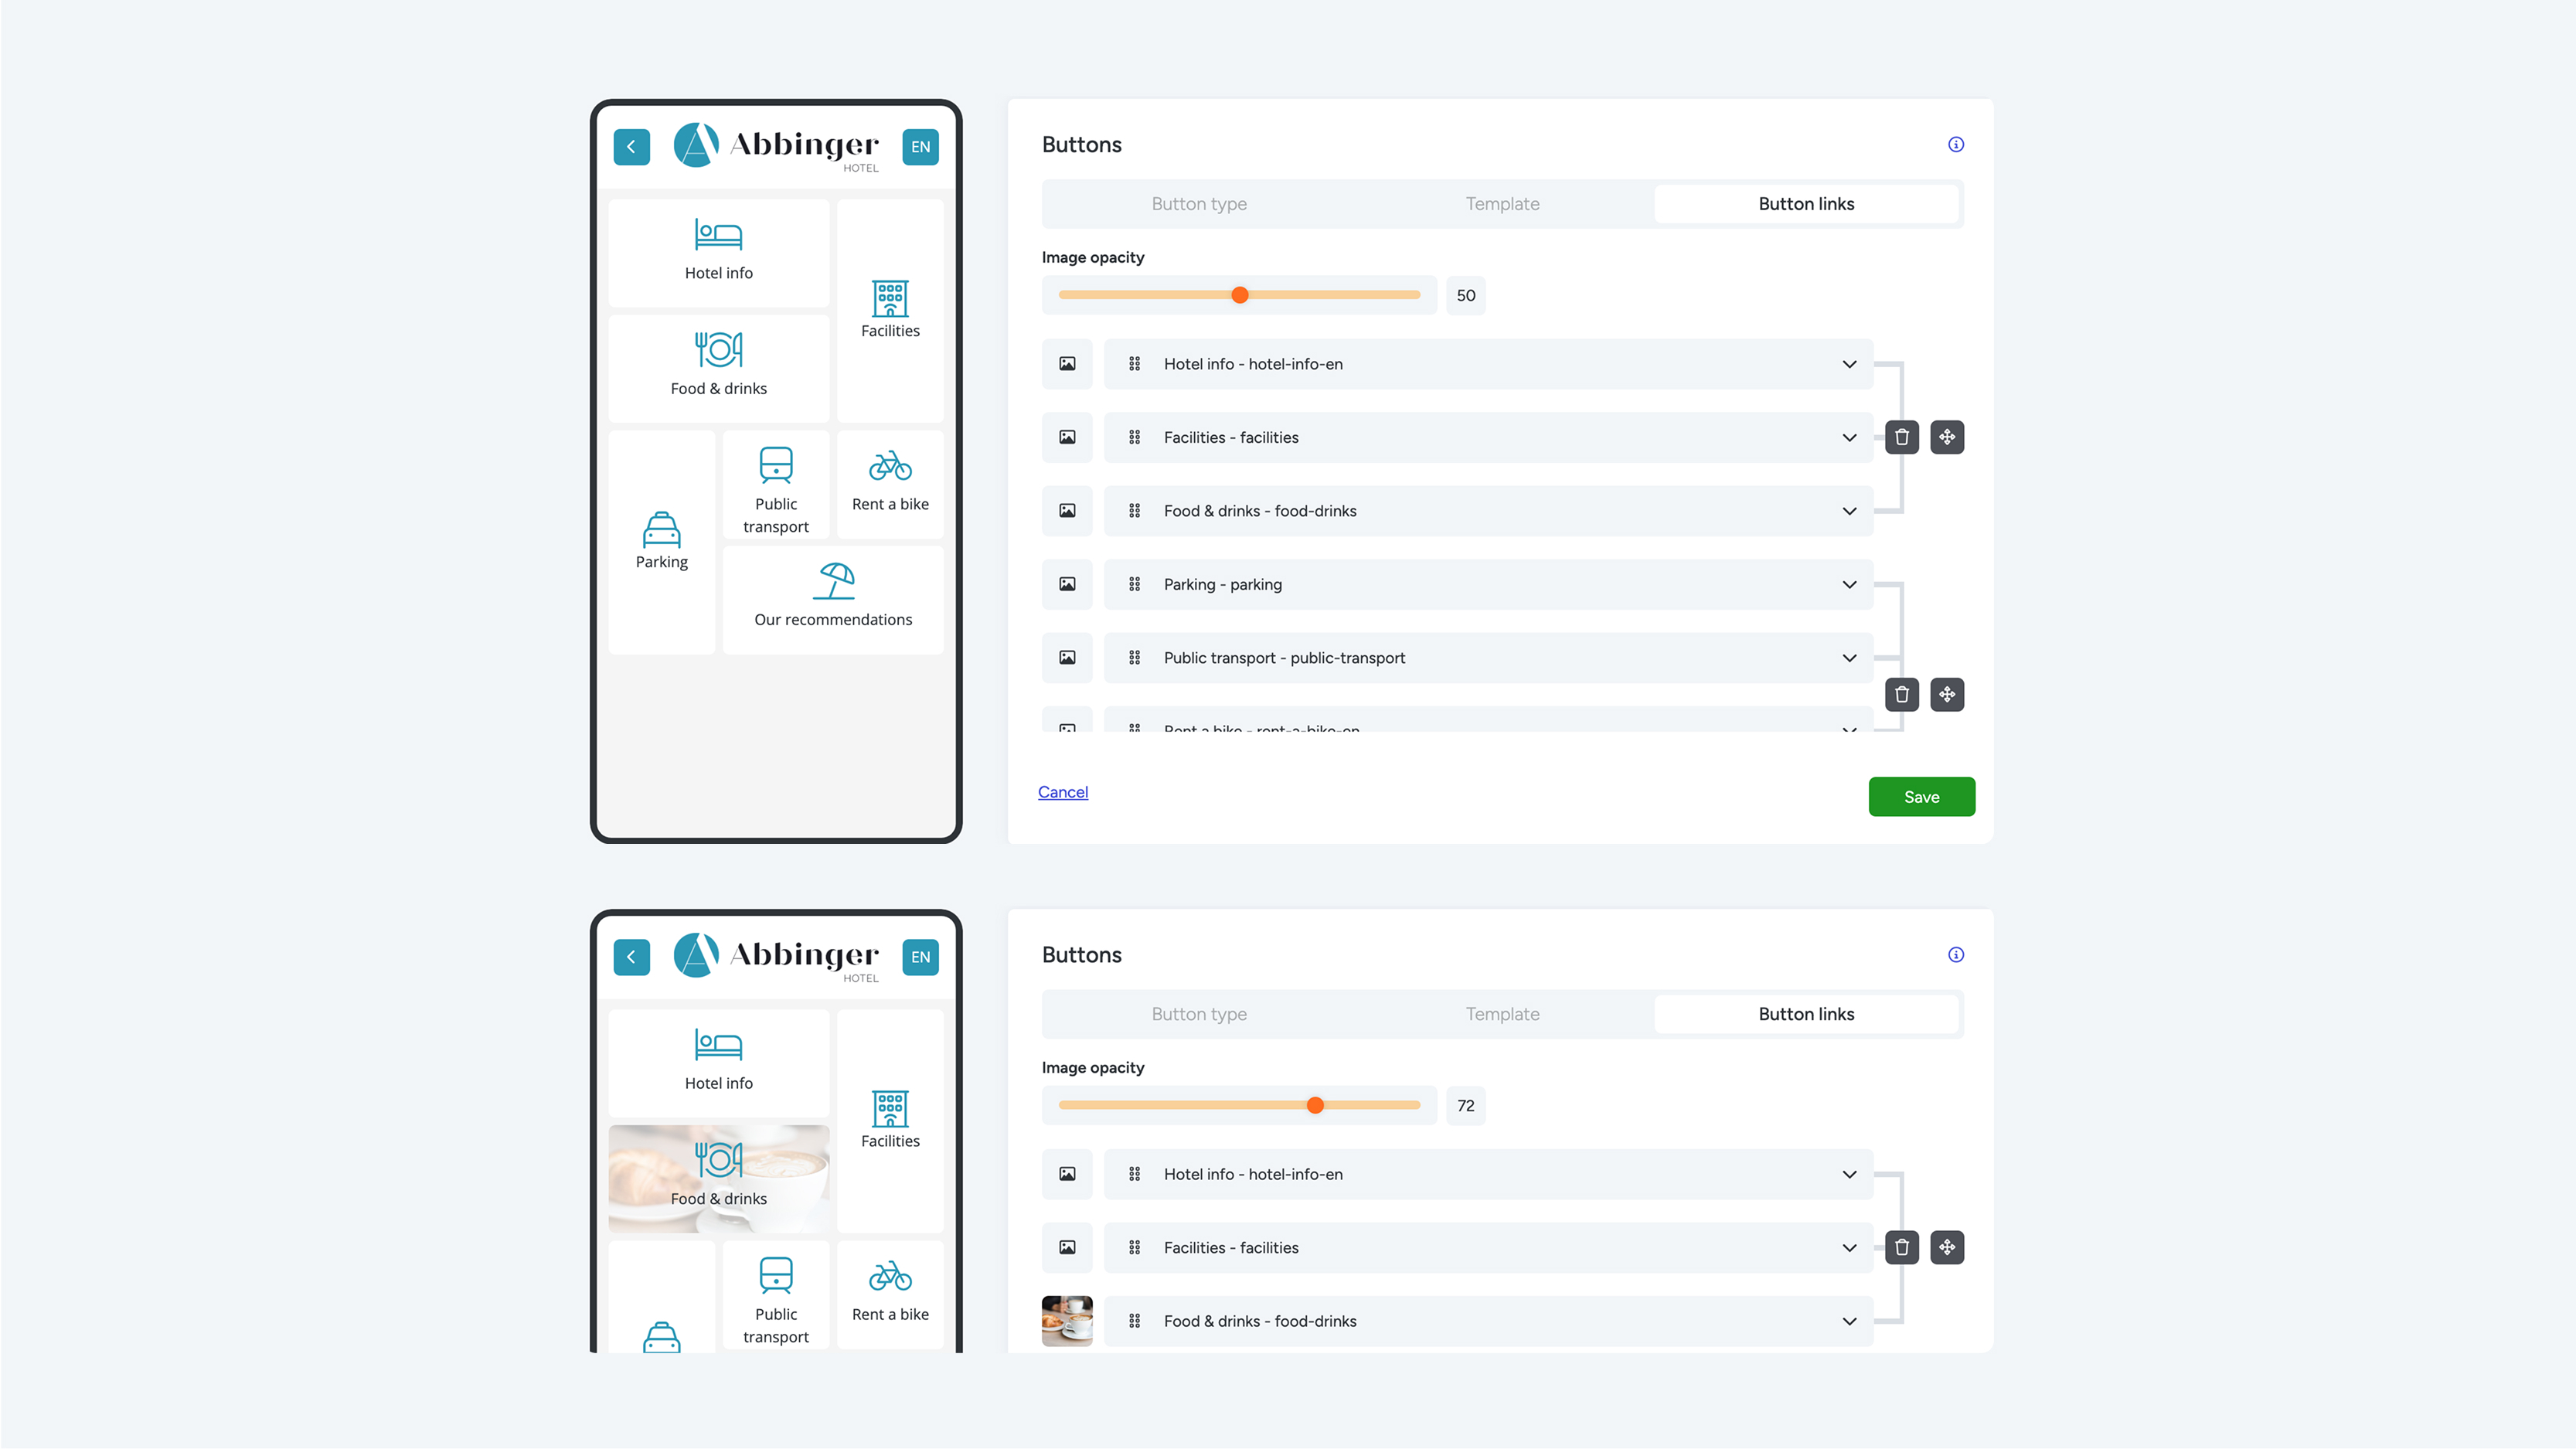
When you select Tetris buttons, you can choose from 9 different templates. Click on the desired template, and you can select multiple templates at the same time. To populate the templates, go to the last tab, “Button Links.”
In the Button Links section, fill in the pages (links) for the Tetris module. Click “Link 1” to add the first page. When clicking the dropdown, a list of options appears:
- Add new page
- Add external link
- Add existing page (scroll down the list)
After selecting the desired pages in the dropdown, you can choose to add an image as a button background. This option is located on the left side of the Links (pages).
Once the other dropdown menus are configured, you can easily adjust the order of the buttons. Drag the title to the desired position using the drag & drop icon.
You must fill in all links (pages) in the module to save it. Important: If any links are missing, the module cannot be saved.