6. Text and heading
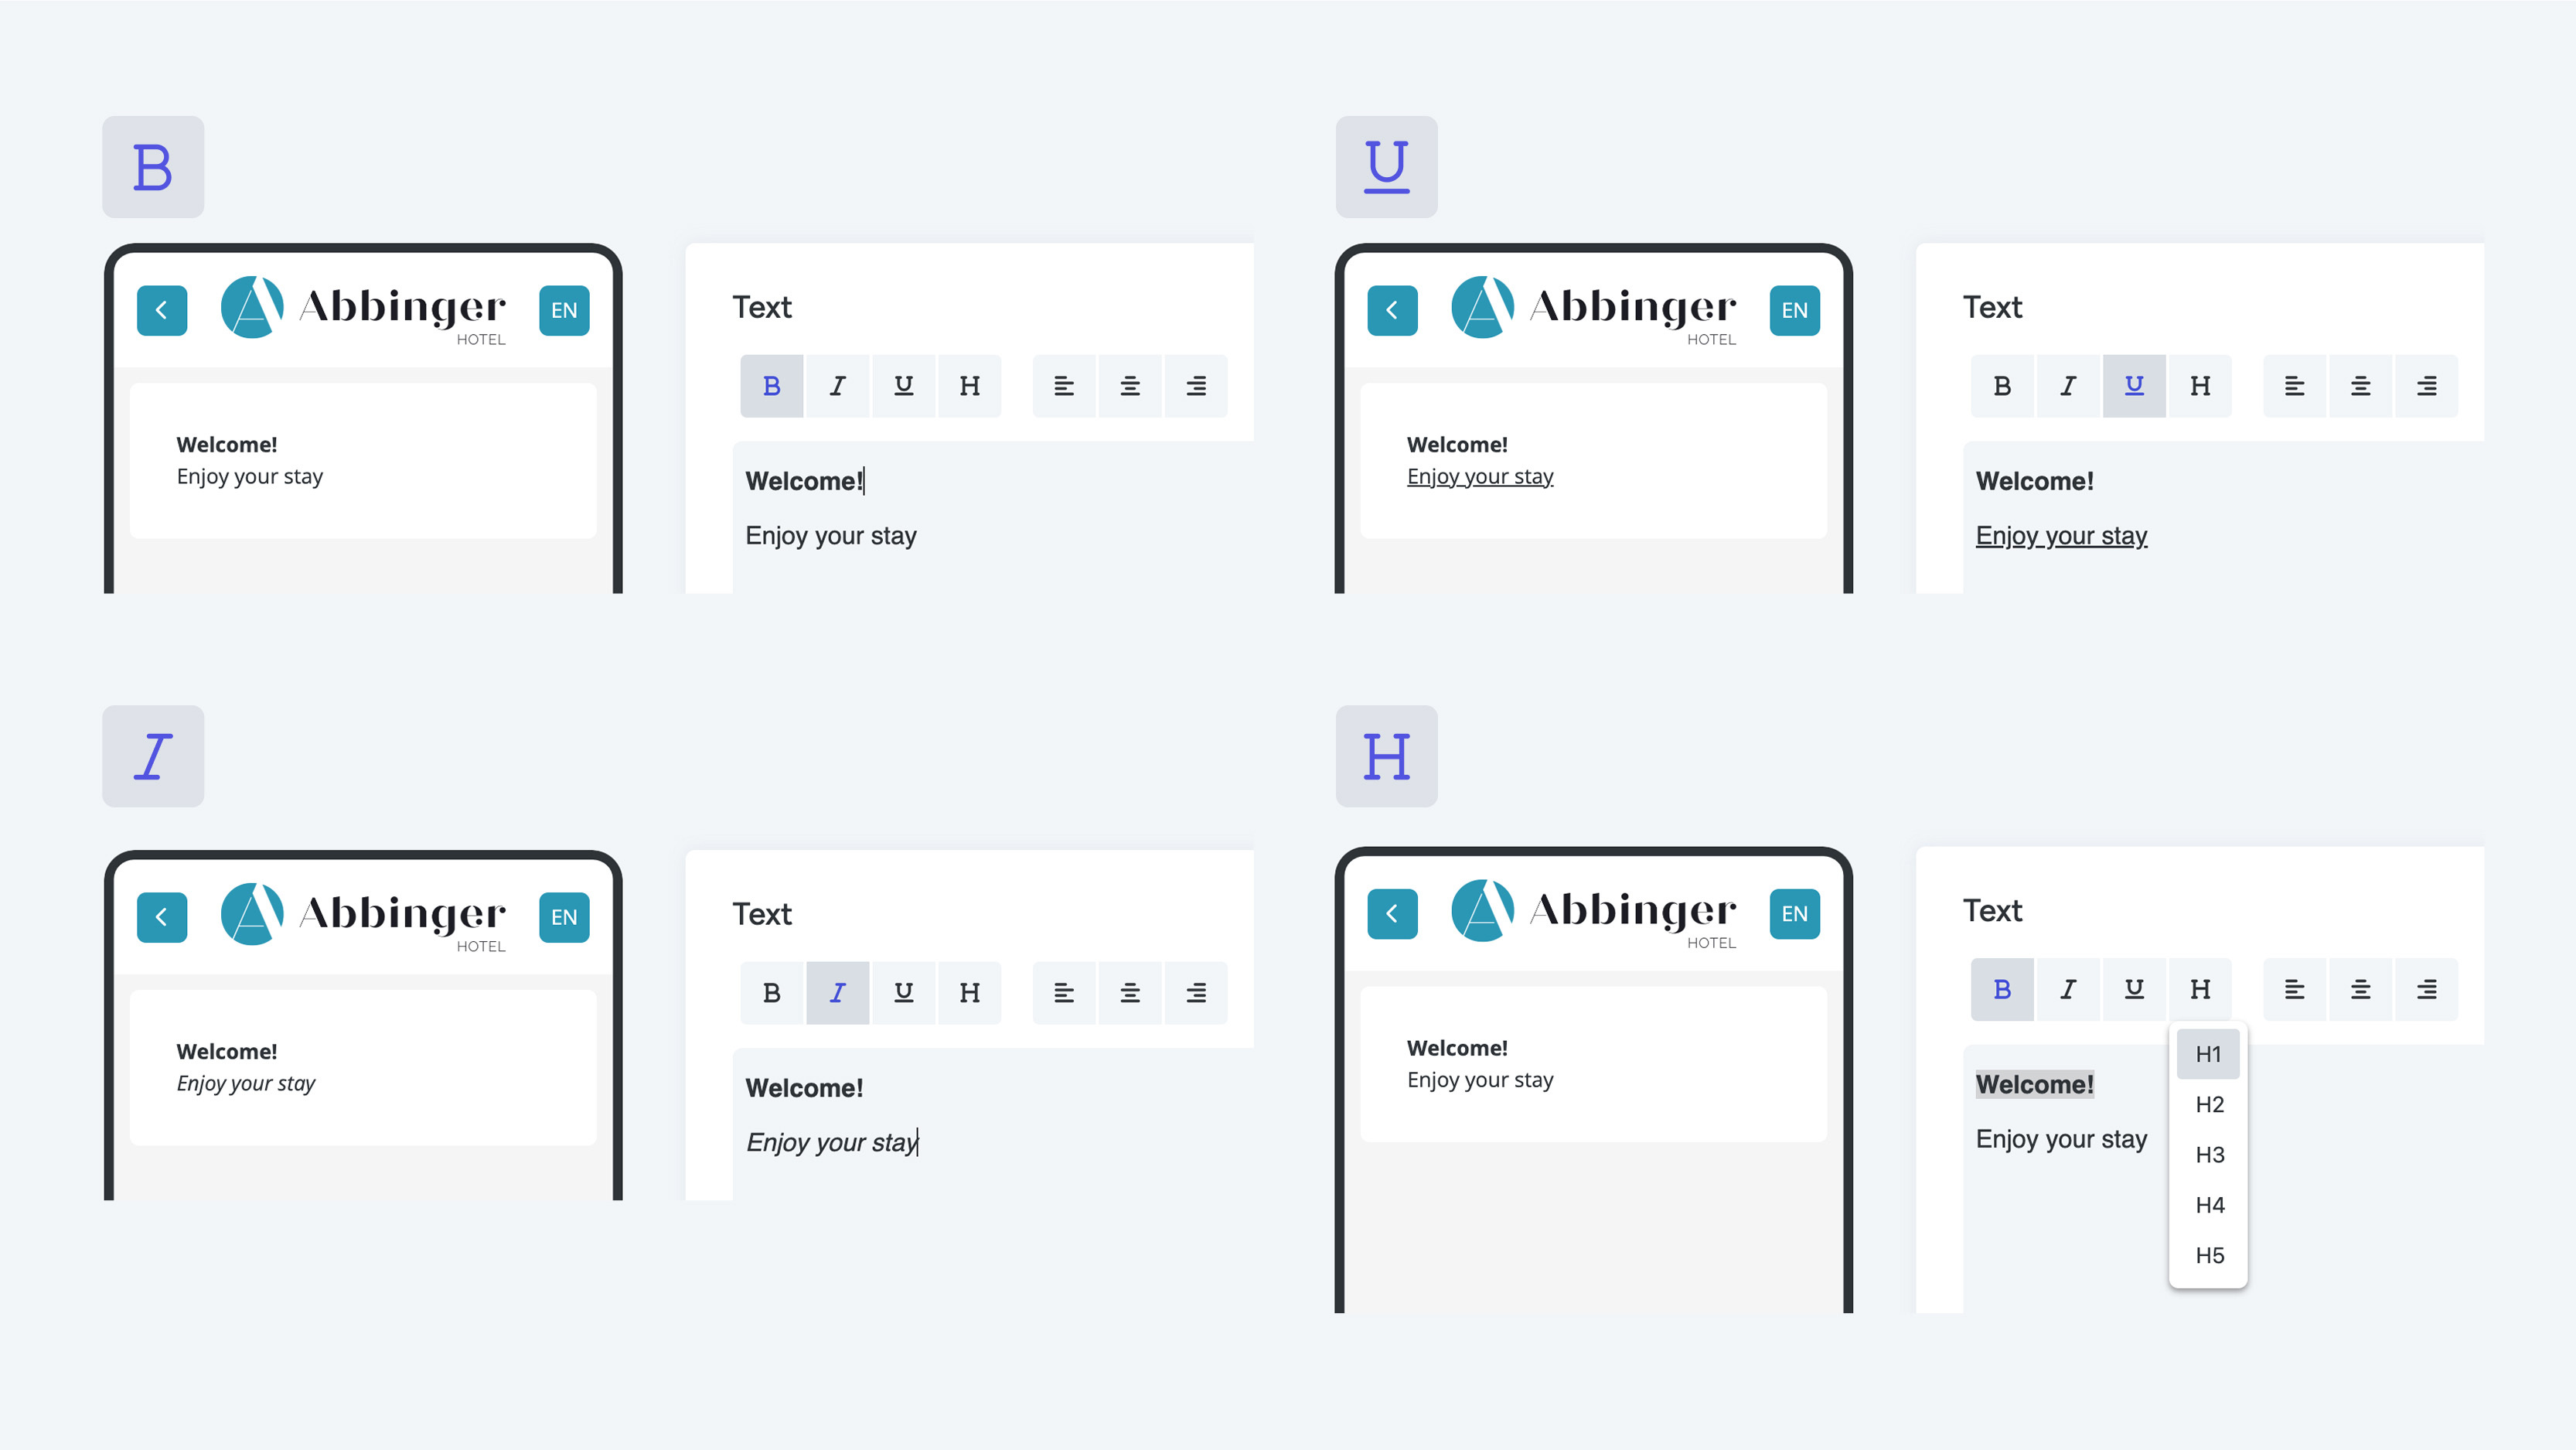
Text
Simply drag the Text module into the phone preview. A settings panel will appear where you can enter your desired text. As you type, the text will instantly appear in the live preview, allowing you to immediately see how your content looks on screen.
To format your text and improve its appearance, you can use various styling options:
- Bold:
Displays the text thicker and darker so it stands out. - Italic:
Used to emphasize specific words or phrases. - Underline:
Adds a horizontal line beneath the text to highlight important information or distinguish certain words.
Headings:
Make your content more visually structured by adding headings. You can choose from different sizes, where H1 is the largest and H5 the smallest. If you only need a single heading, you can also use the Heading module.
You can also easily adjust the alignment of your text:
- Align left: Text is aligned to the left side of the page.
- Center: Text is centered on the page, ideal for titles or important announcements.
- Align right: Text is aligned to the right side of the page.
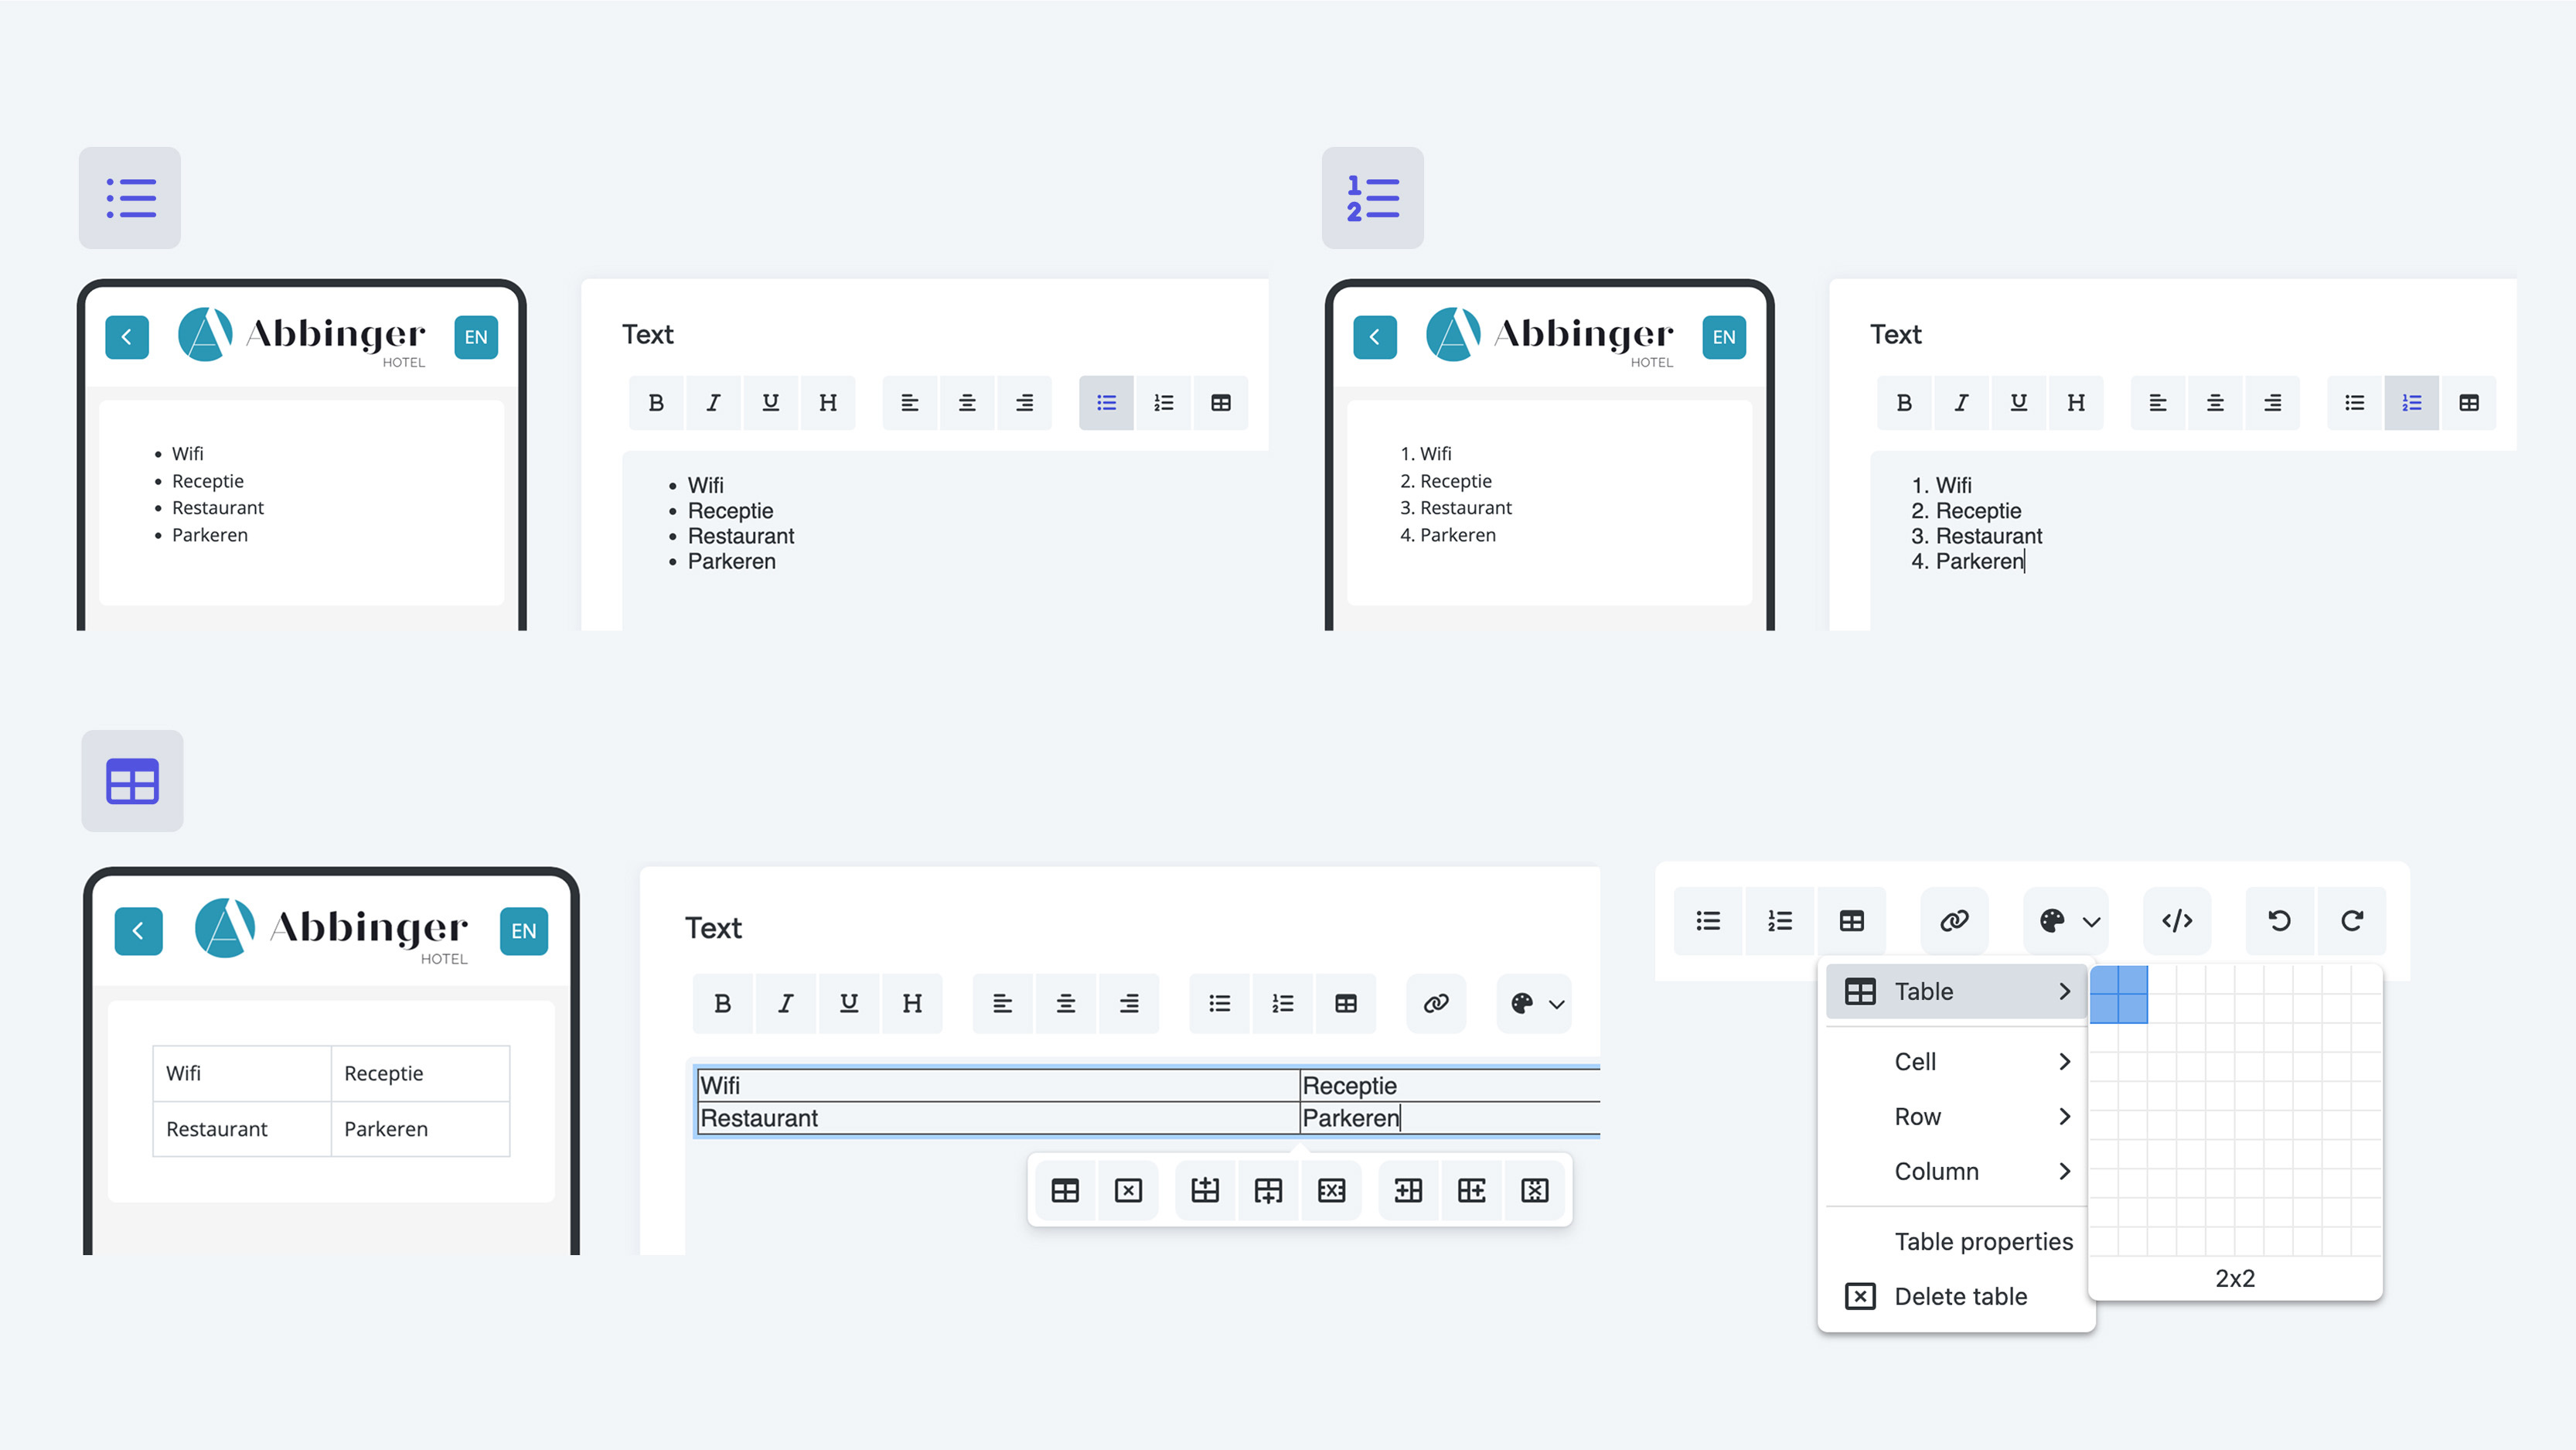
Additional Text Styling Options
To further structure your content, you can use the following options:
- Bullet list:
Create a list where each item is preceded by a bullet point—ideal for listing multiple items.
Numbered list:
Use a numbered list when the order of items matters, such as steps in a process or ranked information.- Table:
Use tables to clearly display data in rows and columns. This is useful for comparing items or presenting structured information such as prices, dates, or names.

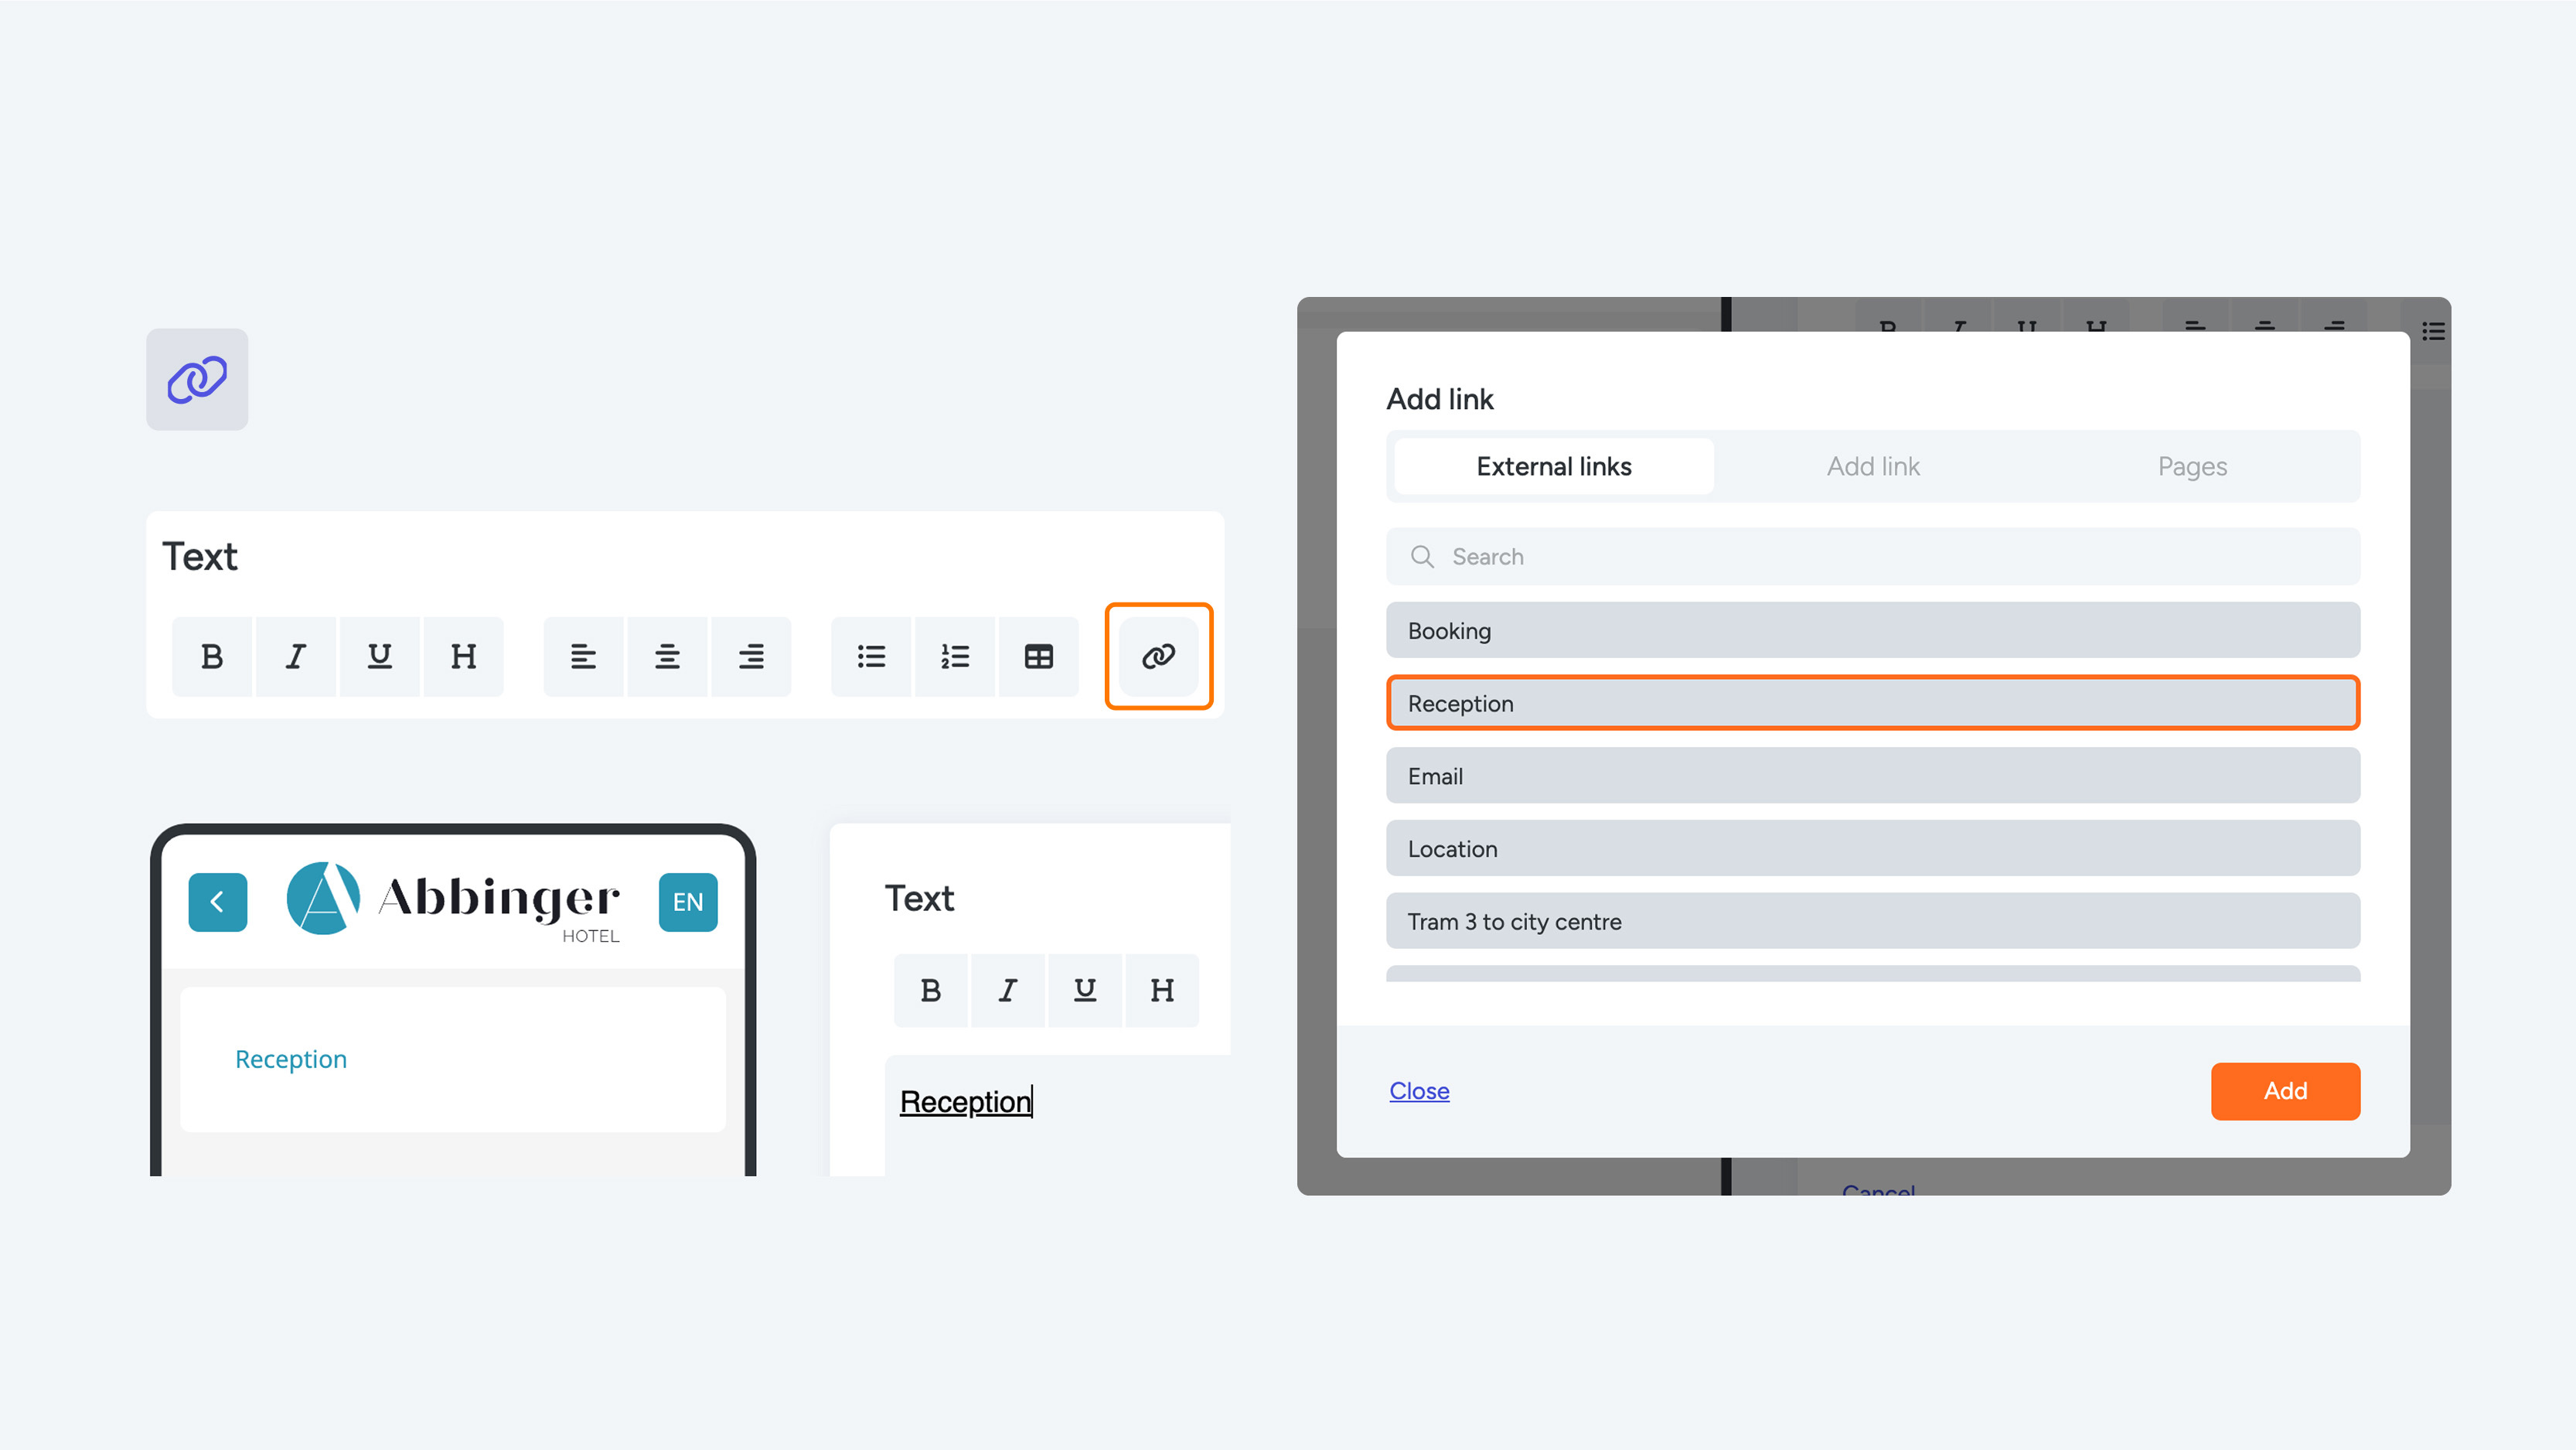
Links and Colors
Want to link text to an external page? You can do this by adding a hyperlink to your text. If you prefer using a button to link to an external website, you can add an external link button to your (Web)App.
You can also adjust the text color to make your content more visually appealing. Several default colors are available in the Text module. If you want to use a specific color, click the color palette icon to open the color picker. Enter the desired HEX or RGB code and click Save.
To remove a custom text color, click the color palette icon again and select the slash (/) to revert to the default text color.
Undo Changes
If you’re not satisfied with changes made in the Text module, you can easily undo your steps by clicking the round arrow icons (left or right). You can also use keyboard shortcuts:
- Mac: Command + Z
- Windows: Ctrl + Z
Heading
Om teksten of titels in de (Web)App beter zichtbaar en gestructureerd te maken, kun je ervoor kiezen om ze in een heading module te plaatsen. De headingtekst is groter en opvallender dan de reguliere tekst die je invoert via de text module.
Sleep eenvoudig de heading module in de telefoon preview en een instellingenpagina verschijnt. Hier kun je je gewenste tekst invoeren. Houd er rekening mee dat je maximaal 100 tekens kunt gebruiken voor de heading.

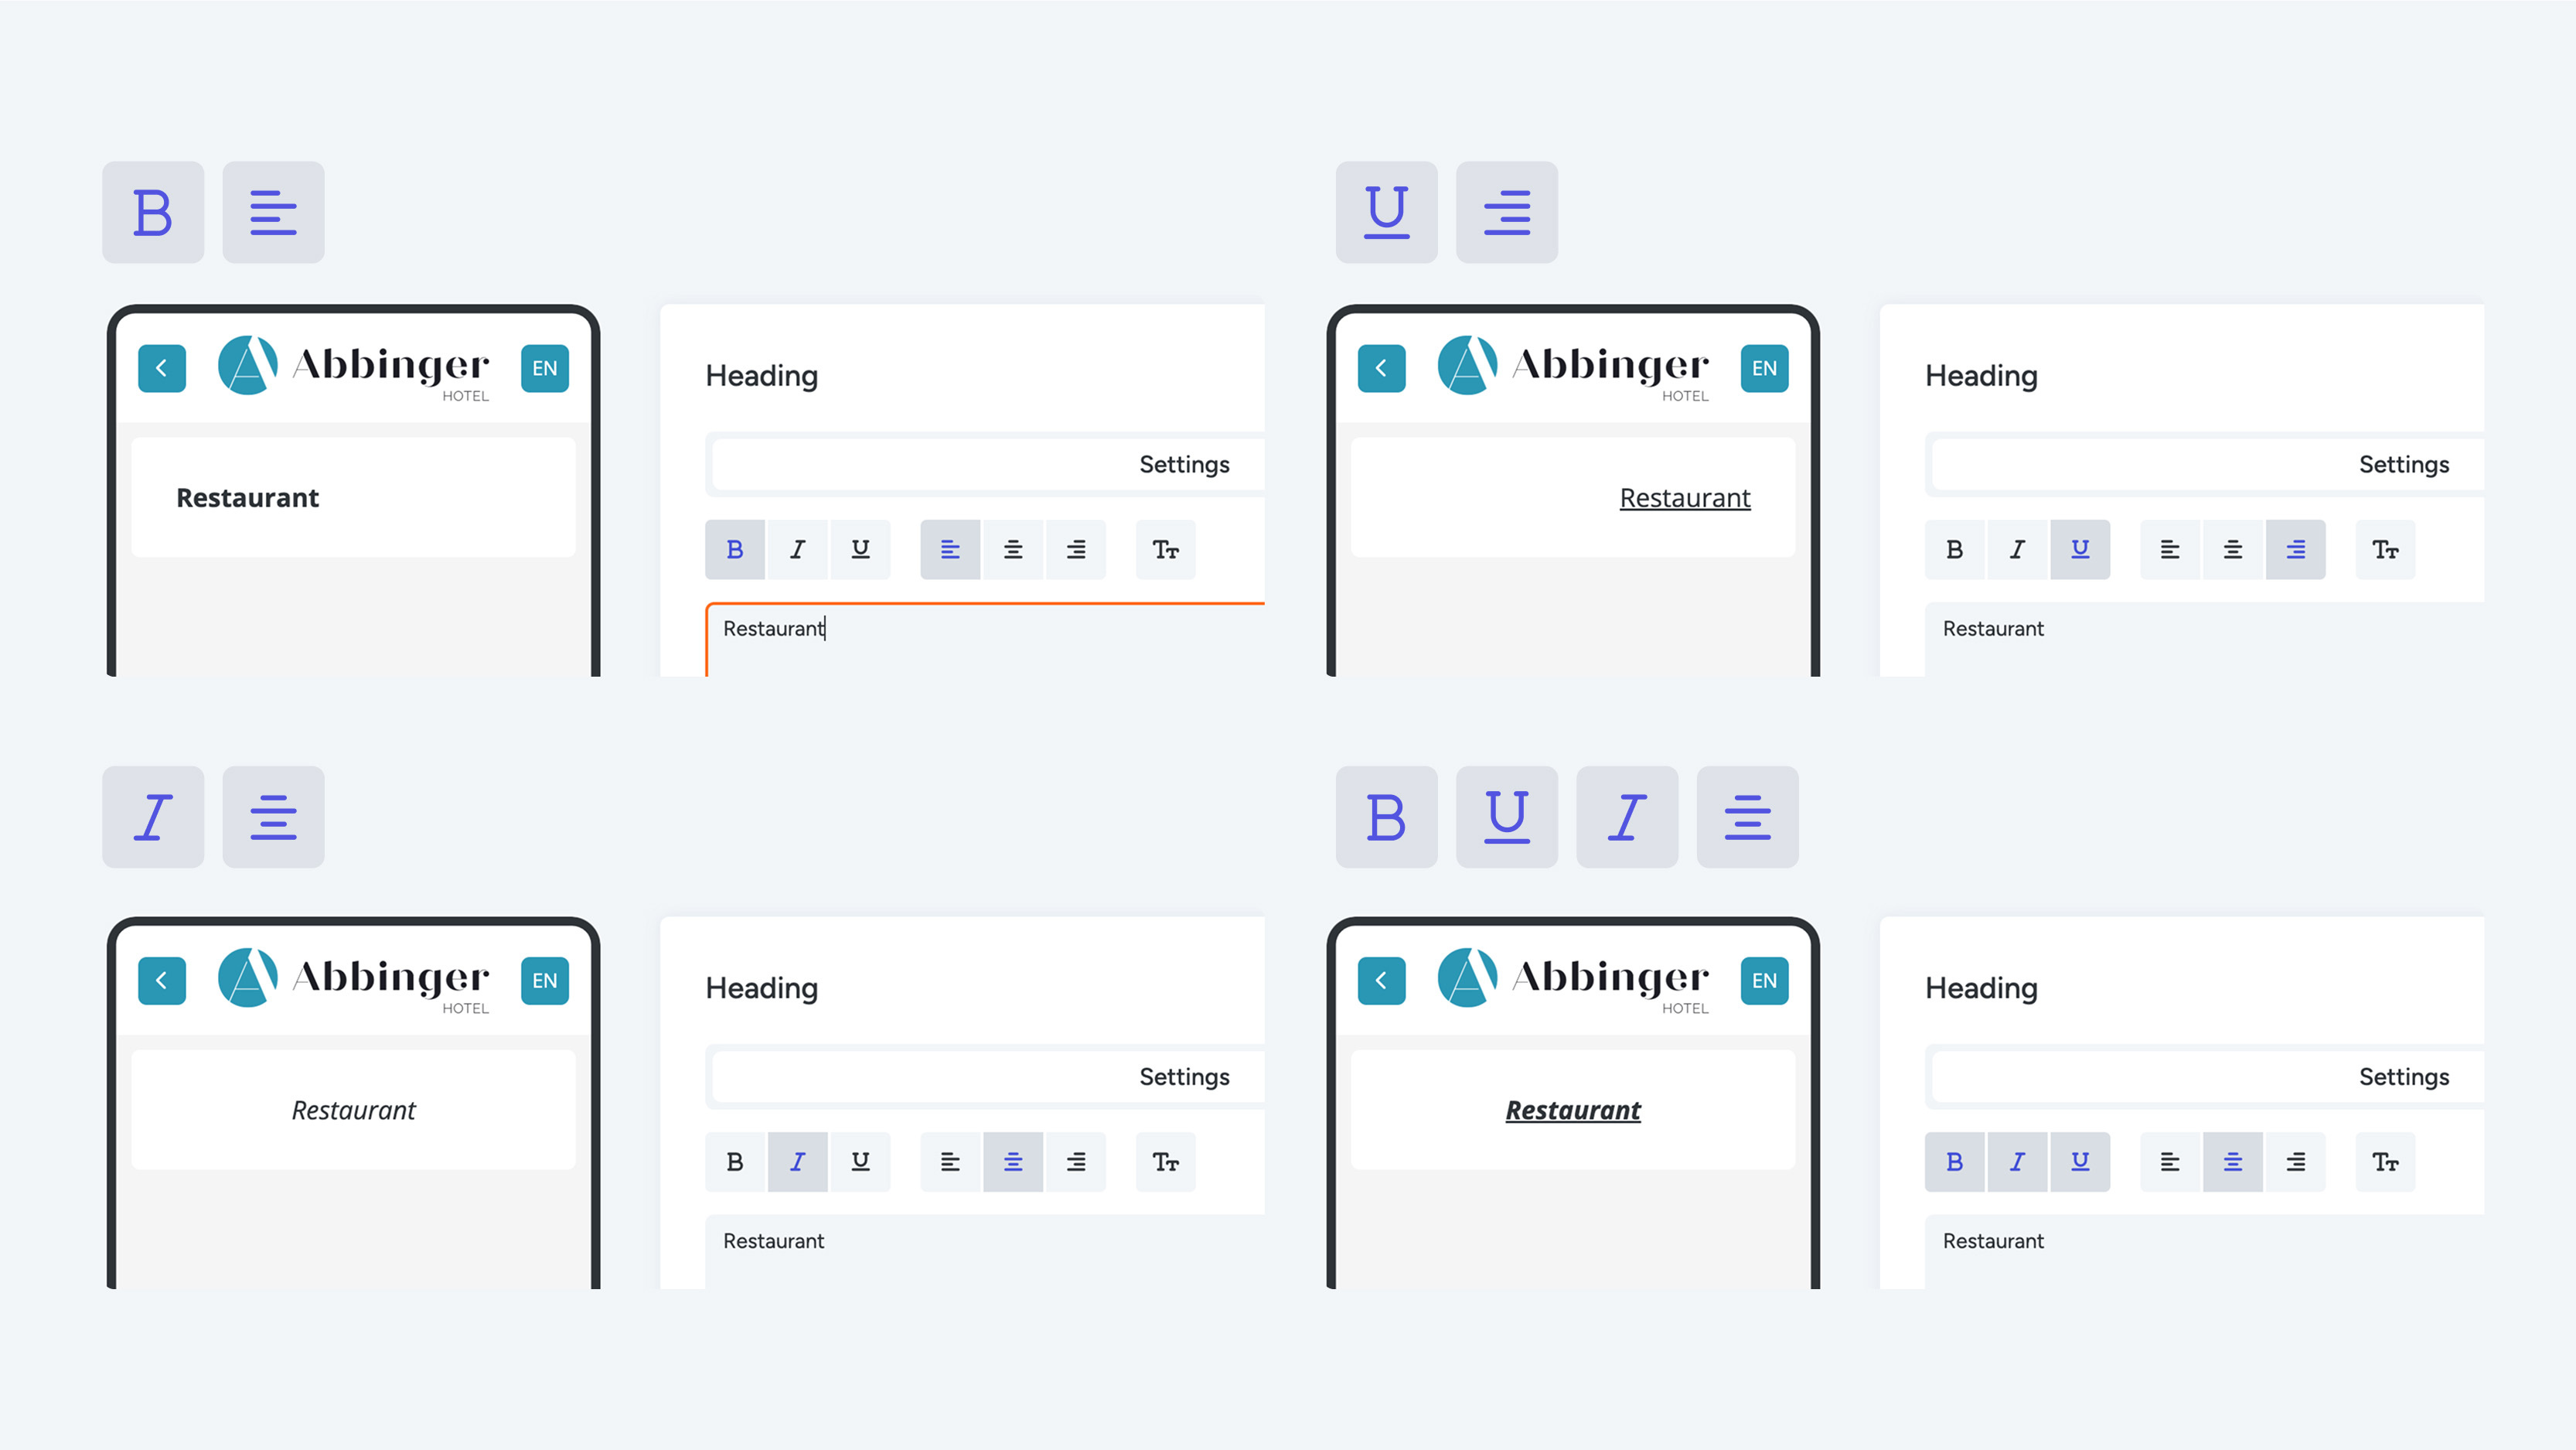
As you type, the text will immediately appear in the live preview. To style your heading, you can apply the following formatting options:
- Bold:
Makes the text thicker and darker than the surrounding text so it stands out clearly. - Italic:
Often used to emphasize specific words or sentences or to create distinction. - Underline:
Highlights the text by adding a horizontal line underneath, commonly used to emphasize important information or visually distinguish certain words.
In addition, you can adjust the alignment of your heading:
- Align left
- Center
- Align right
Finally, you can choose from four different sizes for your heading text:
- Small
- Medium
- Large
- Humongous
Once you’ve entered your heading, you can translate the text. Simply click the translate button in the top-right corner to start the translation process. In the dropdown menu, you can view the available language translations. This so you can then review and adjust the translation as needed.
When you’re satisfied with the translation and adjustments, click Translate & Save. This will automatically translate the heading, save the changes, and close the module.
Would you prefer each page to have its own title instead of adding a separate heading every time? You can easily enable this by turning on the Page Title option in the WebApp Style settings. This will automatically display a title on every page.