Shared Management
Introduction
1. Sign in and manage keys
2. Roles in Connect
3. Dashboard
4. Key overview
5. Create new key
6. Activate key
7. Activation and usage
8. App download and installation
9. Digital key activation
10. Success
11. How to open the iLOQ lock?
12. Contact
You have been invited by a colleague or your organization to assign digital keys to employees. For this purpose, you will receive access to the GuestCompass Shared Management software. With this system, you can easily create, manage, modify, or revoke digital keys. This guide will help you get started step by step.
1. Sign in and Manage Keys
Logging in
You will receive an email from GuestCompass containing your login details. Did not receive an email? Please contact your point of contact.
Log in here: https://connect.guestcompass.nl/login

2. Roles in Connect
- Guest manager: Assign the Guest Manager role to a user responsible for managing guest access by distributing digital keys. This role may include restrictions on the number of keys they can issue or limit access to specific areas of the company.
- Guest manager plus: Assign the Guest Manager Plus role to a user who manages all guests and digital keys across multiple access rights. This role offers broader permissions, including unlimited guest management and key issuance.
- Account manager: Assign the Account Manager role to a user responsible for managing accounts and digital access for an entire company or a specific zone within the company.
- App editor: Assign the App Editor role to a user responsible for editing and managing content within the web app. App Editors can update content but do not have the authority to change system settings or user permissions.
- App manager: Assign the App Manager role to a user who handles web app settings and user access management. App Managers are responsible for maintaining the app's technical functionality, ensuring it runs smoothly and meets user needs.
Company: Assign the Company role to a user who manages access, users, and settings for one or more companies. Company users have control over their own operations and can make adjustments in the web app as needed for their specific business processes.
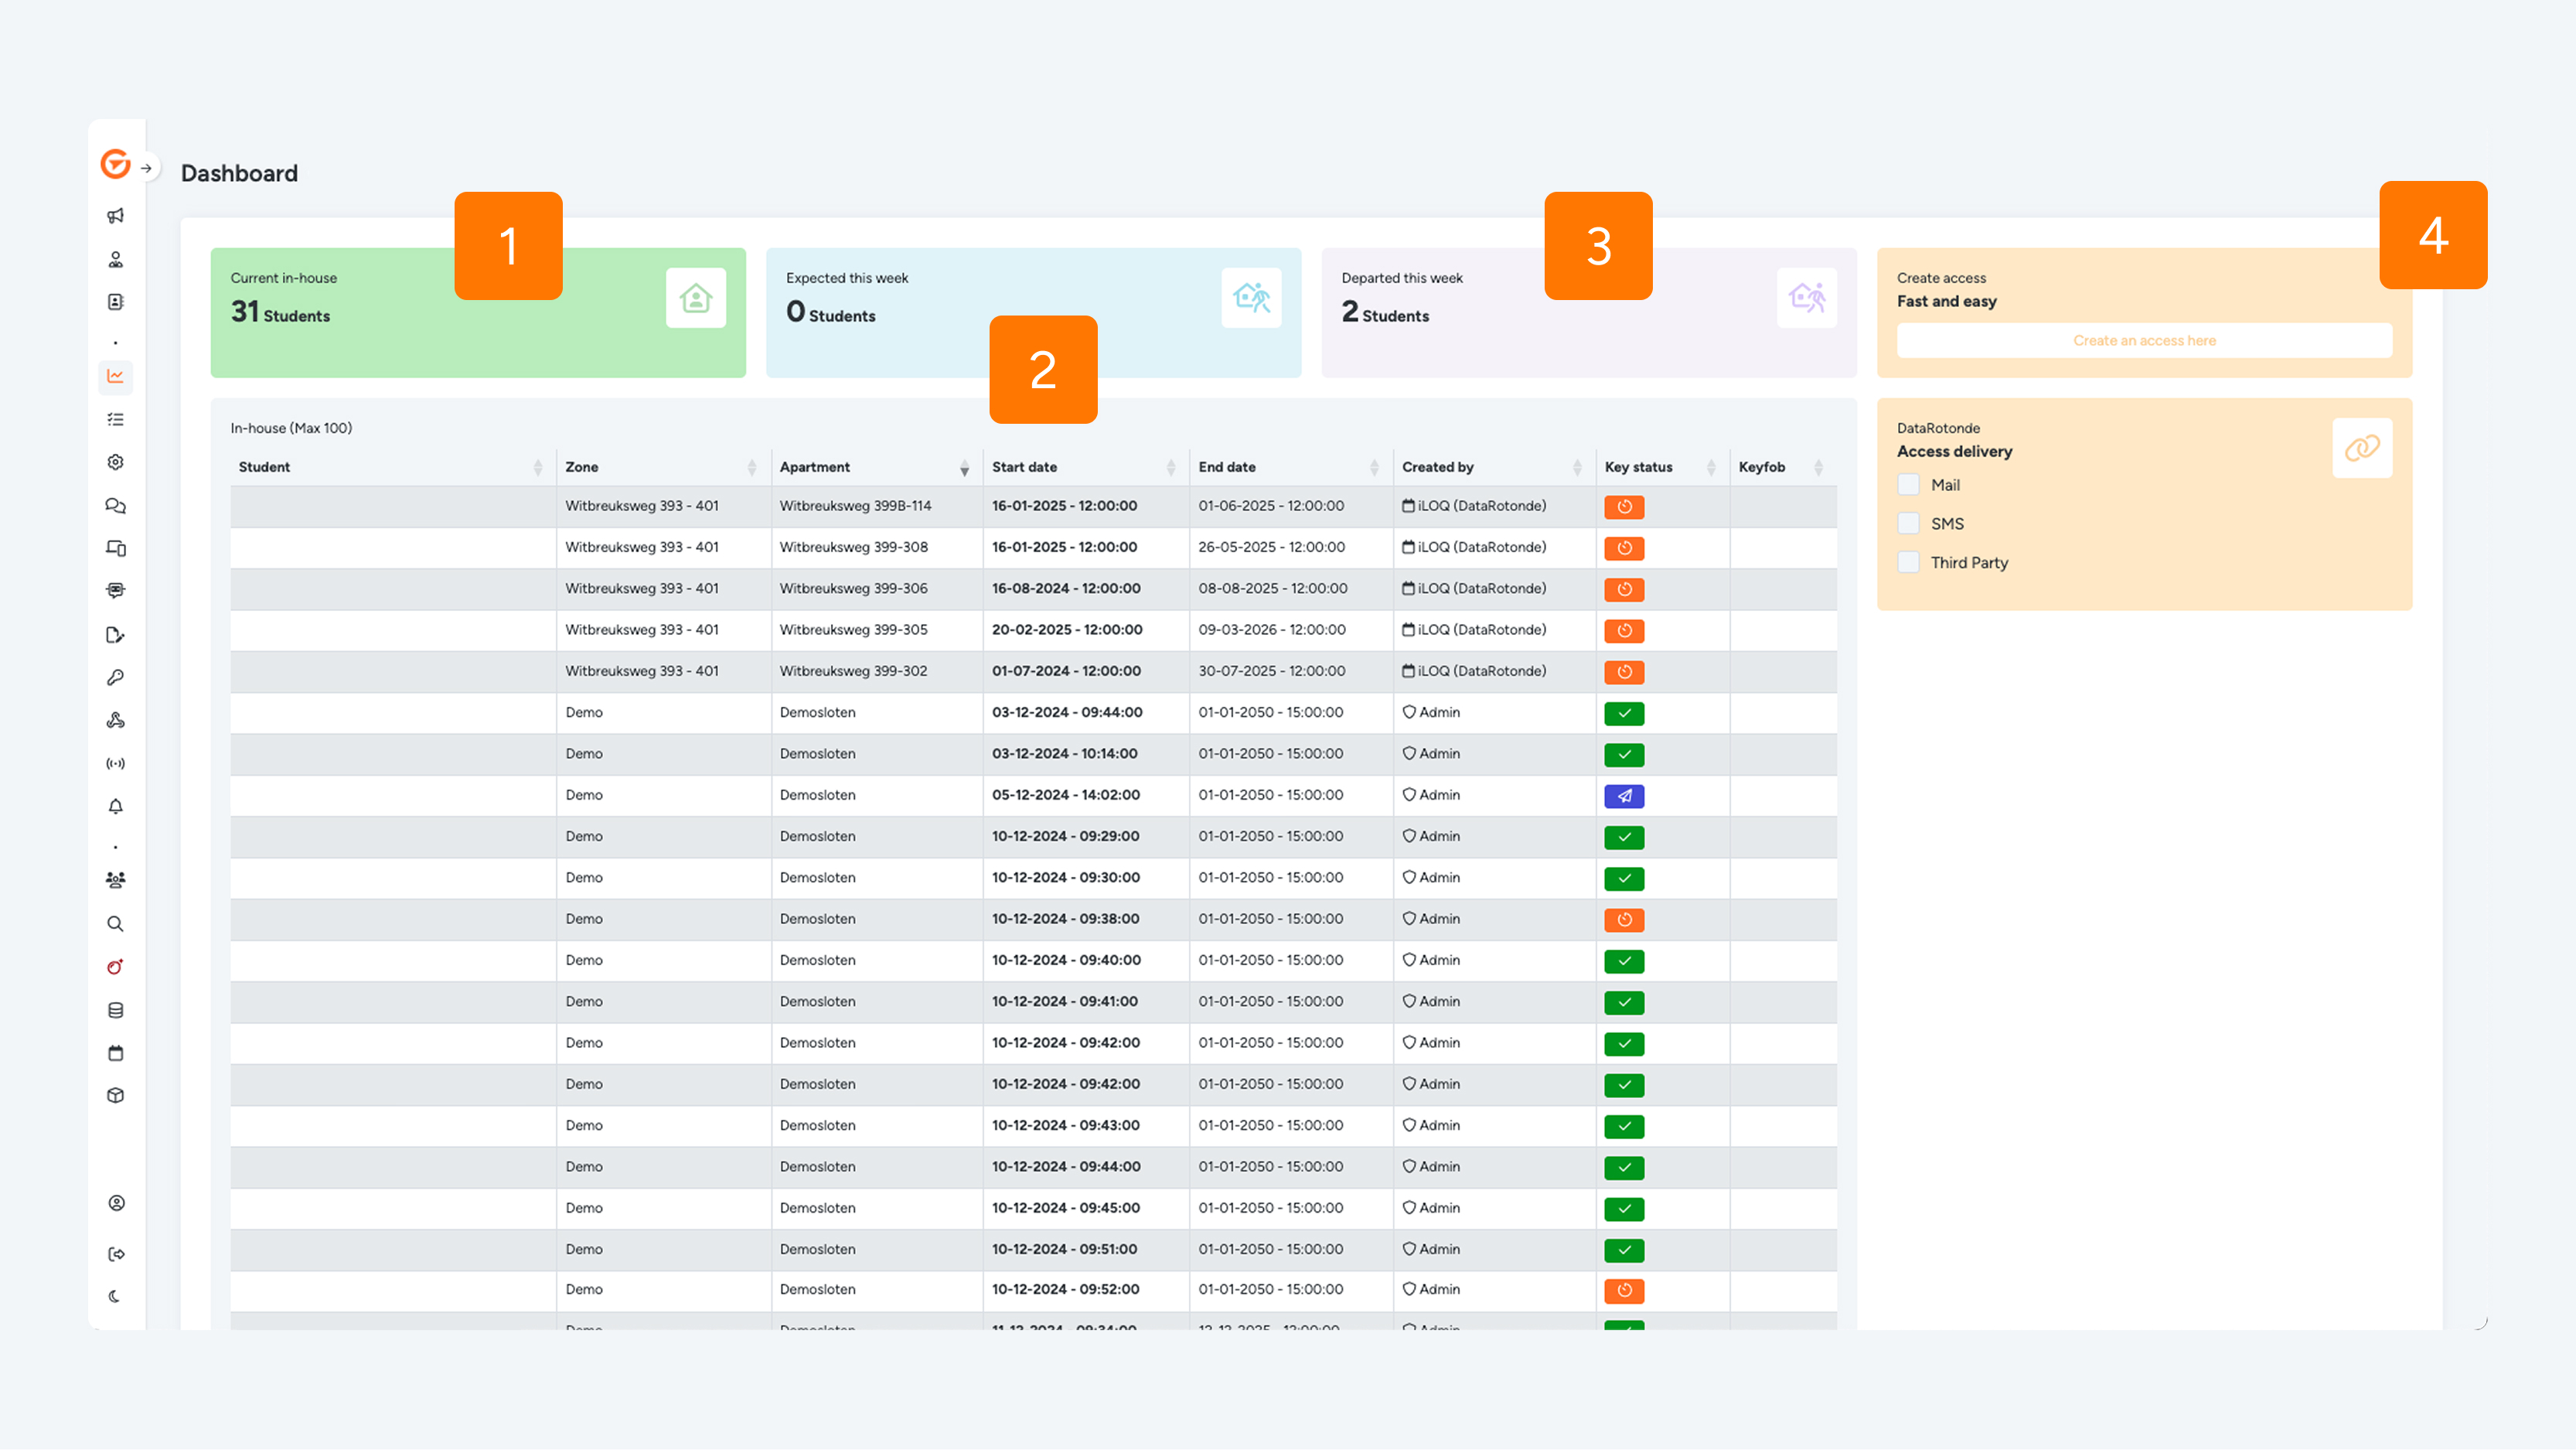
3. Dashboard
After logging in, you will arrive at the Dashboard. Here you will find an overview of key usage:
- Max persons – the total number of keys you are allowed to issue
- Active – the number of active keys and how many are still available (and can be issued)
- Expired – expired keys
- Create a new key – Click Fast and easy or Reception, and then click Persons.
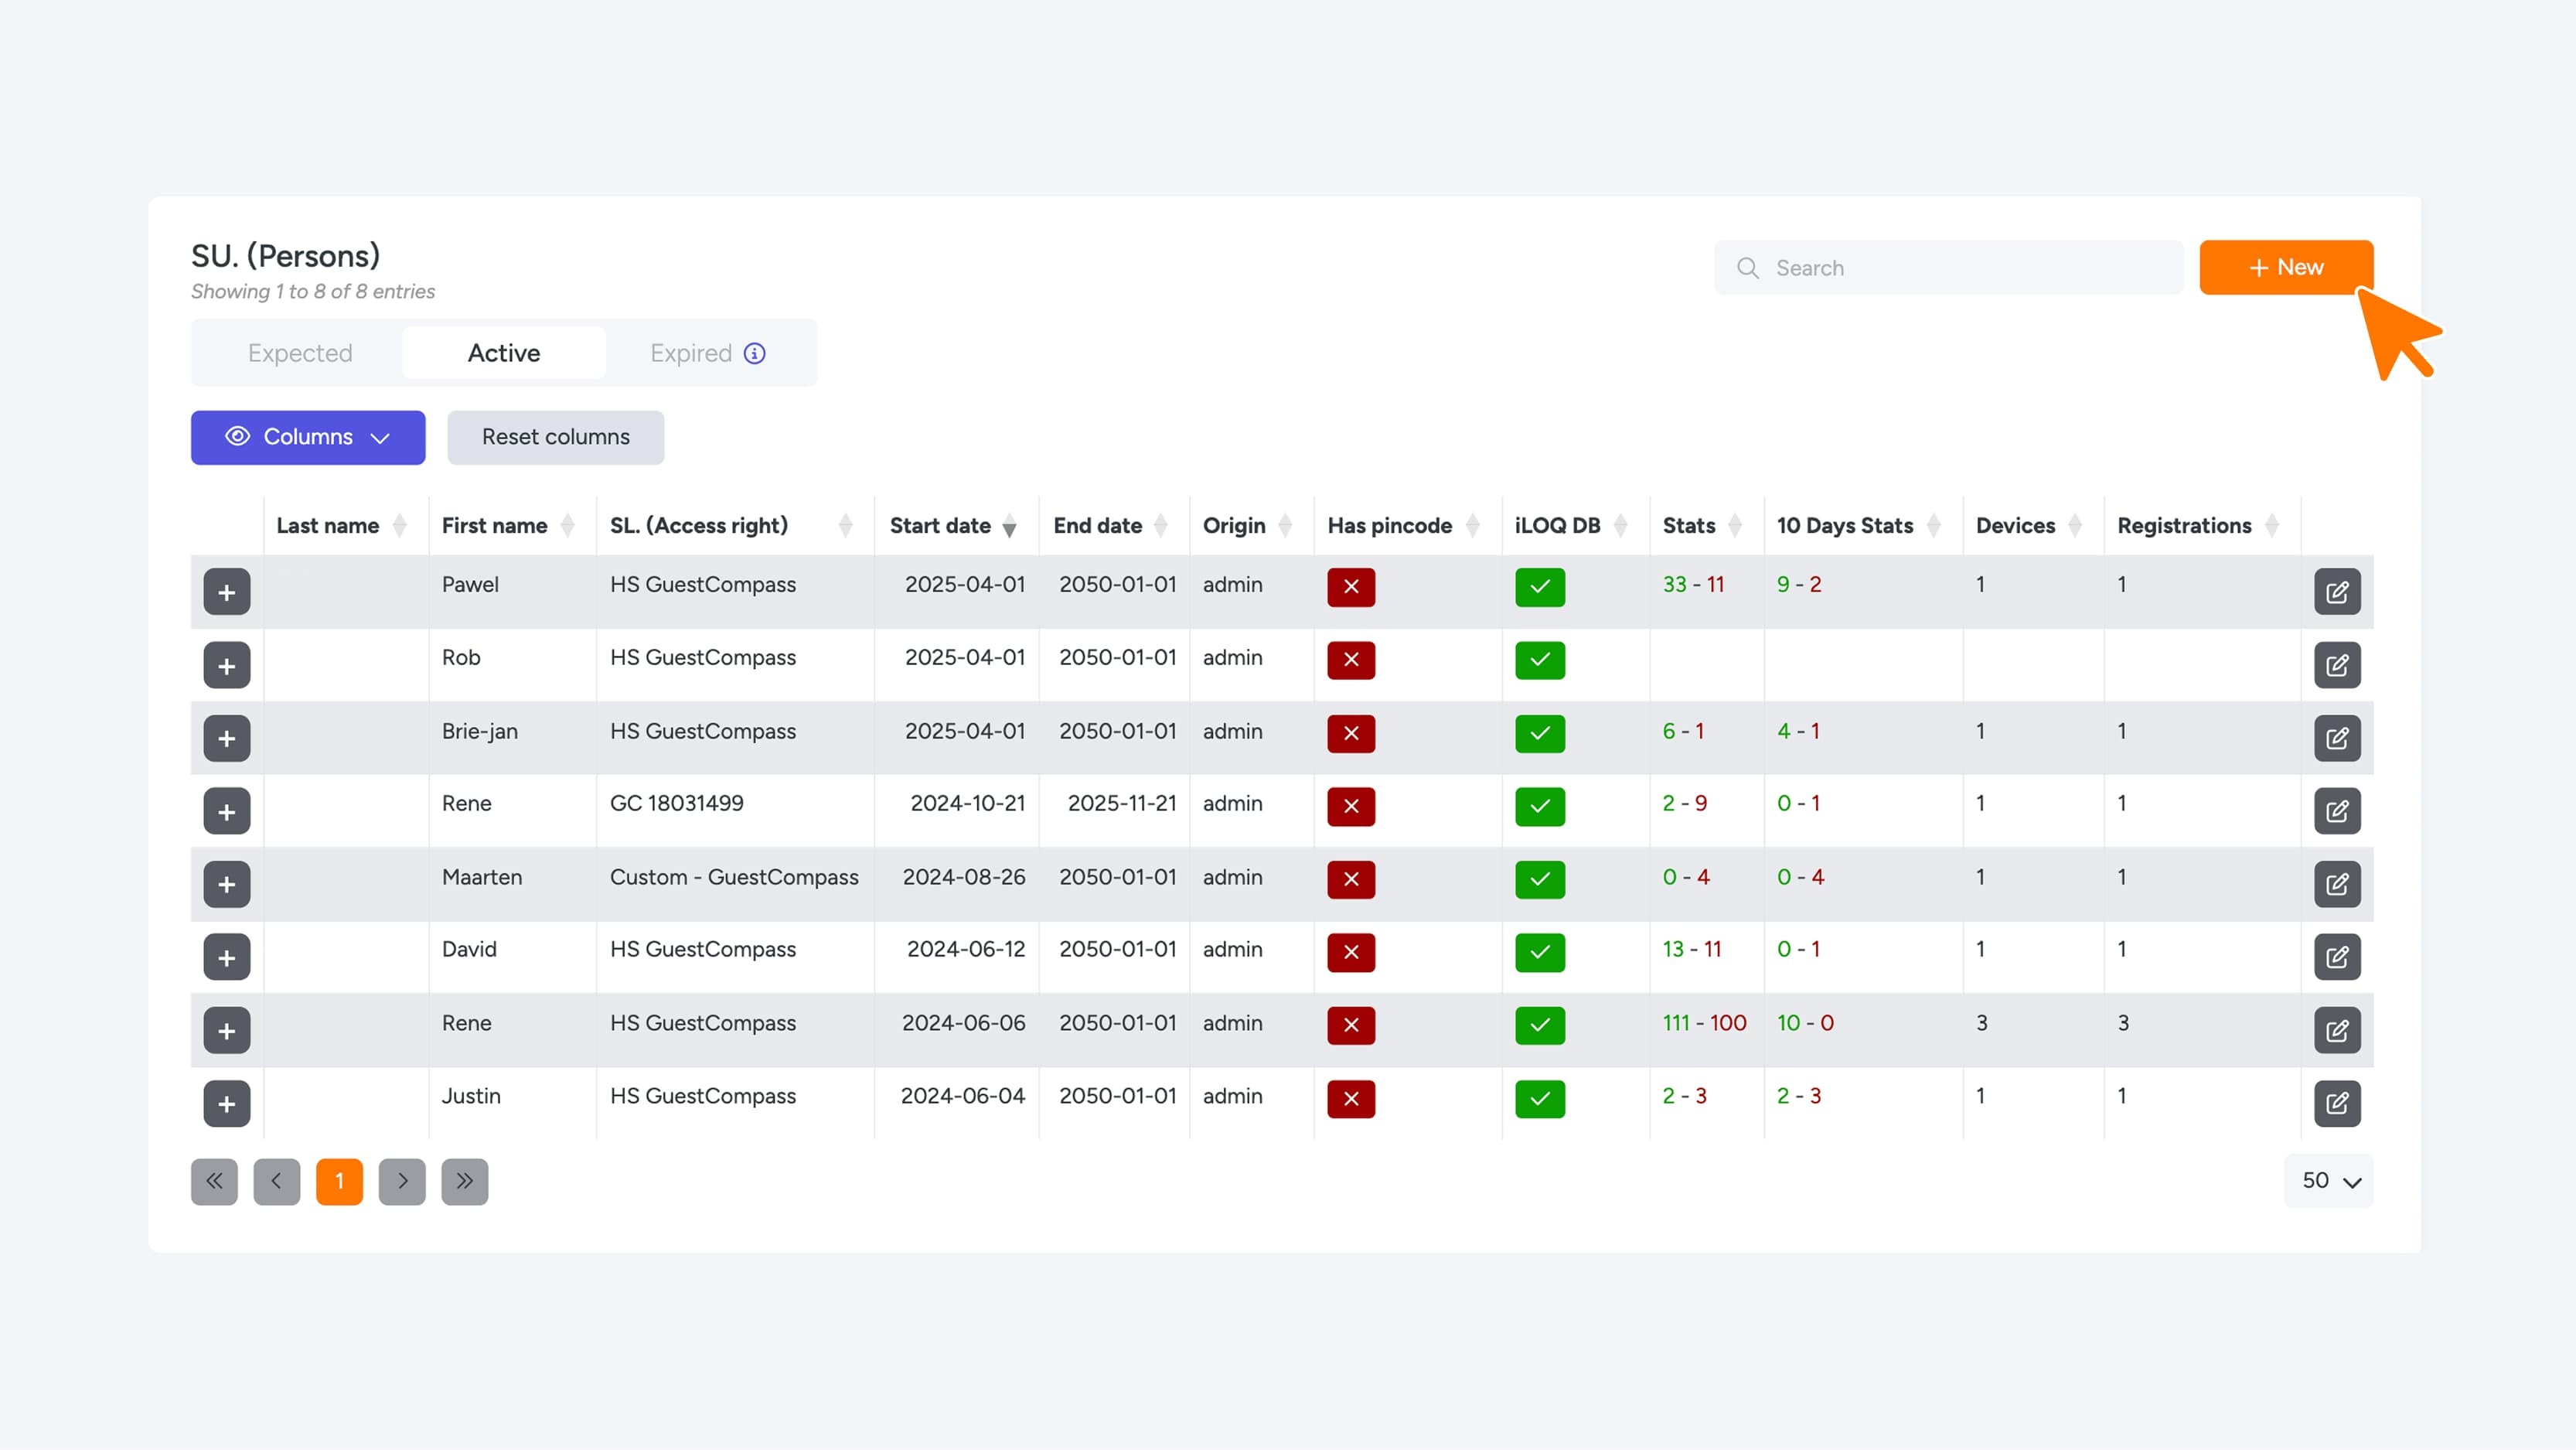
4. Key Overview
Go to Management > SU (Students) in the menu for a more detailed overview. See image 2 Steps on dashboard.
- Person Overview shows the number of available and used keys
- Persons shows active, future, and expired keys
- Expired keys can be reactivated
- Click + New to create a new key.
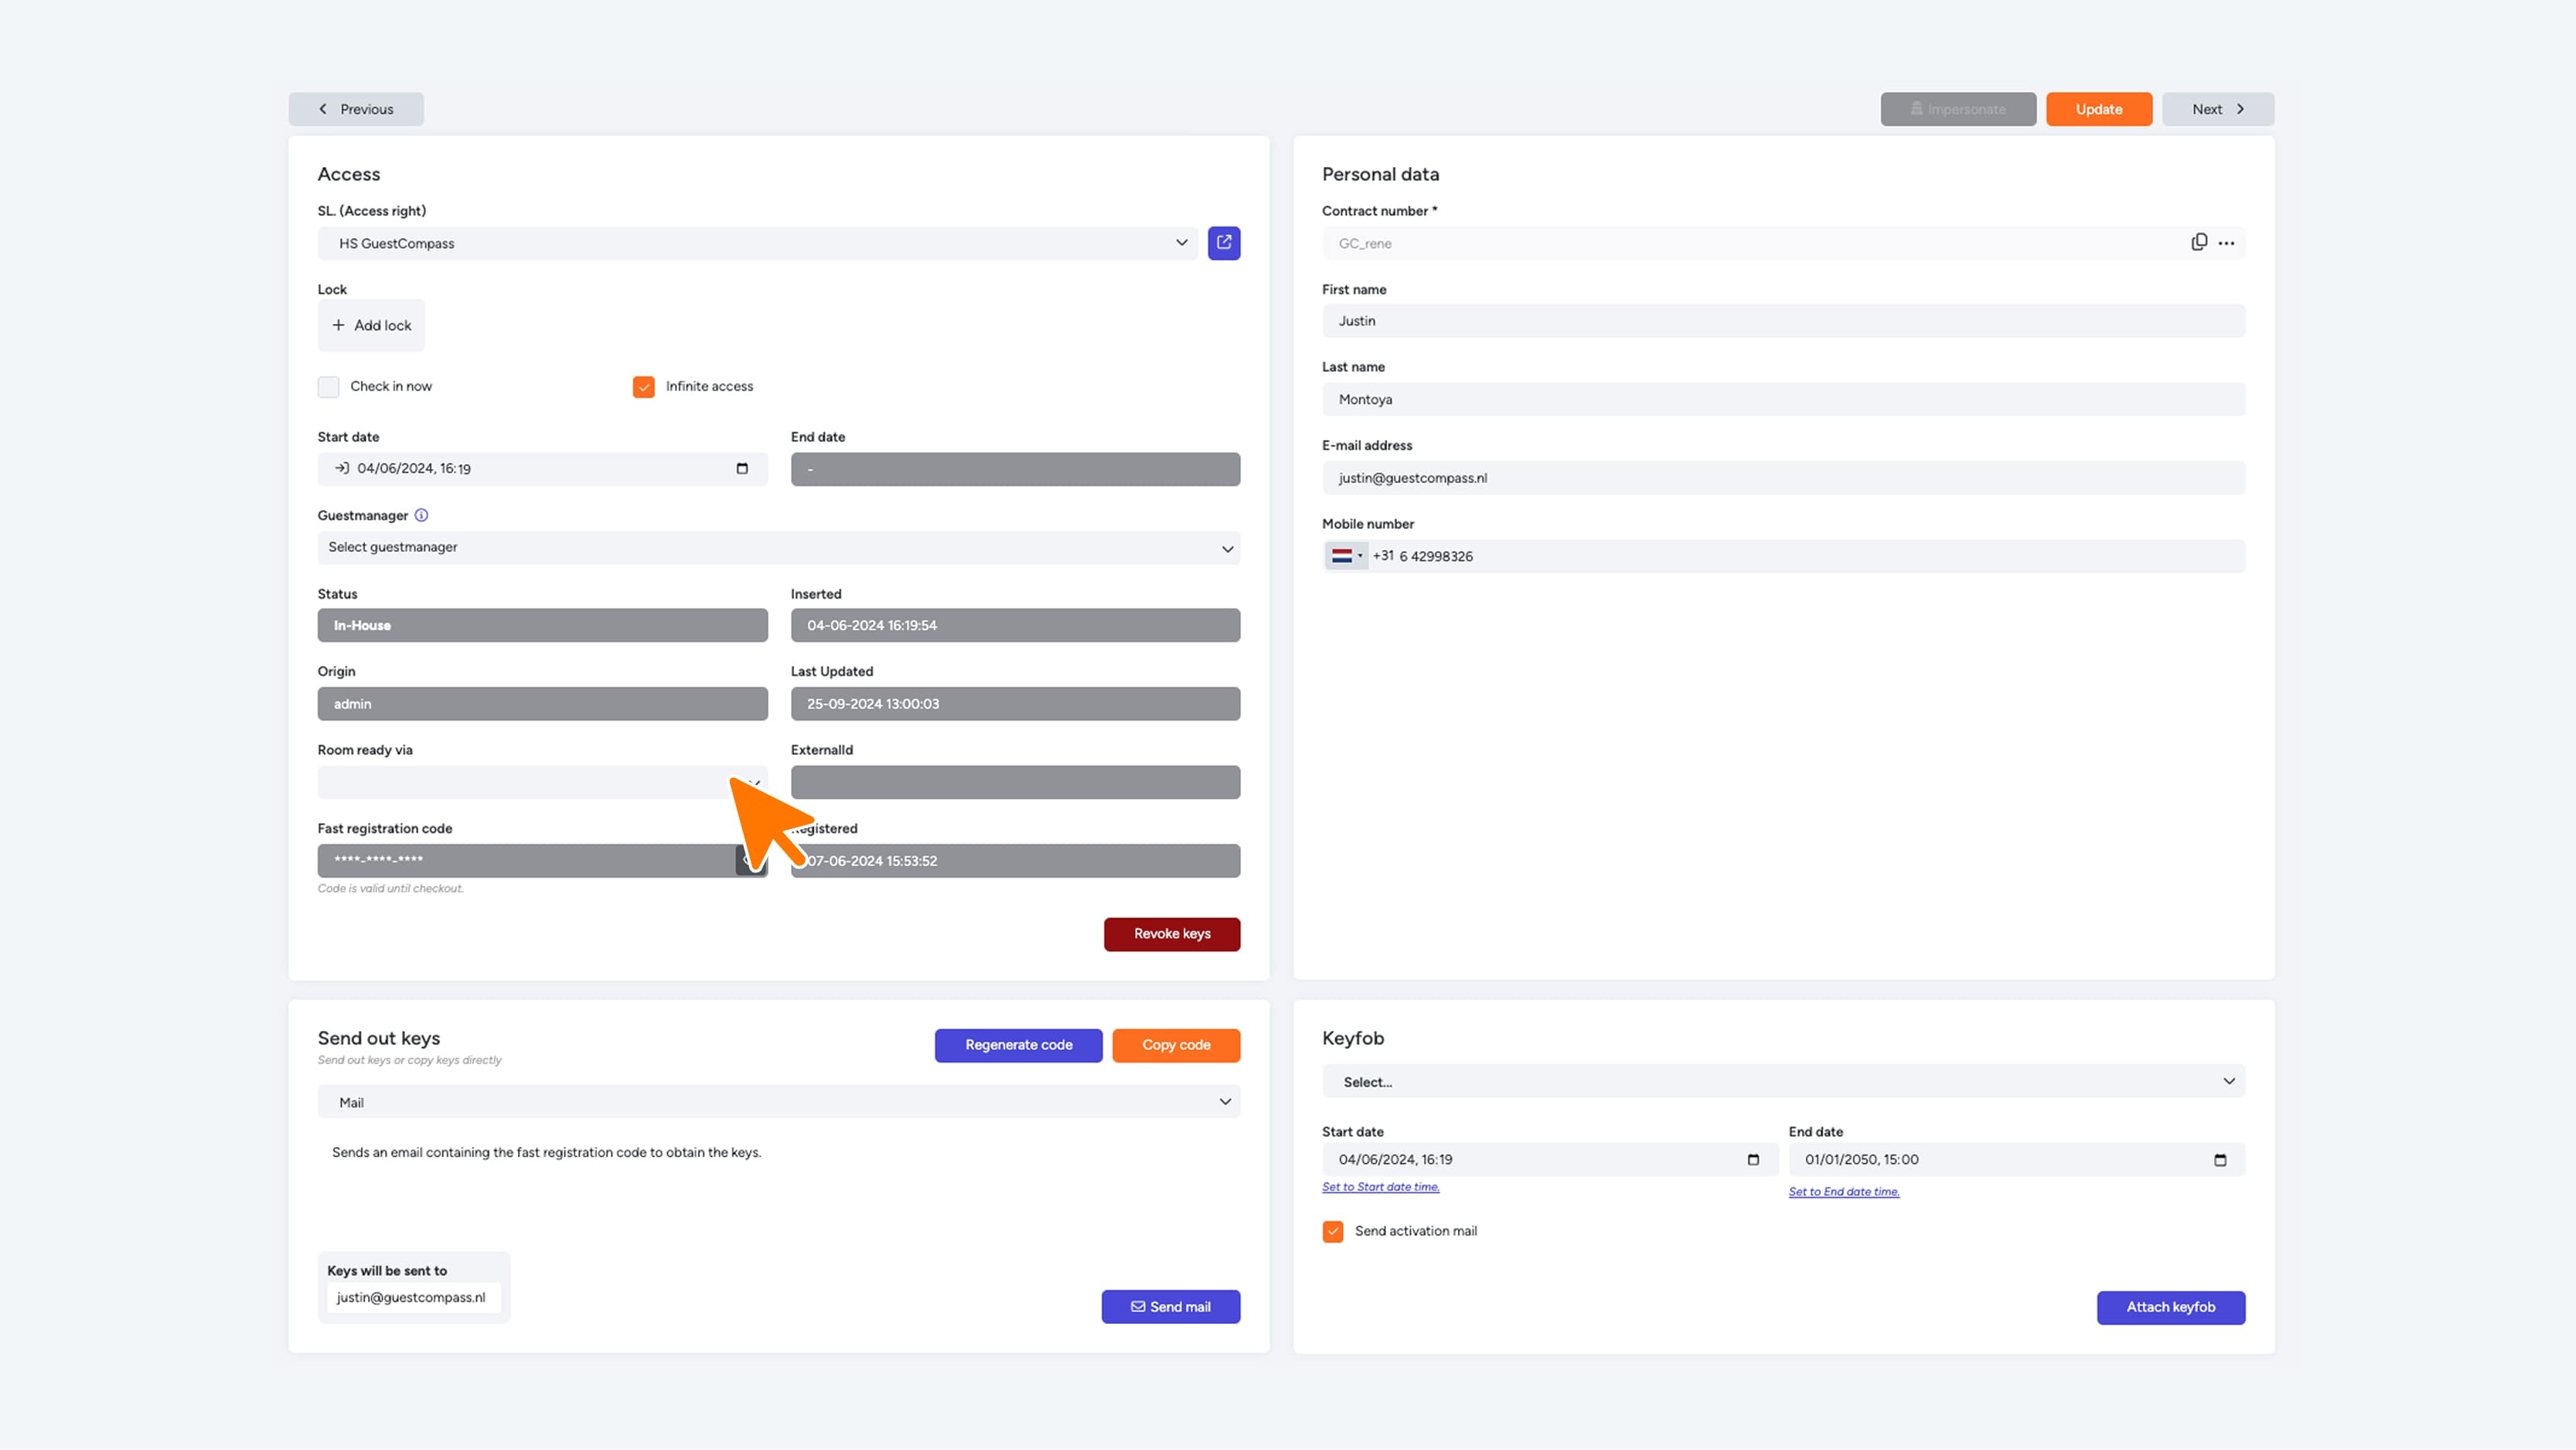
5. Create a New Key
On the creation screen, fill in the following details:
- Select your company in the Switchlist
- Choose a start date (or select Check in now or Unlimited access)
- Enter the Contract number (customer registration number) – this must be provided by the company to the new user
- User’s First name
- User’s Last name
- Email address
- Phone number
Click Save to create the key.
Note: The key still needs to be activated by the user.

6. Activate the Key
After creating the key:
- Choose to send the activation code to the user by email
- Click Send mail
- Go to Persons to verify that the key is active
Use the pencil icon to edit key details.

Go to Persons to check if the key is active. Use the pencil icon to edit key details.
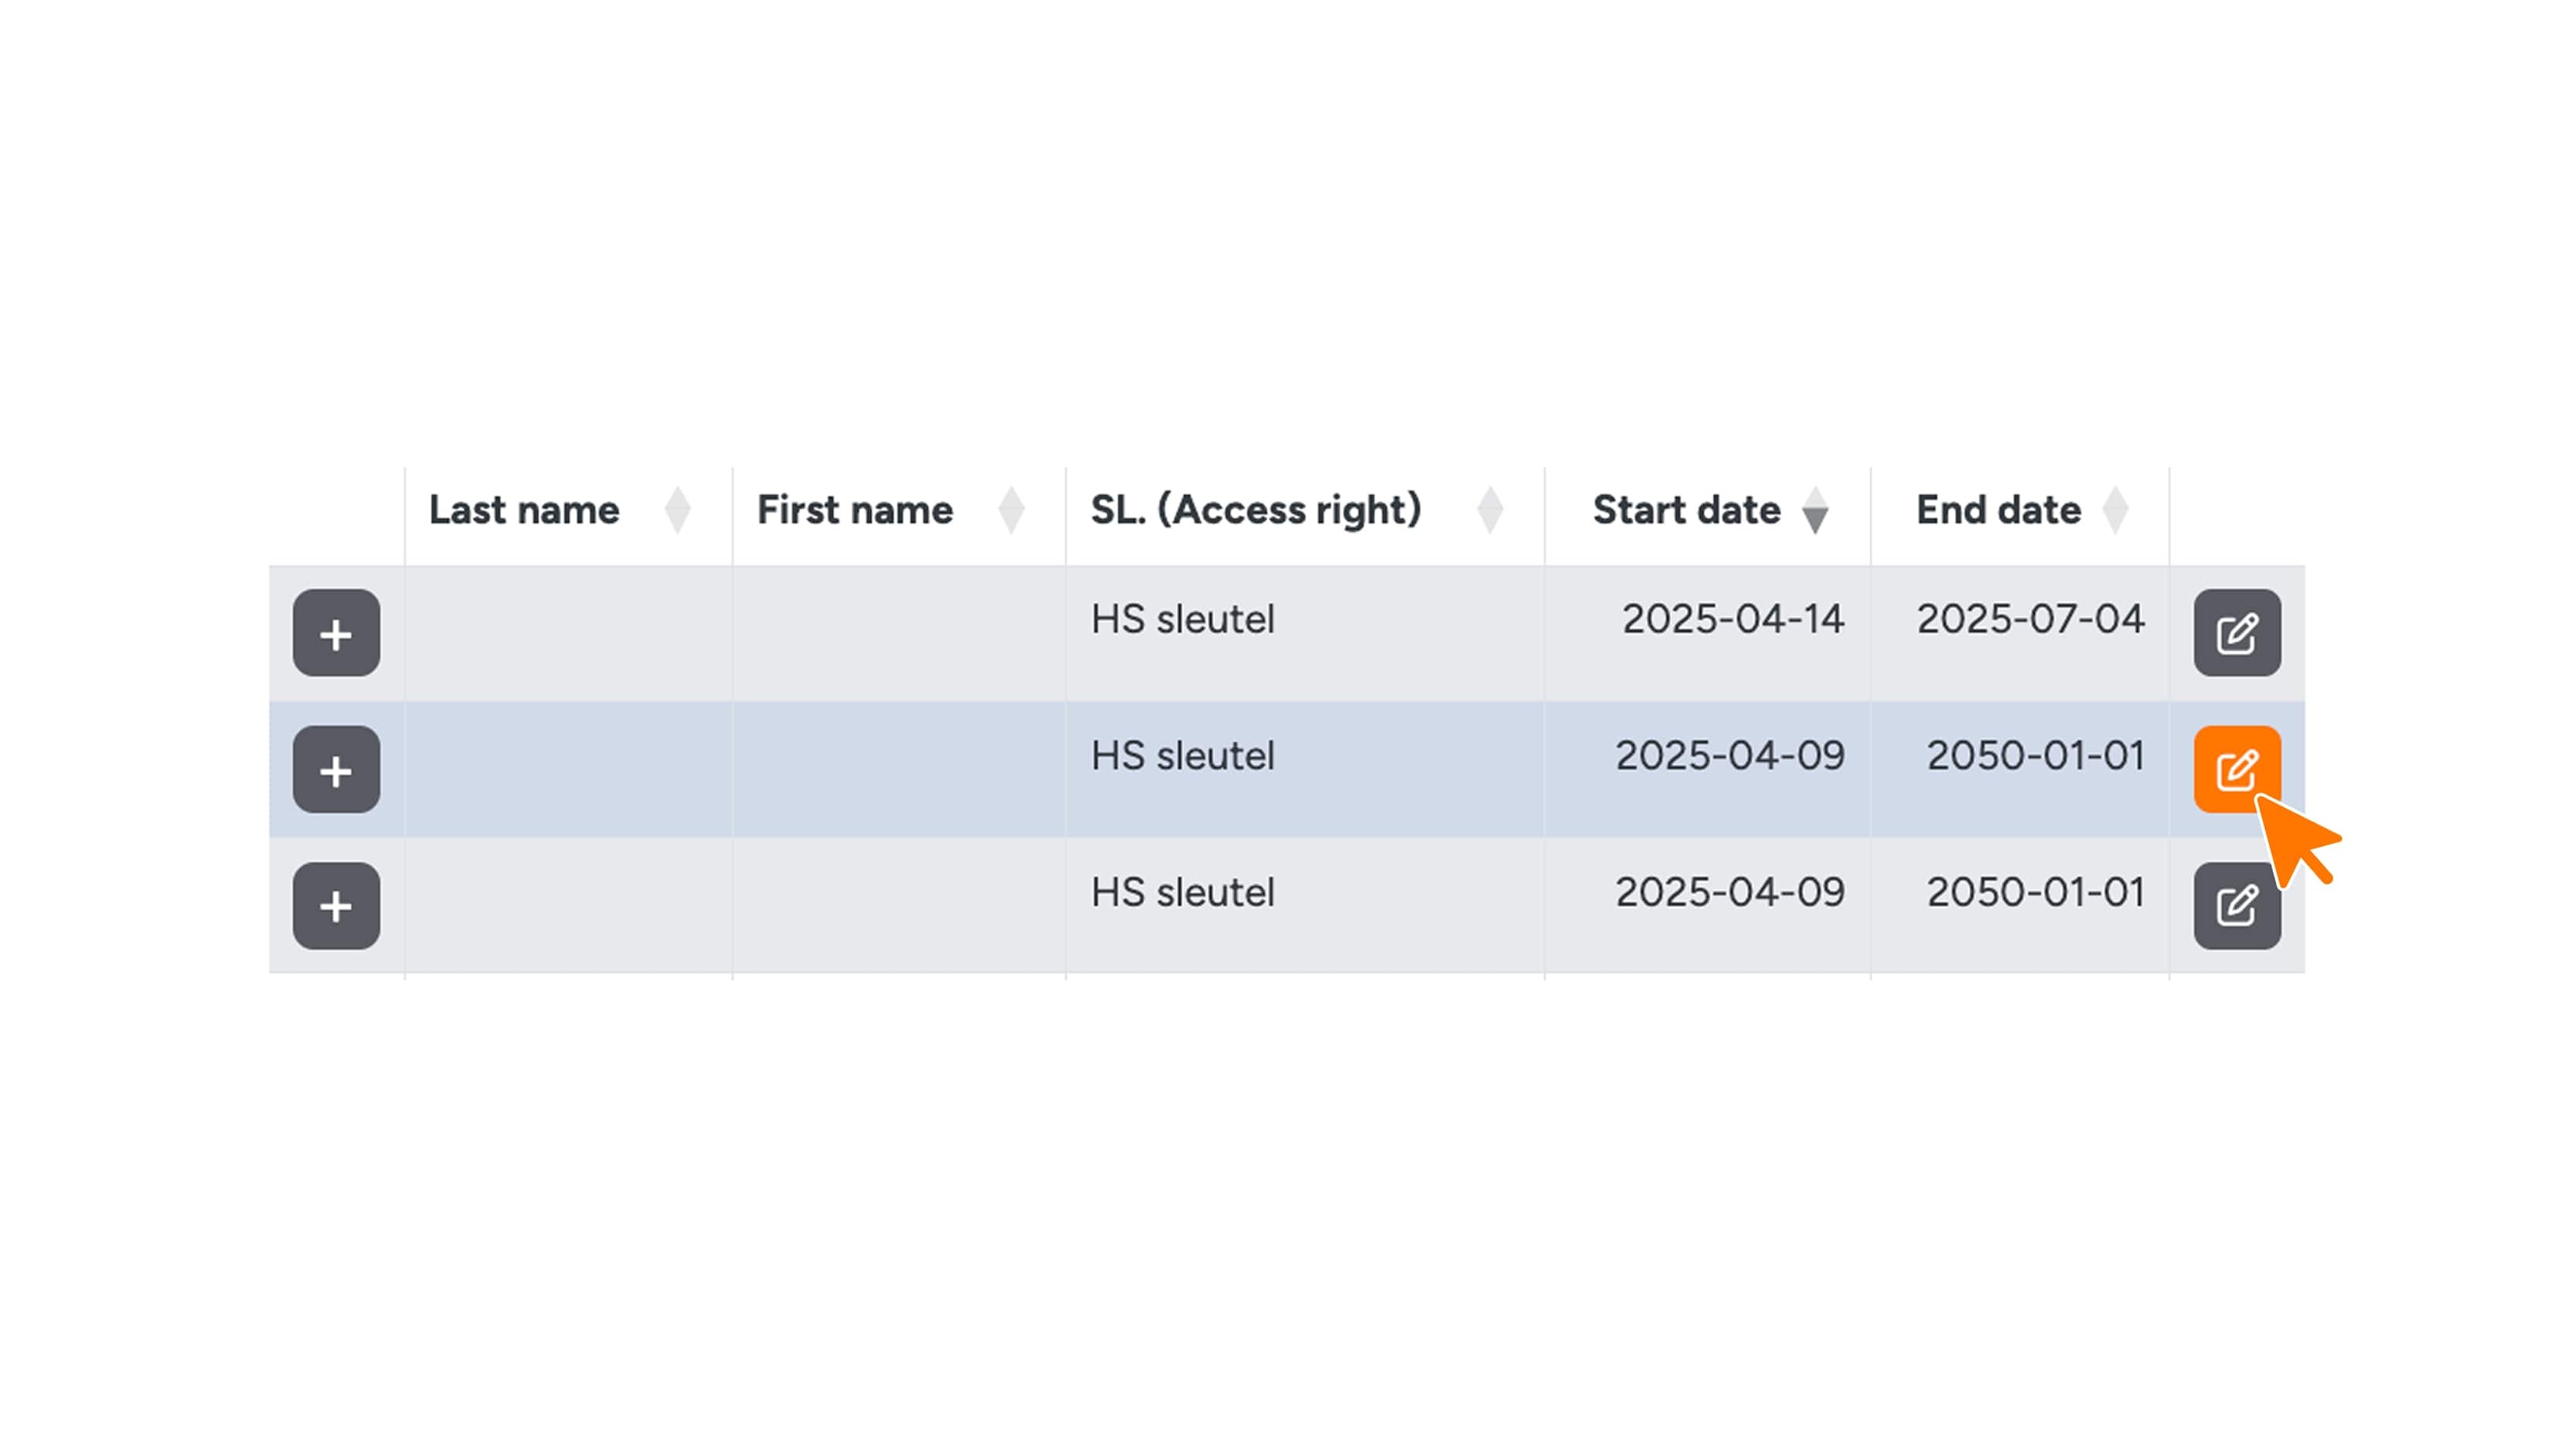
7. Activation and usage
- Click on Persons. You will see that the new key has been created and already has access (is active).
- Use the pencil button to edit the key details.
8. App download and installation
- Your colleague will receive an email containing a link to download the app and a unique 15-digit key code
- Your colleague must first download and install the app
9. Digital key activation
- Copy the code from the email
- Select the desired building/location
- Click the My Digital Key button
Click Registration
You will need the code from the email, the contract number (customer registration number), and your date of birth.
Using the 15-Digit Activation Code
Enter the code from the email.
Copying and pasting is easiest—press and hold to copy, then paste it into the app.
10. Success
After entering the key code, the key will be activated. You can follow the process on the screen. Do not close the screen!
Once everything is completed, a third icon will appear in the black bar at the bottom of the app.
Don’t see the icon? Try the registration process again.
11. How to open the iLOQ lock?
Make sure the user knows how the locks work:
In the app, click Keyless course
The course detects your mobile device type
Watch the Keyless video
Answer 3 questions about the Keyless video
We have more information about iLOQ on this page.
12. Contact
The user now has access via their phone to the locks that your company has been granted access to.
You can contact GuestCompass via the app for questions about using the app or access.
Or email: support@guestcompass.nl