20. Locks and sliders
Sliders in the (Web)App (updated September 2025)
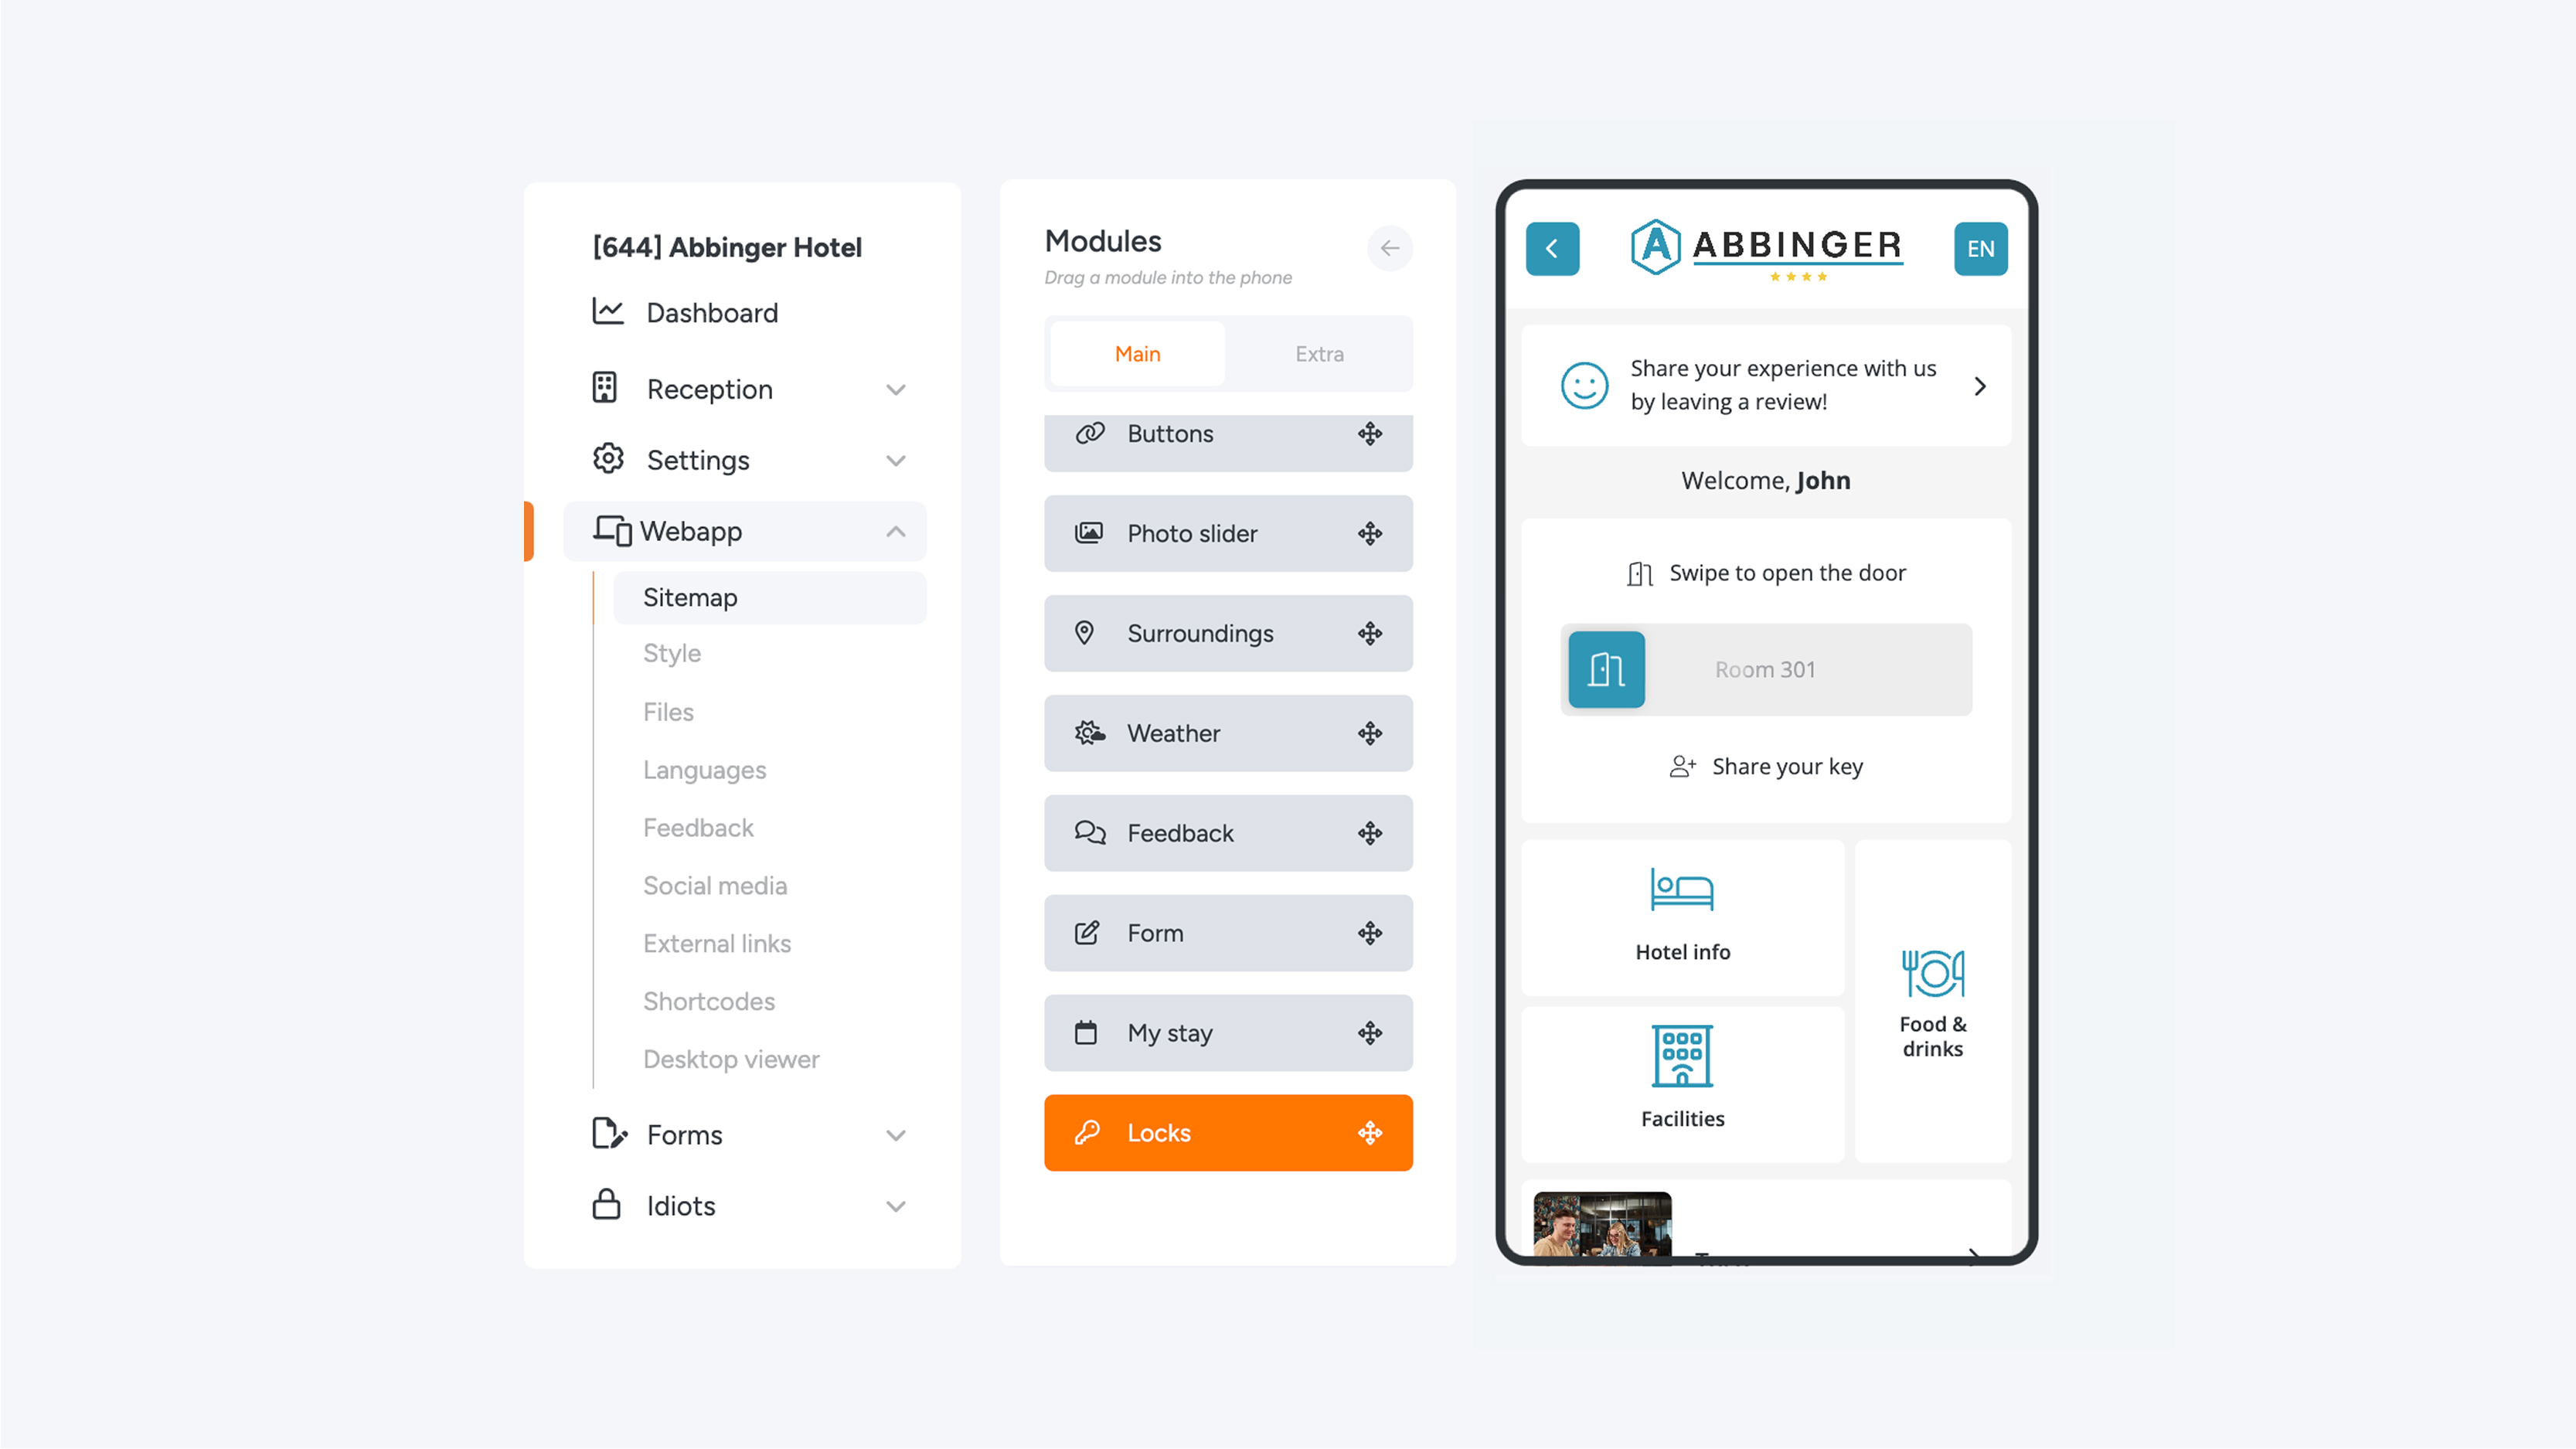
With the Locks module, you can decide exactly where the locks (sliders) are placed in the (Web)App. This gives you the flexibility to fully tailor the layout to your personal preferences or to the branding and requirements of your organization.
Important: Adding the Locks module does not mean that the locks will function immediately.
To ensure the locks work correctly, they must first be imported and then assigned to one or more switch lists.

Settings within the Locks Module
Within this module, you will find several settings that you can configure to optimize the user experience. Below is an overview of the most important options and features.
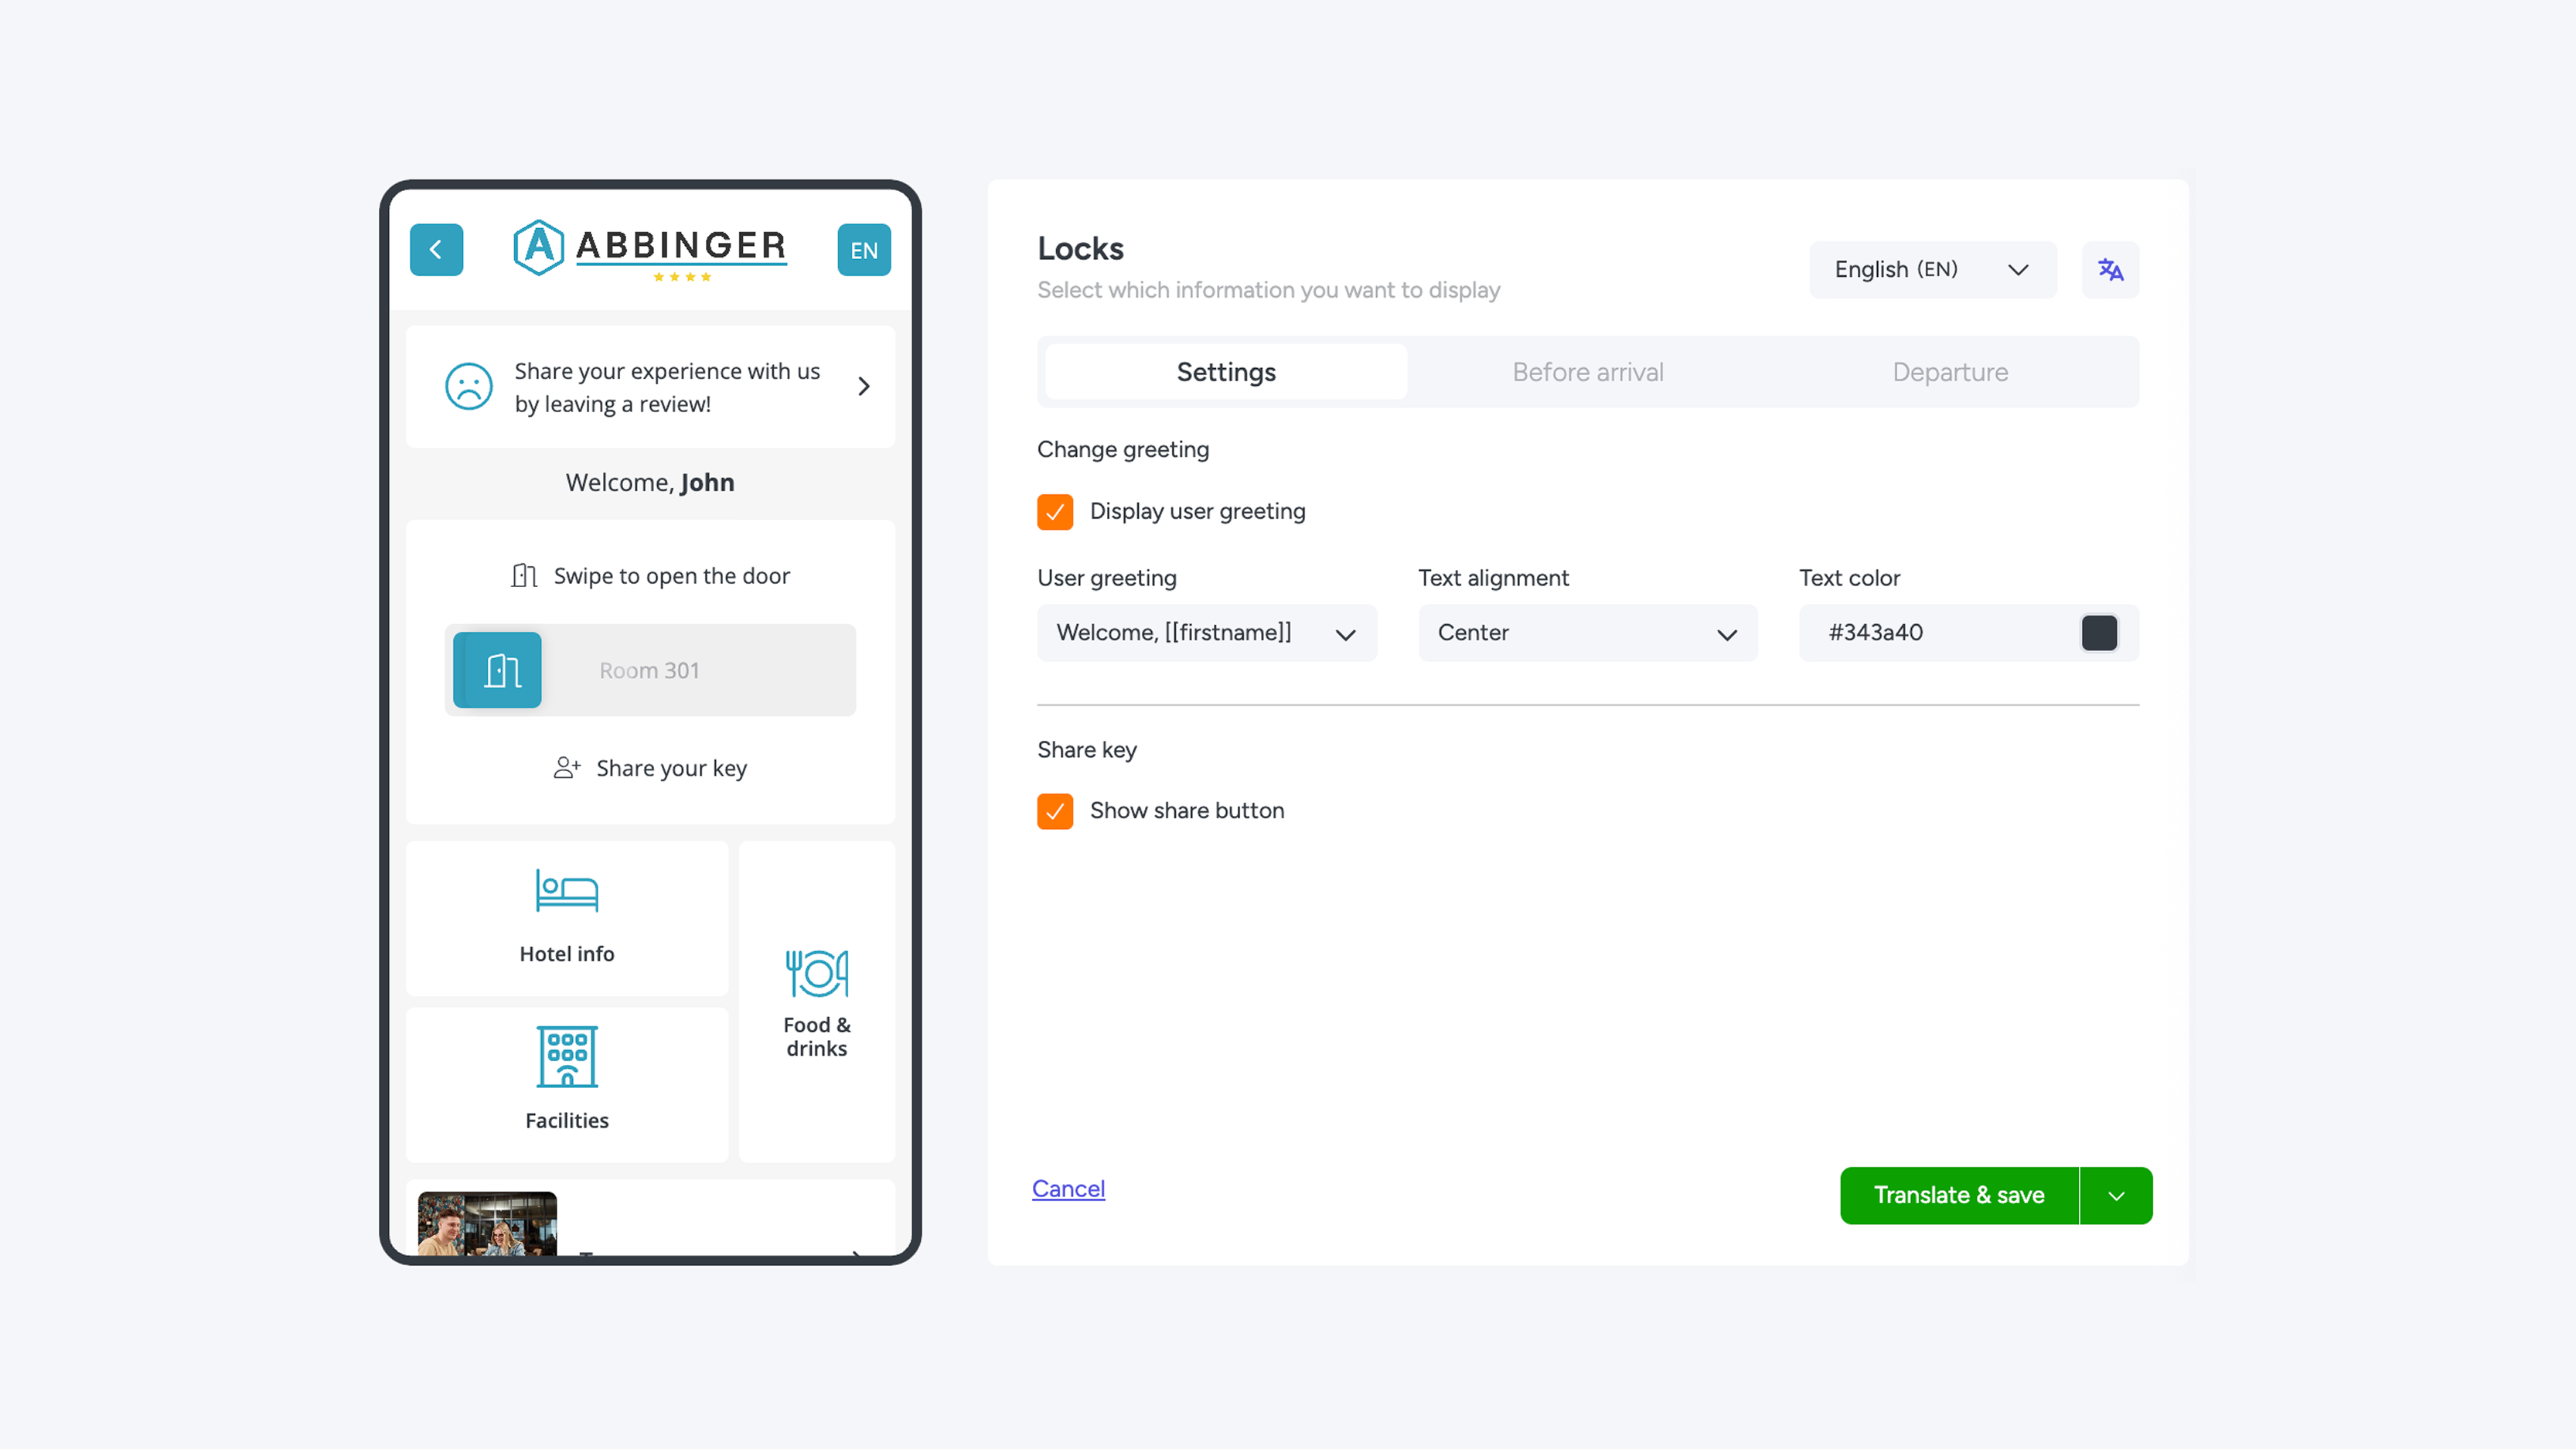
1. Settings
- Welcome message
You can enable or disable the automatic welcome message. When this feature is enabled, you can choose from different greeting formats:
- Welcome, [[firstname]]
- Welcome, [[lastname]]
- Welcome, [[fullname]]
- Text options
You can customize the greeting text as desired:
- Text color: choose a color that matches your branding.
- Alignment: set the text alignment to left, center, or right.
IInvite Button (share key)
Do you want users to easily be able to share their digital key, with roommates or colleagues for example?
- You can activate the Invite Button.
- This button is automatically displayed below the sliders.
- With one click, the user can invite someone else to gain access.
- This improves ease of use and offers flexibility in situations where multiple people need access.
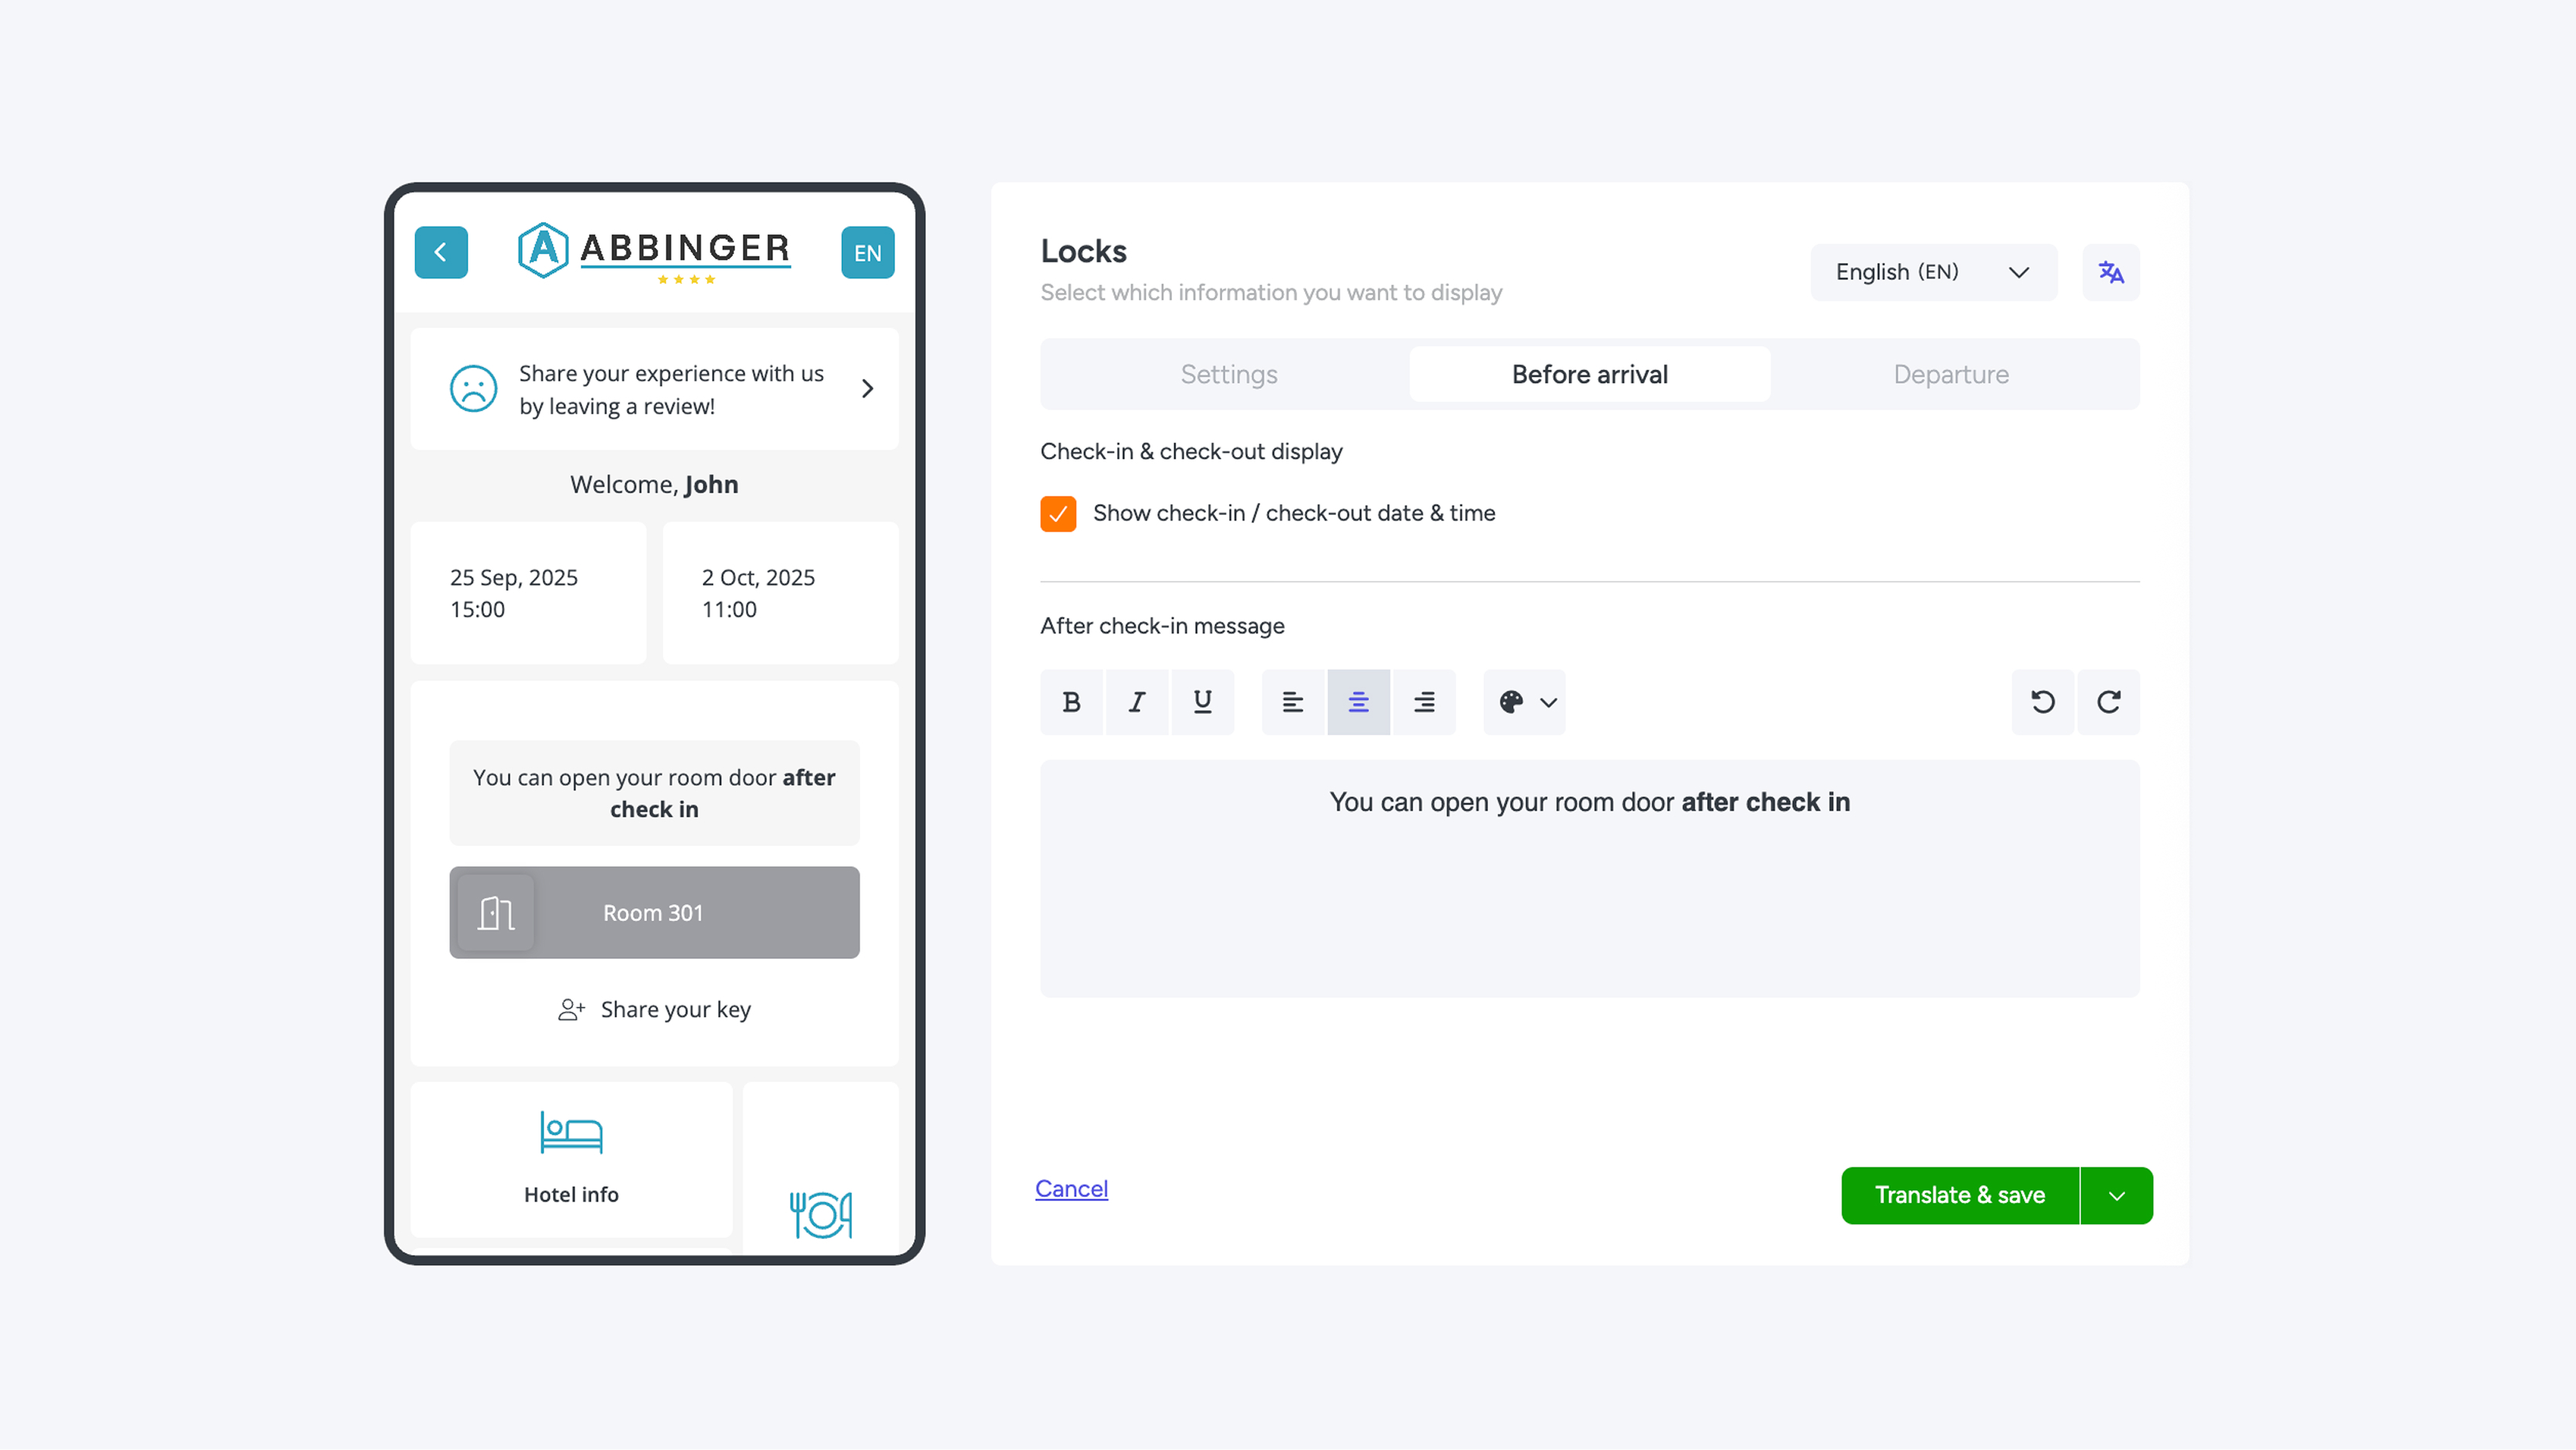
2. Before Arrival
With this feature, you can provide users with information and settings even before their arrival.
- Check-in and Check-out
- Here you can display the check-in and check-out date and time.
- If the user is not yet allowed to check in, the slider will be shown as inactive (greyed out). In this case, it is not possible to slide the slider to the right.
- Pre-arrival messages
- You can add a personal message that will be visible before the sliders can be used.
- Just like in the text module, this text can be styled with formatting options.
- Actions can easily be undone using the arrow icons in the top-right corner of the text field.
- Translate and save
Are you satisfied with the text? You can translate it using the “Translate & Save” button or via the translation options in the top-right corner of the screen.
More information can be found on this page:
https://tutorials.guestcompass.nl/webapp-aanpassingen/opslaan
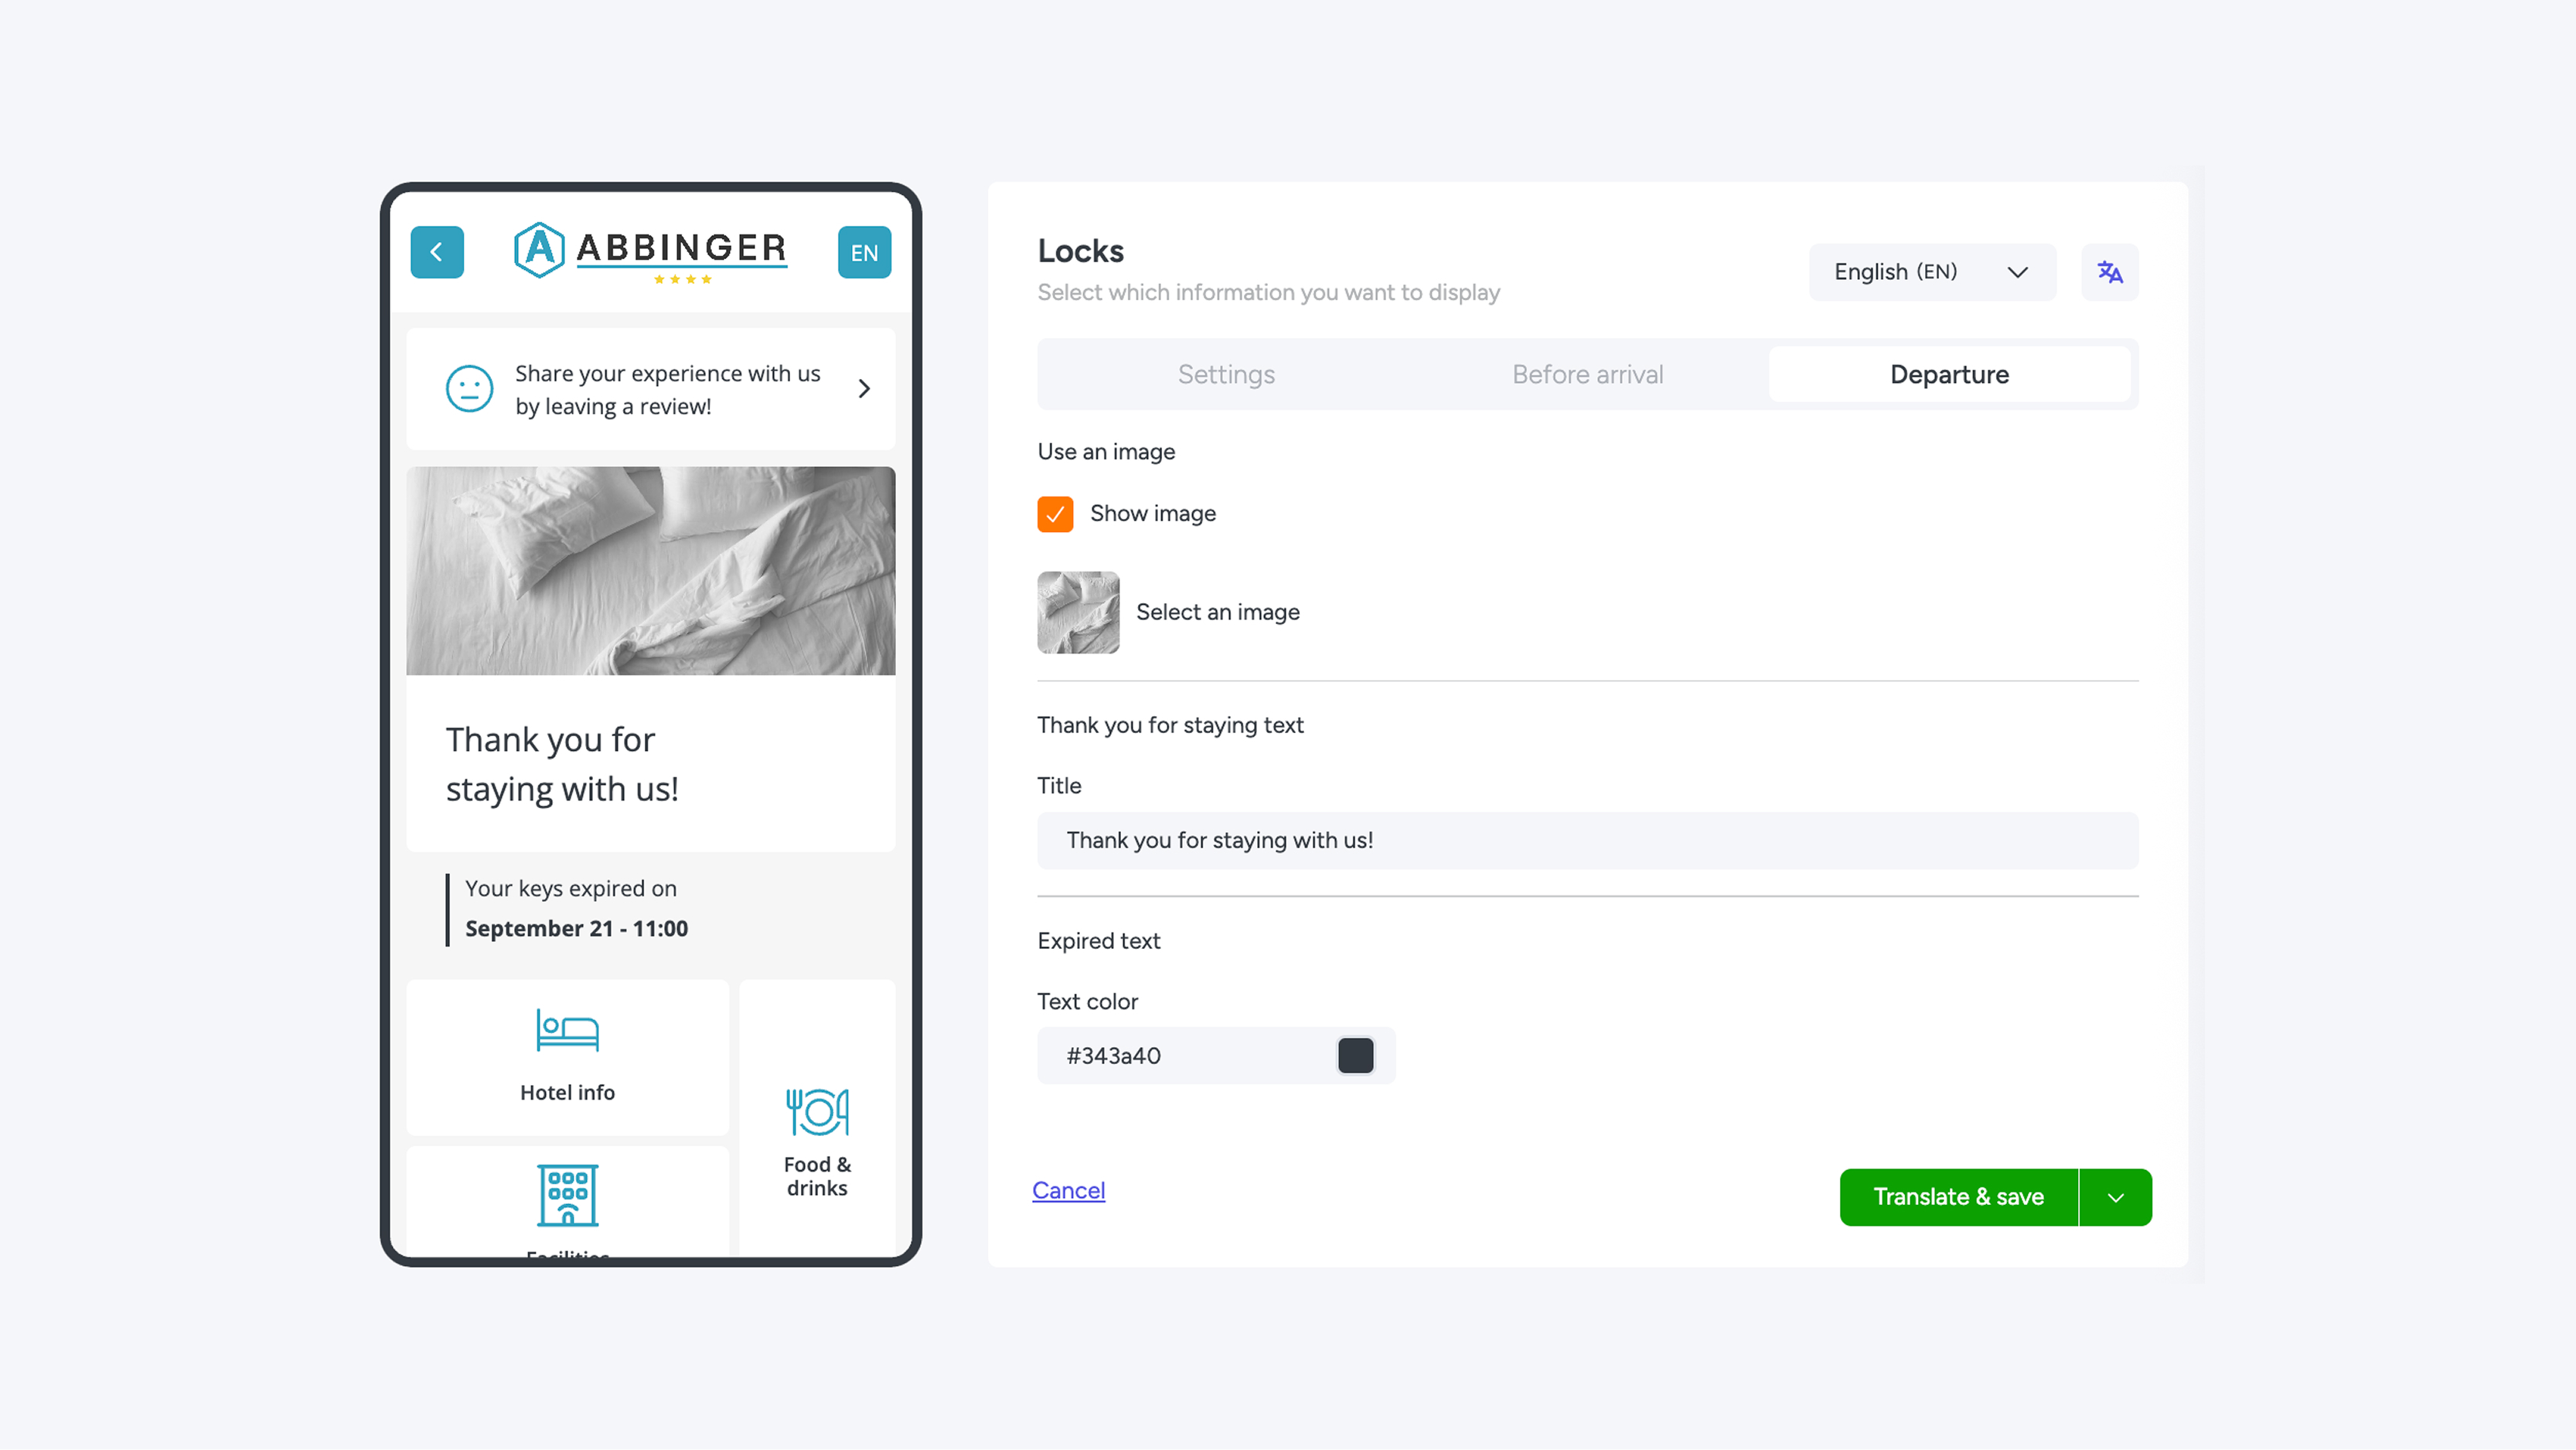
3. Departure
At departure you can show a amended message to round off the user experience properly.
- Content
- The message can be made up of only text, or a combination of text and image.
- Both components are optional en completely customisable.
- Translation
- Here too you can easily translate the text using the translate button.
- This way you can be sure every user receives the message in the correct language.
Extended Key Options
Want to show the key in the drop-up function for instant guest access? Or do you need to provide access to specific doors outside of the stay dates? Check out our ‘Extended Key Options’ page for a step-by-step guide.